Appendix B: Risk Management Tools
Risk Assessment Tools Identifying, Assessing, & Mitigating Risk
This appendix contains tools readers may use to review the accident and case study examples in Appendices C and D from an academic risk management perspective. For example, Figure B-1 depicts the PAVE checklist. Many of the tools described in this appendix work to the same end, and pilots may use a combination of tools to manage risk. Instructors normally provide training and guidance on the appropriate use of these tools.
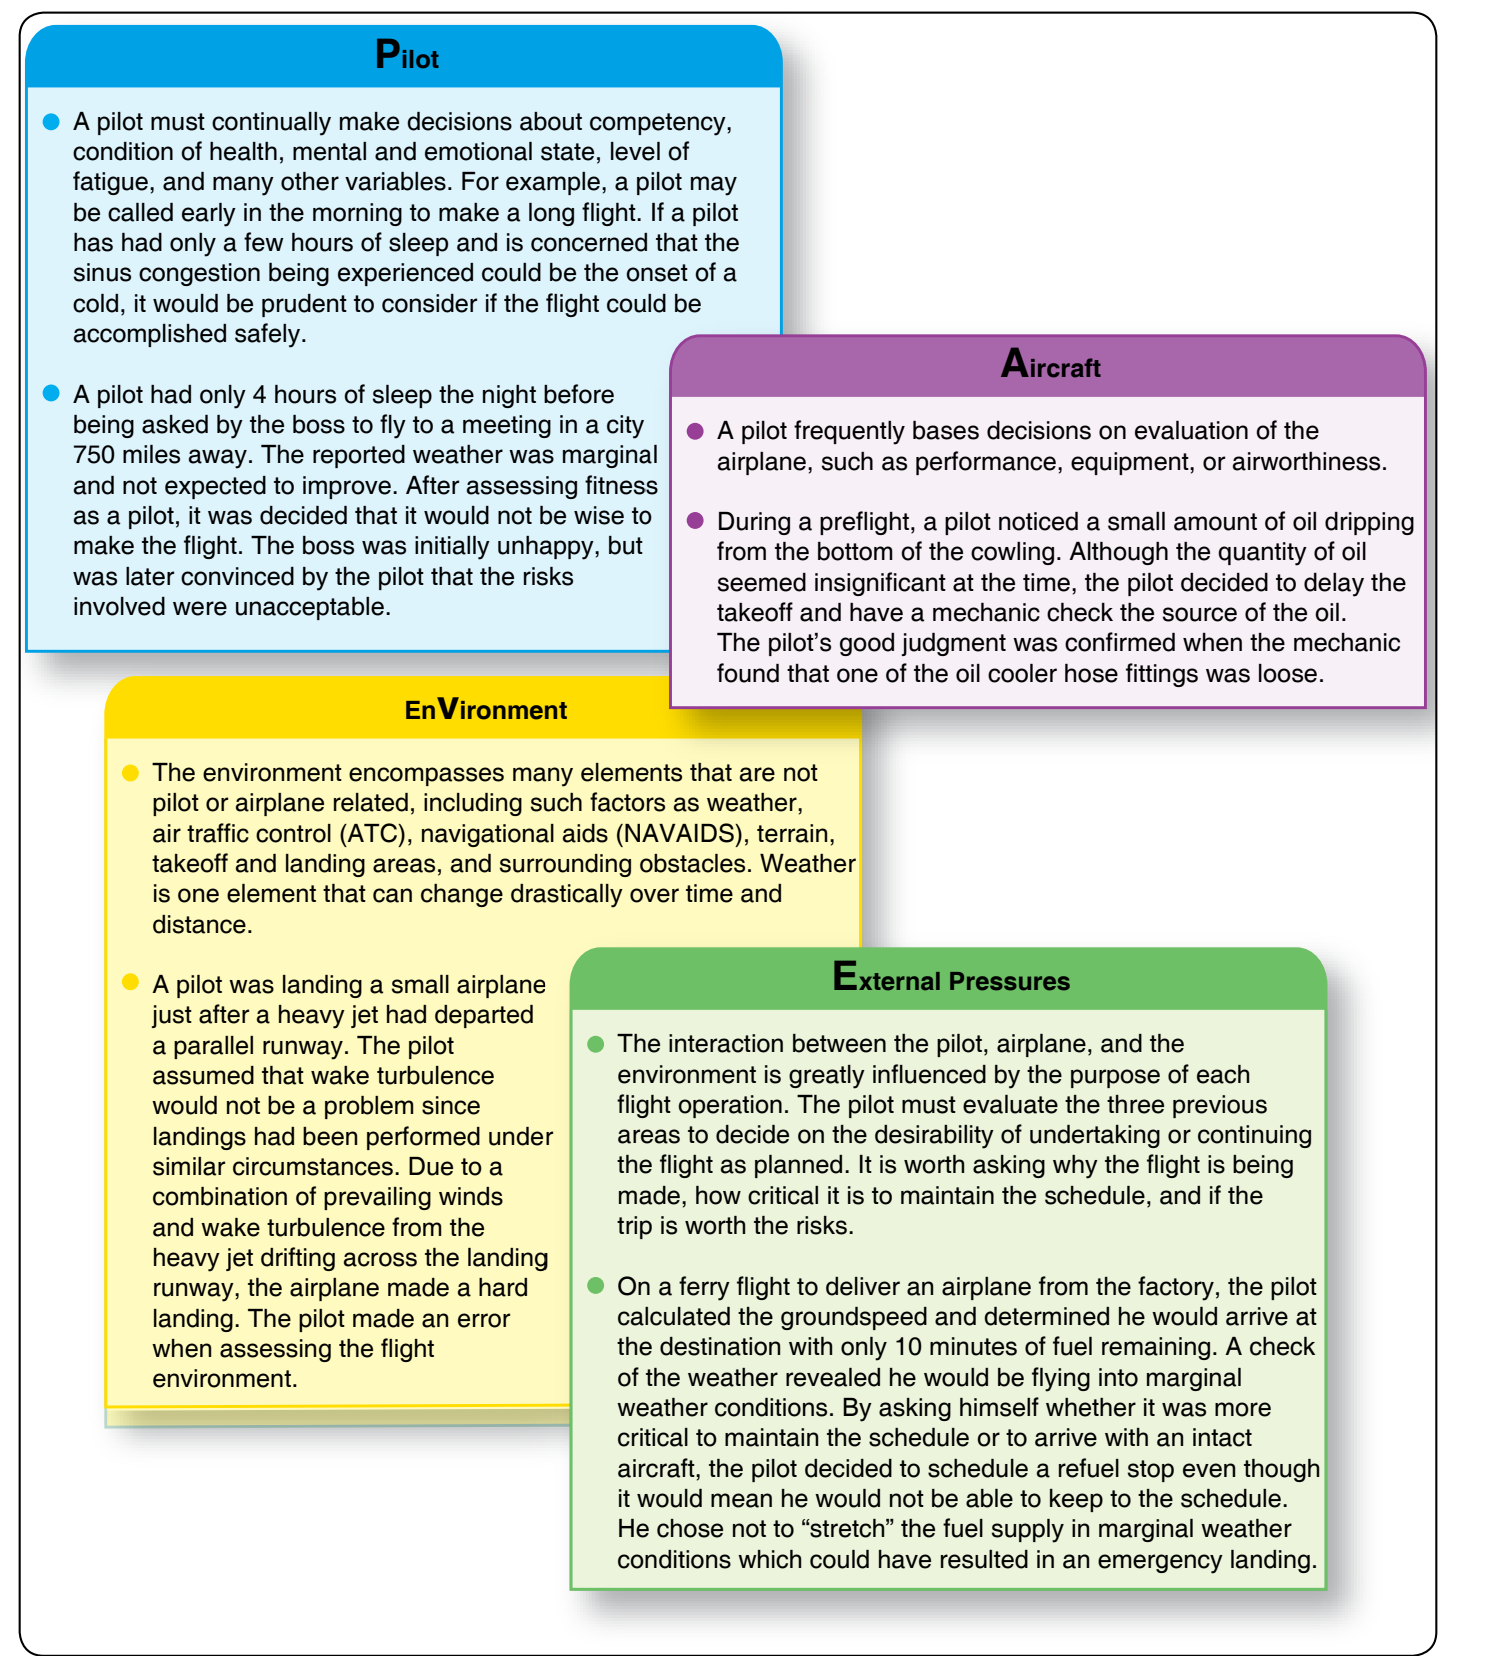
Risk Identification Tools
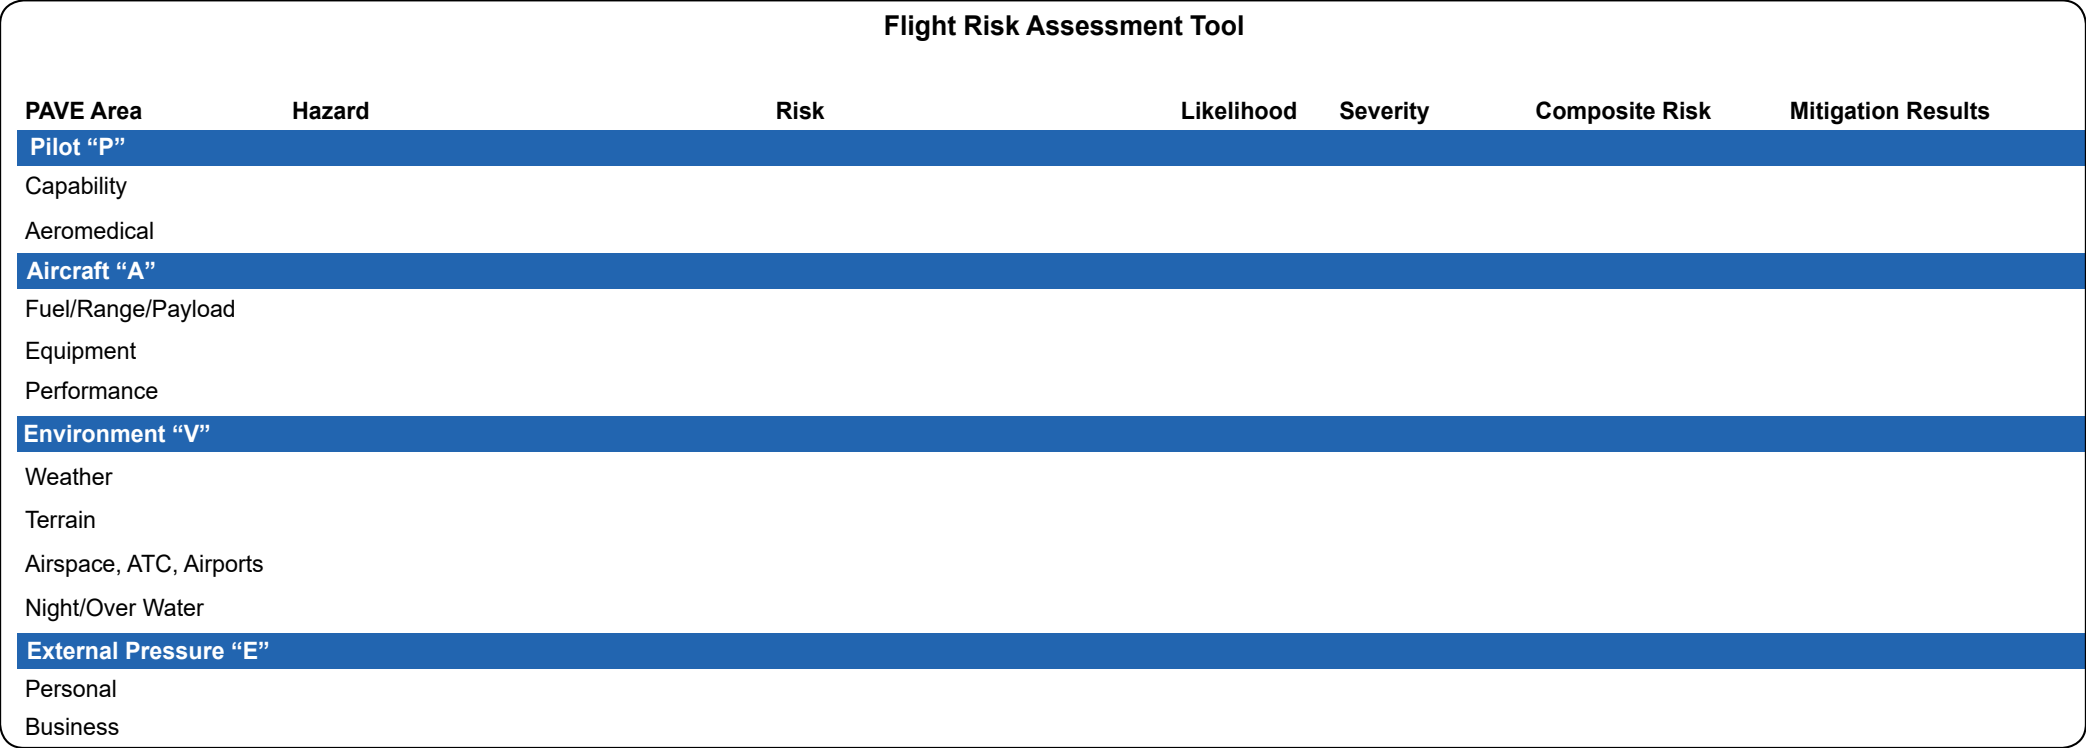
Pilots may also use the FRAT [Figure B-2], which incorporates the PAVE checklist to aid with hazard identification.
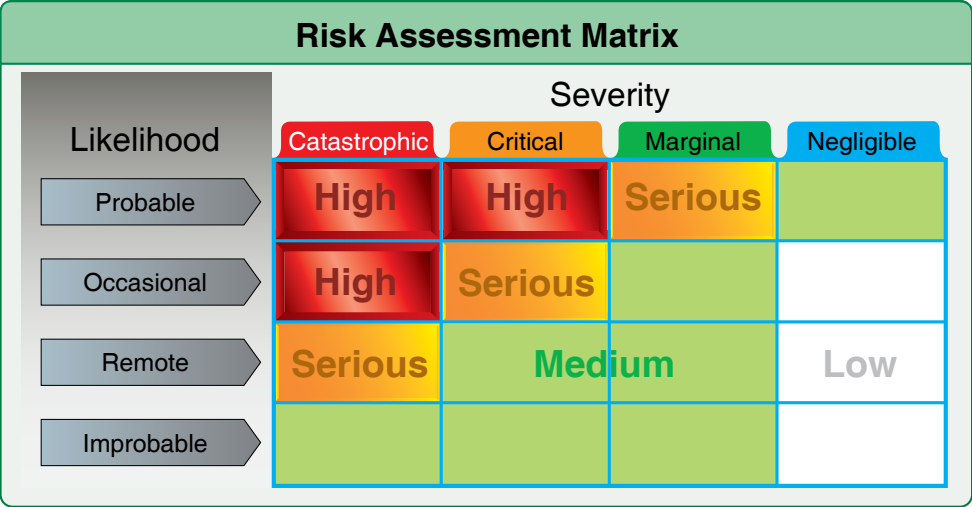
The risk assessment matrix shown in Figure B-3 provides a means to determine risk level. The risk likelihood and severity determine the overall level of risk for each hazard, after which various means to reduce unacceptable risk can be analyzed.
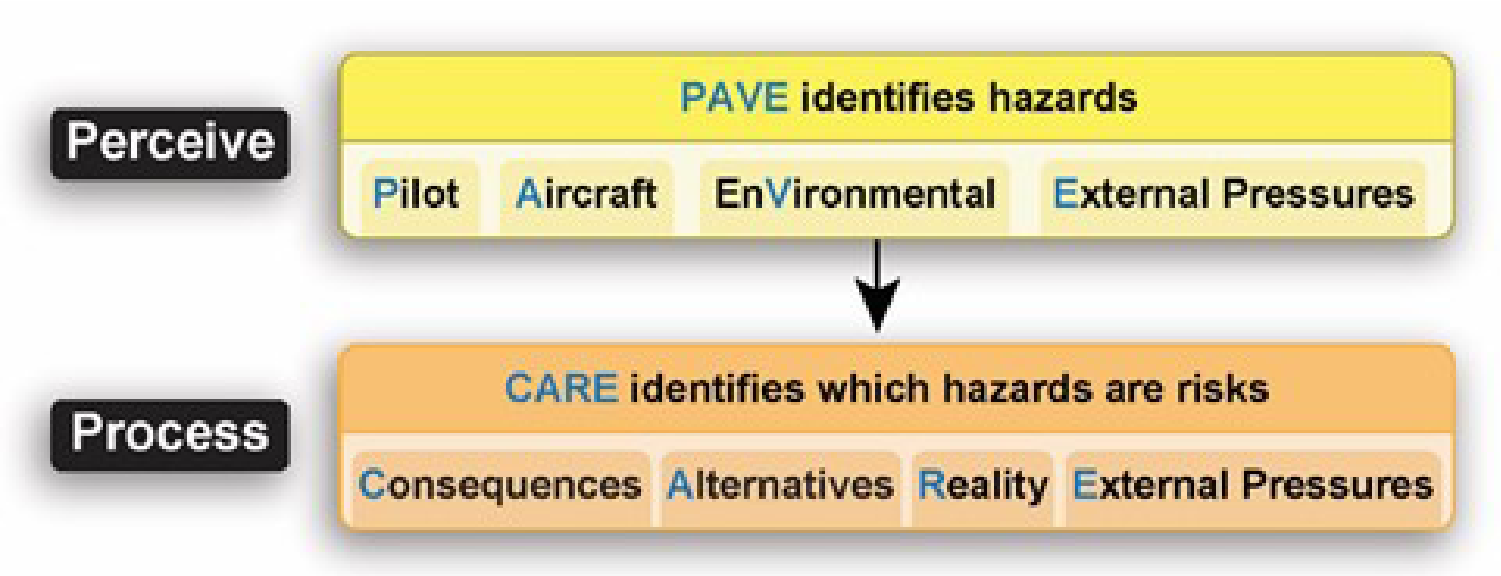
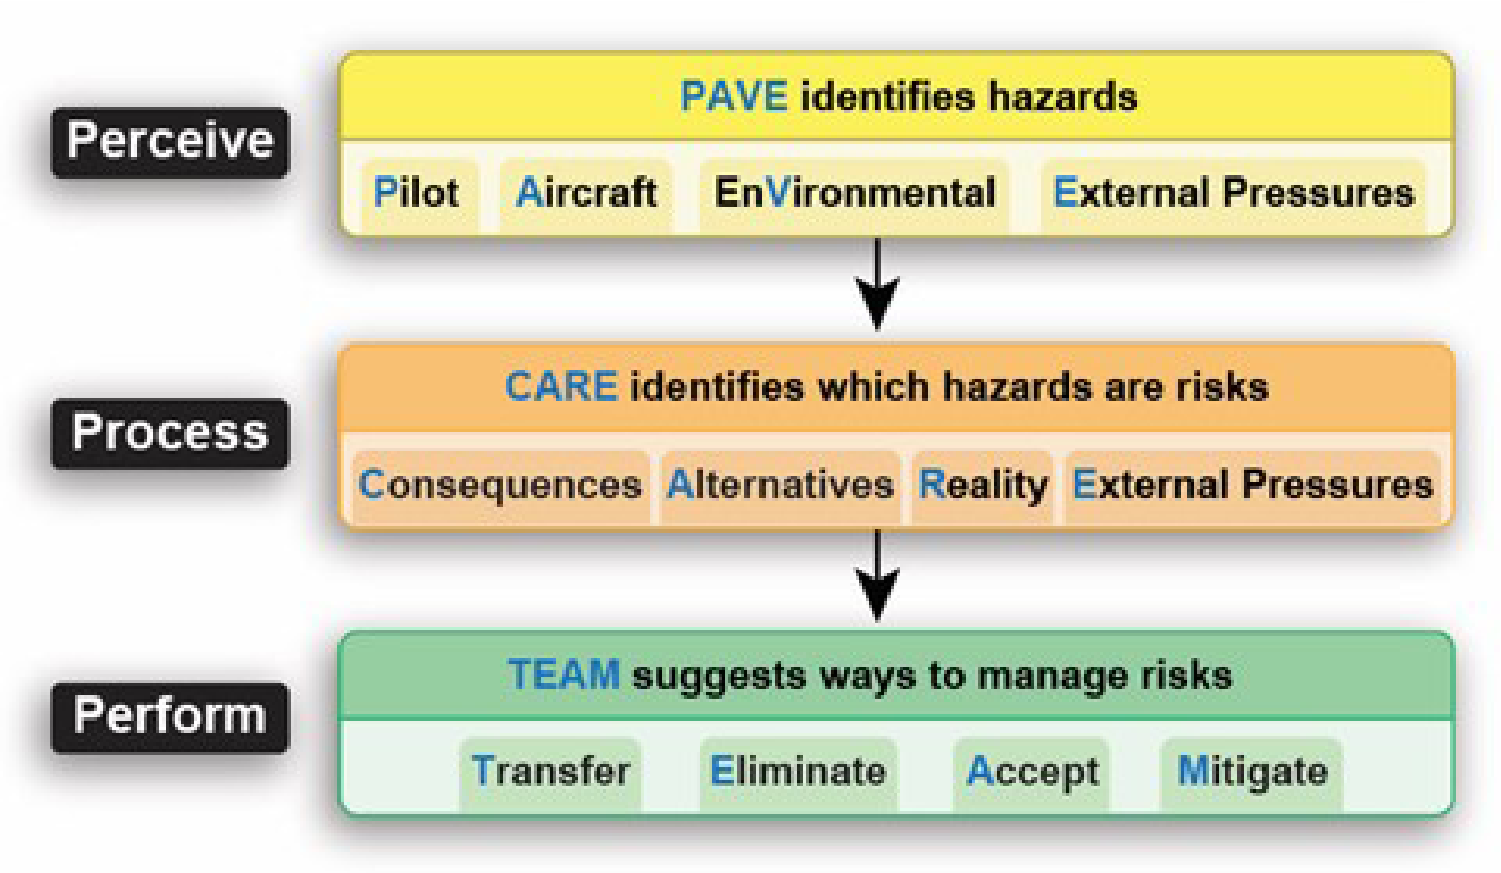
The 3P model illustrated in Figure B-4 allows for streamlined hazard identification and mitigation during in-flight operations. However, the “perceive” portion of the 3P model and PAVE checklist share a common purpose. Both serve to identify hazards.


Additional Risk Assessment Tools
The CARE checklist provides a breakdown of rationale pilots use during the 3P “process” stage [Figure B-6]. It includes a perspective of what could happen (consequences), what may be done to prevent an unwanted outcome (alternatives), a check of the actual conditions (reality), and an analysis of pilot motivation (external pressures).
Risk Mitigation Tools
The TEAM checklist shares the “perform” step in the 3P model as well as the “alternatives” component from the CARE checklist.
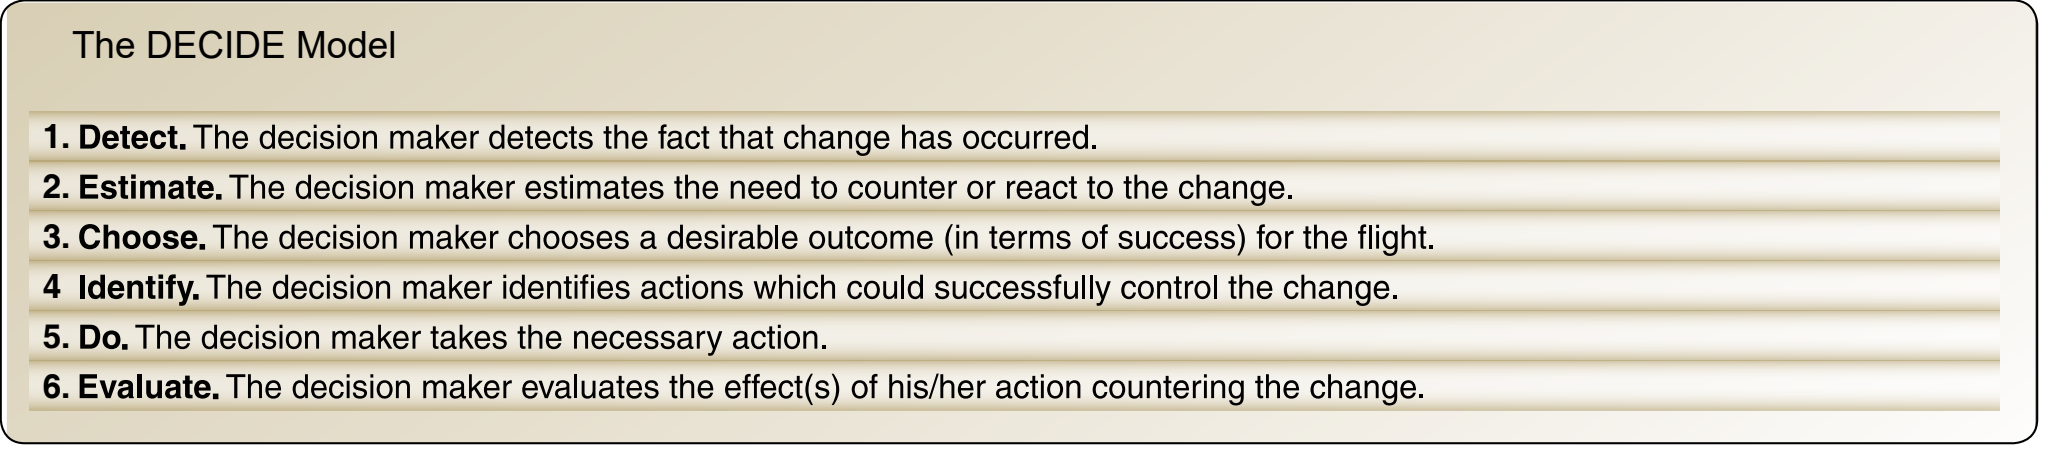
Analysis of hazards and associated risks may follow the six-step DECIDE Model shown in Figure B-8.