
Chapter 5
Aircraft Welding
The flame for the torch in Figure 5-23 is set by first closing the oxygen valve below the cutting lever and fully opening the oxygen valve on the handle. (This supplies the high-pressure oxygen blast when the cutting lever is actuated.) The acetylene valve on the handle is then opened and the torch is lit with a striker. The acetylene flame is increased until the black soot is gone. Then, open the oxygen valve below the cutting lever and adjust the flame to neutral. If more heat is needed, open the valves to add more acetylene and oxygen. Actuate the cutting lever and readjust the preheat flame to neutral if necessary. The metal is heated to a bright red color (1,400 °F–1,600 °F, which is the kindling or ignition temperature) by the preheat orifices in the tip of the cutting torch. Then, a jet of high-pressure oxygen is directed against it by pressing the oxygen lever on the torch. This oxygen blast combines with the red-hot metal and forms an intensely hot molten oxide that is blown down the sides of the cut. As the torch is moved along the intended cut line, this action continues heating the metal in its path to the kindling temperature. The metal, thus heated, also burns to an oxide that is blown away to the underside of the piece.
Proper instruction and practice provides the knowledge and skill to become proficient in the technique needed to cut with a torch. Hold the torch in either hand, whichever is most comfortable. Use the thumb of that hand to operate the oxygen cutting lever. Use the other hand to rest the torch on and steady it along the cut line.
Begin at the edge of the metal and hold the tip perpendicular to the surface, preheating until the spot turns bright red. Lightly depress the cutting lever to allow a shower of sparks and molten metal to blow through the cut. Fully depress the cutting lever and move the torch slowly in the direction of the intended cut.
Practice and experience allow the technician to learn how to judge the speed at which to move the torch. It should be just fast enough to allow the cut to penetrate completely without excessive melting around the cut. If the torch is moved too fast, the metal will not be preheated enough, and the cutting action stops. If this happens, release the cutting lever, preheat the cut to bright red, depress the lever, and continue with the cut.
Shutting Down the Gas Welding Equipment
Shutting down the welding equipment is fairly simple when some basic steps are followed:
- Turn off the flame by closing the acetylene valve on the torch first. This shuts the flame off quickly. Then, close the oxygen valve on the torch handle. Also, close oxygen valve on cutting torch, if applicable.
- If the equipment is not used in the immediate future (approximately the next 30 minutes), the valves on the acetylene and oxygen cylinders should be closed and pressure relieved from the hoses.
- In a well-ventilated area, open the acetylene valve on the torch and allow the gas to escape to the outside atmosphere, and then close the valve.
- Open the oxygen valve on the torch, allow the gas to escape, and then close the valve.
- Close both the acetylene and oxygen regulators by backing out the adjusting screw counterclockwise until loose.
- Carefully coil the hose to prevent kinking and store it to prevent damage to the torch and tip.
Gas Welding Procedures & Techniques
The material to be welded, the thickness of the metal, the type of joint, and the position of the weld dictates the procedure and technique to be used.
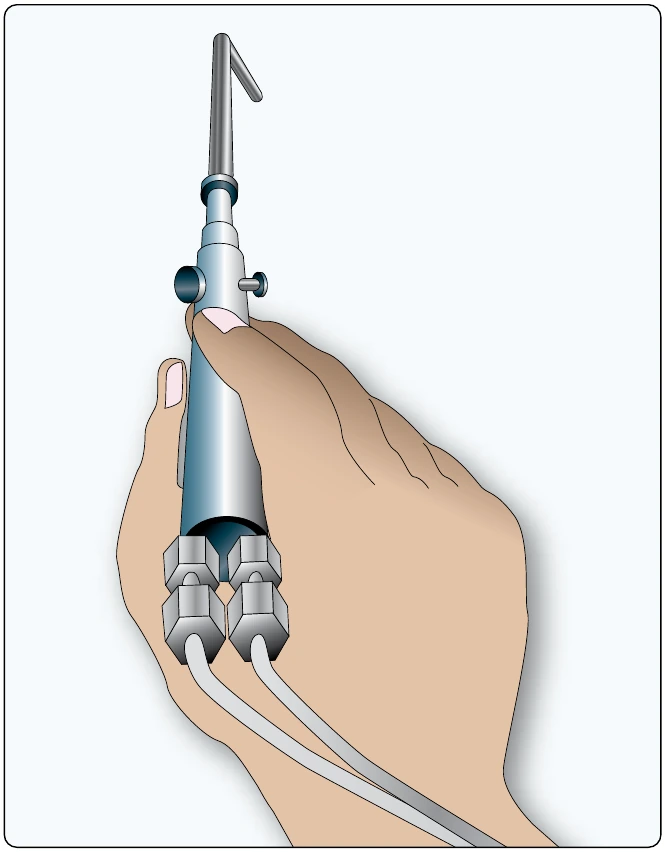
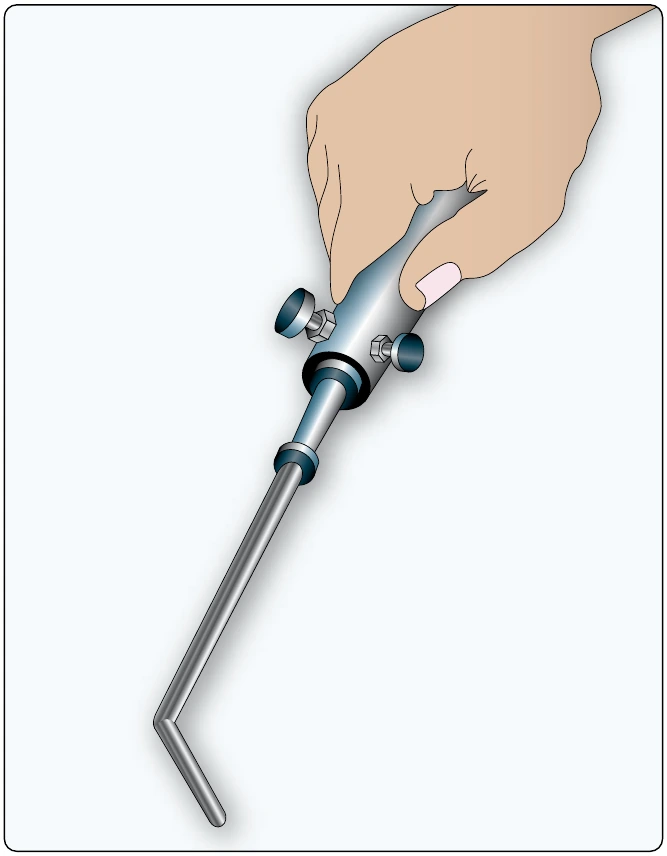
When light-gauge metal is welded, the torch is usually held with the hose draped over the wrist. [Figure 5-24] To weld heavy materials, the more common grip may provide better control of the torch. [Figure 5-25]
The torch should be held in the most comfortable position that allows the tip to be in line with the joint to be welded, and inclined between 30° and 60° from the perpendicular. This position preheats the edges just ahead of the molten puddle. The best angle depends on the type of weld, the amount of preheating required, and the thickness and type of metal. The thicker the metal, the more vertical the torch must be for proper heat penetration. The white cone of the flame should be held about 1⁄8-inch from the surface of the metal.
Welding can be performed by pointing the torch flame in the direction that the weld is progressing. This is referred to as forehand welding, and is the most commonly used method for lighter tubing and sheet metal. The filler rod is kept ahead of the tip in the direction the weld is going and is added to the puddle.
For welding thick metals or heavy plate, a technique called backhand welding can be used. In this method, the torch flame is pointed back toward the finished weld and the filler rod is added between the flame and the weld. This method provides a greater concentration of heat for welding thicker metals and would rarely be used in aircraft maintenance.
Puddle
If the torch is held in the correct position, a small puddle of molten metal forms. The puddle should be centered in the joint and composed of equal parts of those pieces being welded. After the puddle appears, the tip should be moved in a semicircular arc or circular motion equally between the pieces to ensure an even distribution of heat.
Adding Filler Rod to the Puddle
As the metal melts and the puddle forms, filler rod is needed to replace the metal that flows out from around the joint. The rod is added to the puddle in the amount that provides for the completed fillet to be built up about one-fourth the thickness of the base metal. The filler rod selected should be compatible with the base metal being welded.