Chapter 10
Engine Maintenance & Operation
Before refacing the seat, make sure that the valve guide is in good condition, clean, and does not have to be replaced. Mount the cylinder firmly in the hold down fixture. An expanding
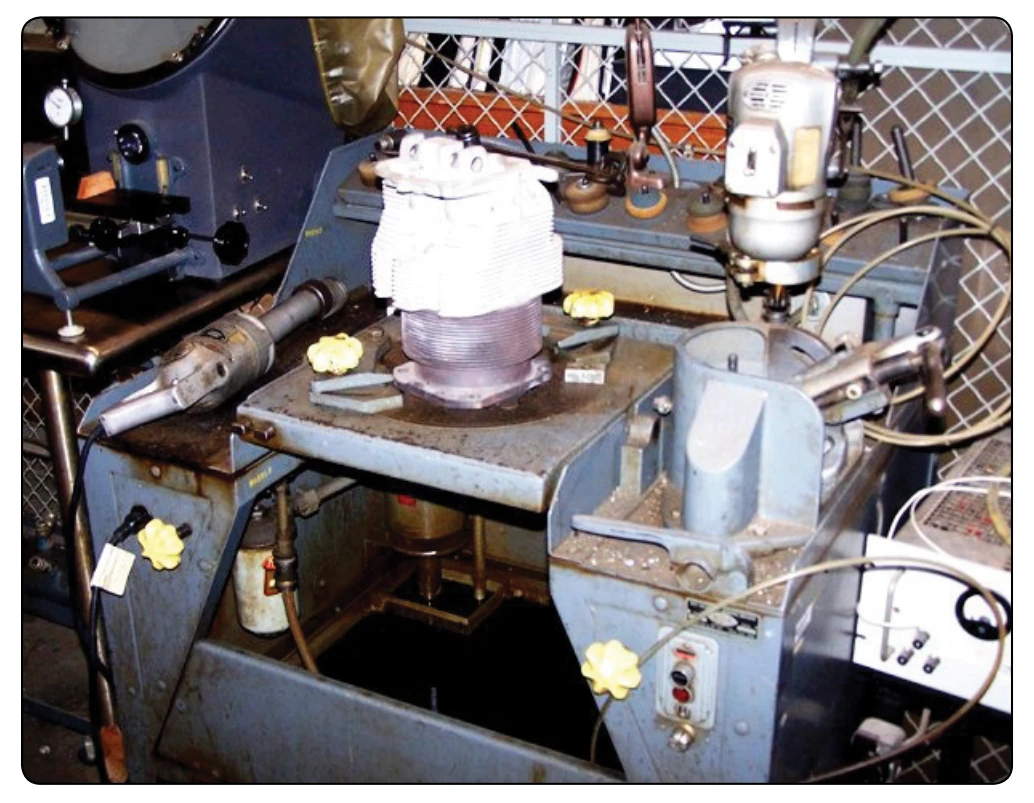
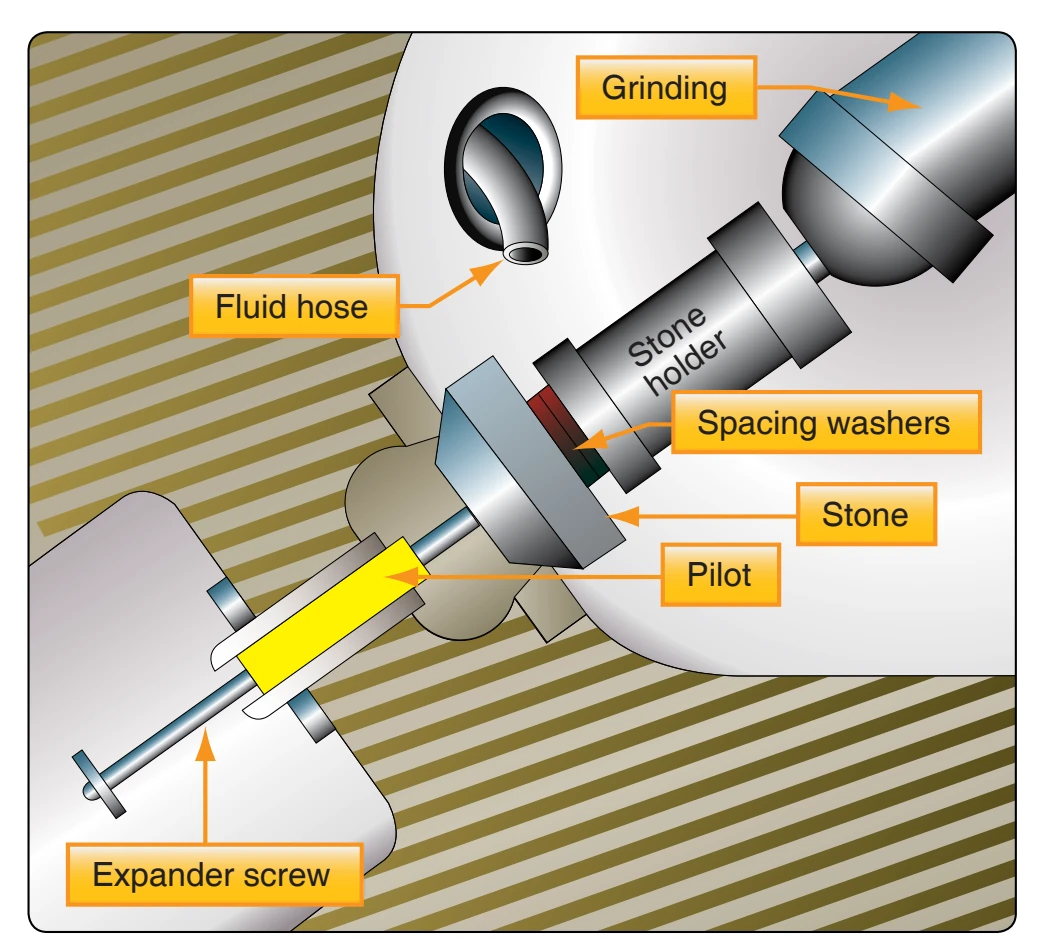
pilot is inserted in the valve guide from the inside of the cylinder, and an expander screw is inserted in the pilot from the top of the guide. [Figure 10-17] The pilot must be tight in the guide, because any movement can cause a poor grind. The fluid hose is inserted through one of the spark plug inserts.
The three grades of stones available for use are classified as rough, finishing, and polishing stones. The rough stone is designed to true and clean the seat. The finishing stone must follow the rough to remove grinding marks and produce a smooth finish. The polishing stone does just as the name implies and is used only where a highly polished seat is desired.
The stones are installed on special stone holders. The face of the stone is trued by a diamond dresser. The stone should be refaced whenever it is grooved or loaded, and when the stone is first installed on the stone holder. The diamond dresser also may be used to cut down the diameter of the stone. Dressing of the stone should be kept to a minimum as a matter of conservation; therefore, it is desirable to have sufficient stone holders for all the stones to be used on the job.
In the actual grinding job, considerable skill is required in handling the grinding gun. The gun must be centered accurately on the stone holder. If the gun is tilted offcenter, chattering of the stone results, and a rough grind is produced. It is very important that the stone be rotated at a speed that permits grinding instead of rubbing. This speed is approximately 8,000 to 10,000 revolutions per minute (rpm). Excessive pressure on the stone can slow it down. It is not a good technique to let the stone grind at slow speed by putting pressure on the stone when starting or stopping the gun. The maximum pressure used on the stone at any time should be no more than that exerted by the weight of the gun.
Another practice, conducive to good grinding, is to ease off on the stone every second or so to let the coolant wash away the chips on the seat. This rhythmic grinding action also helps keep the stone up to its correct speed. Since it is quite a job to replace a seat, remove as little material as possible during the grinding. Inspect the job frequently to prevent unnecessary grinding.
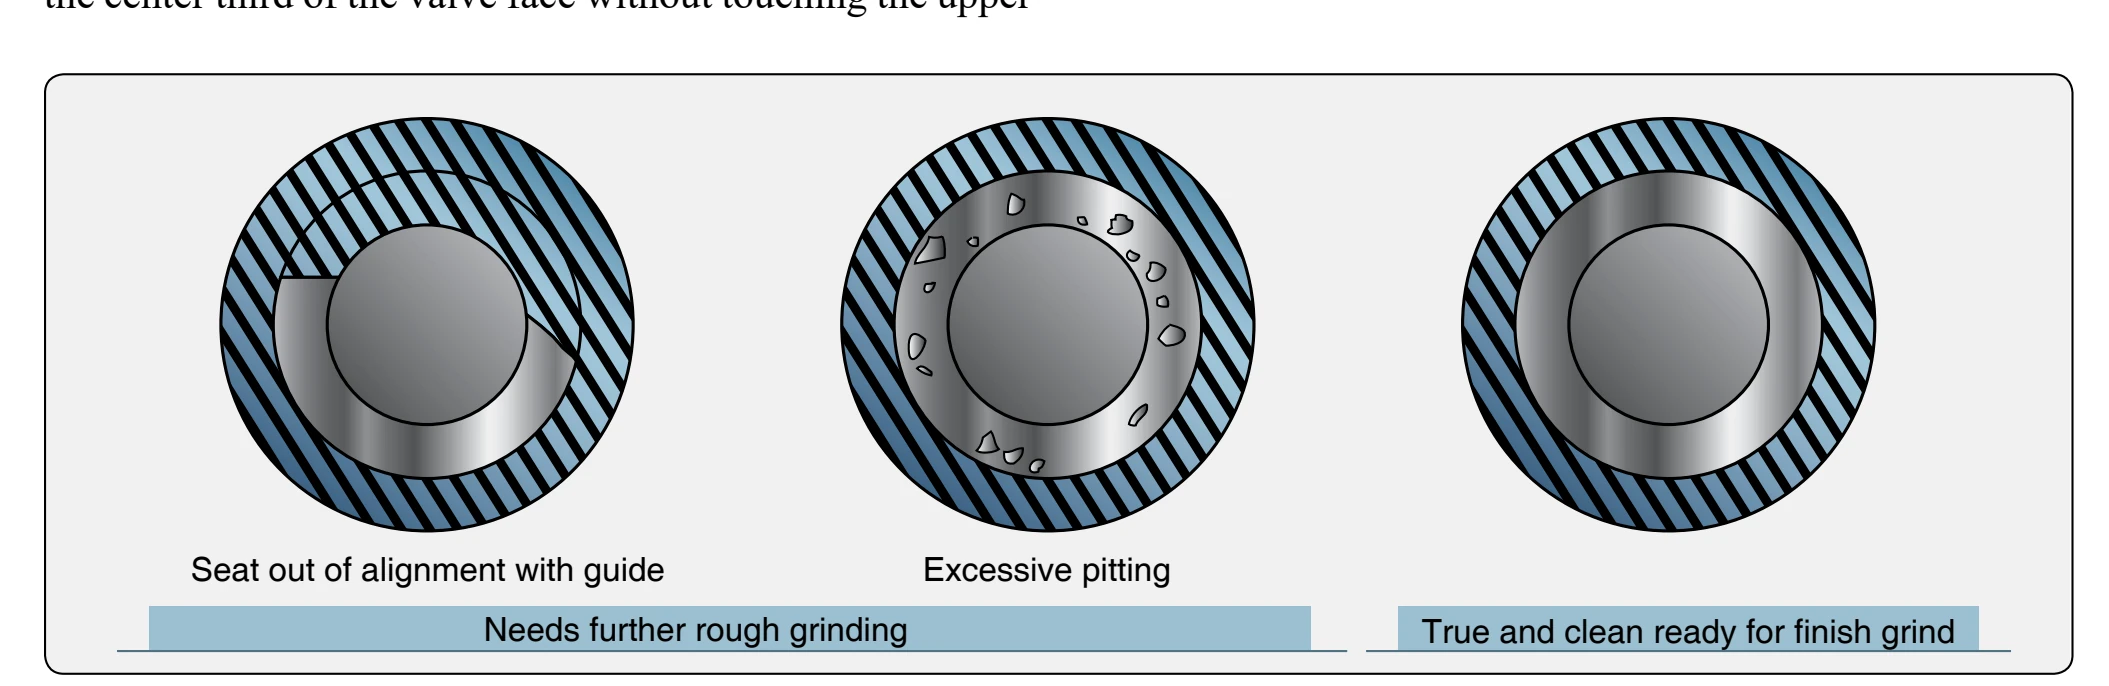
The rough stone is used until the seat is true to the valve guide and until all pits, scores, or burned areas are removed. [Figure 10-18] After refacing, the seat should be smooth and true. The finishing stone is used only until the seat has a smooth, polished appearance. Extreme caution should be used when grinding with the finishing stone to prevent chattering.
The size and trueness of the seat can be checked by several methods. Runout of the seat is checked with a special dial indicator and should not exceed 0.002 inch. The size of the seat may be determined by using Prussian blue. Prussian blue is used to check for contact transfer from one surface to the other. To check the fit of the seat, spread a thin coat of Prussian blue evenly on the seat. Press the valve onto the seat. The blue transferred to the valve indicates the contact surface. The contact surface should be one-third to two-thirds the width of the valve face and in the middle of the face. In some cases, a-go and no-go gauge is used in place of the valve when making the Prussian blue check. If Prussian blue is not used, the same check may be made by lapping the valve lightly to the seat. Lapping is accomplished by using a small amount of lapping compound placed between the valve face and seat. The valve is then moved in a rotary motion back and forth until the lapping compound grinds slightly into the surface. After cleaning the lapping contact compound off, a contact area can be seen. Examples of test results are shown in Figure 10-19.
If the seat contacts the upper third of the valve face, grind off the top corner of the valve seat. [Figure 10-20] Such grinding is called narrowing grinding. This permits the seat to contact portion of the valve face.
If the seat contacts the bottom third of the valve face, grind off the inner corner of the valve seat. [Figure 10-21] The seat is narrowed by a stone other than the standard angle. It is common practice to use a 15° angle and 45° angle cutting stone on a 30° angle valve seat, and a 30° angle and 75° angle stone on a 45° angle valve seat. [Figure 10-22]
If the valve seat has been cut or ground too much, the valve contacts the seat too far up into the cylinder head, and the valve clearance, spring tension, and the fit of the valve to the seat is affected. To check the height of a valve, insert the valve into the guide, and hold it against the seat. Check the height of the valve stem above the rocker box or some other fixed position.
Before refacing a valve seat, consult the overhaul manual for the particular model engine. Each manufacturer specifies the desired angle for grinding and narrowing the valve seat.
Valve Reconditioning
One of the most common jobs during engine overhaul is grinding the valves. The equipment used should preferably be a wet valve grinder. With this type of machine, a mixture of soluble oil and water is used to keep the valve cool and carry away the grinding chips.
Like many machine jobs, valve grinding is mostly a matter of setting up the machine. The following points should be checked or accomplished before starting a grind. True the stone by means of a diamond nib. The machine is turned on, and the diamond is drawn across the stone, cutting just deep enough to true and clean the stone. Determine the face angle of the valve being ground and set the movable head of the machine to correspond to this valve angle. Usually, valves are ground to the standard angles of 30° or 45°. However, in some instances, an interference fit of 0.5° or 1.5° less than the standard angle may be ground on the valve face.