
Chapter 2
Design and Construction
RSL Lanyard and Container Mount
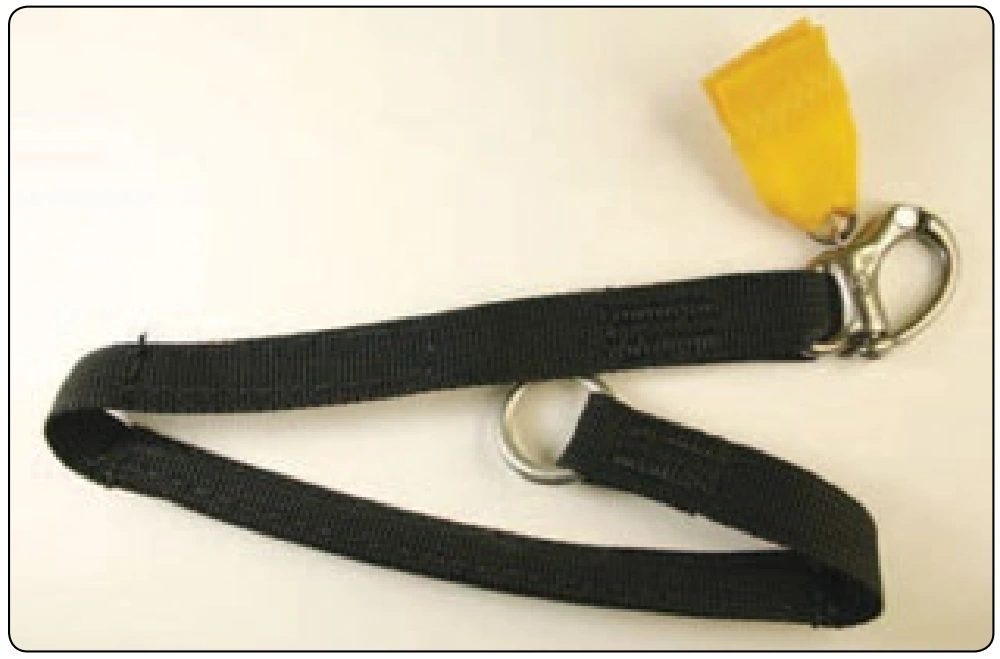
These two components are interactive. That is, the design of the container directly affects the design of the lanyard. Once the two above locations are determined, then the routing of the lanyard can be completed. It was originally thought that the lanyard should have a long length to allow acceleration during activation to pull the ripcord cable. This has not proven to be true and most manufacturers keep their lanyards as short as possible to prevent snagging and easier stowing. The Racer cross-connector/lanyard is so sized as to not pull the reserve ripcord until both risers have separated
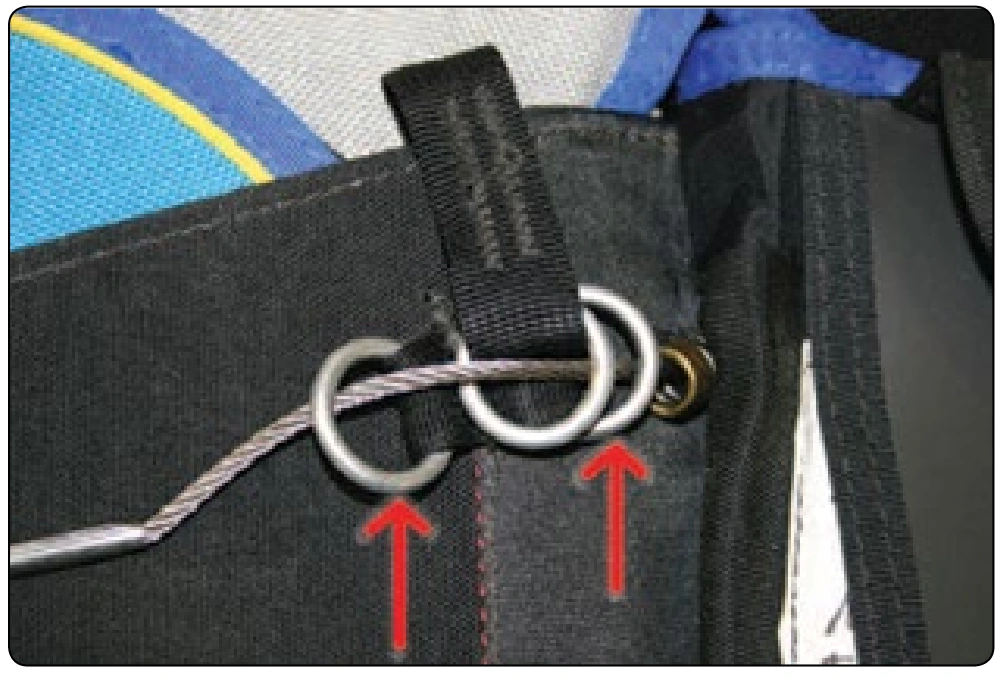
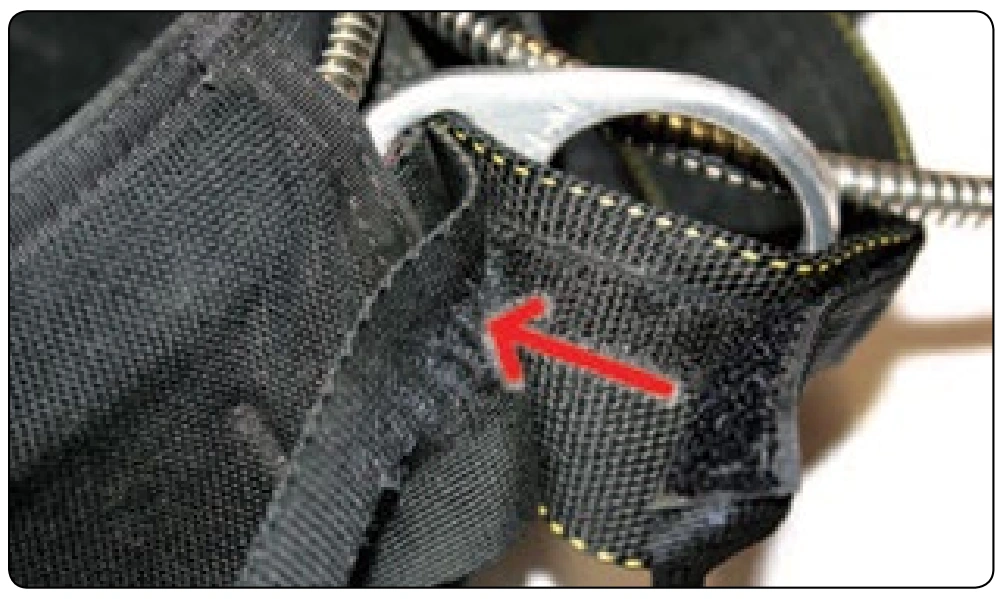
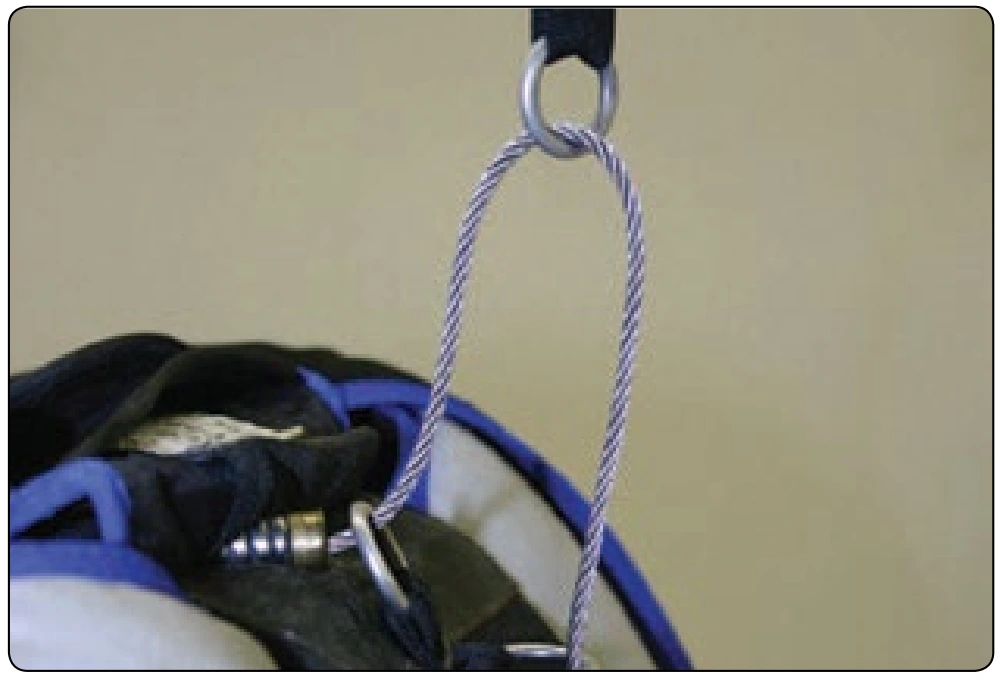
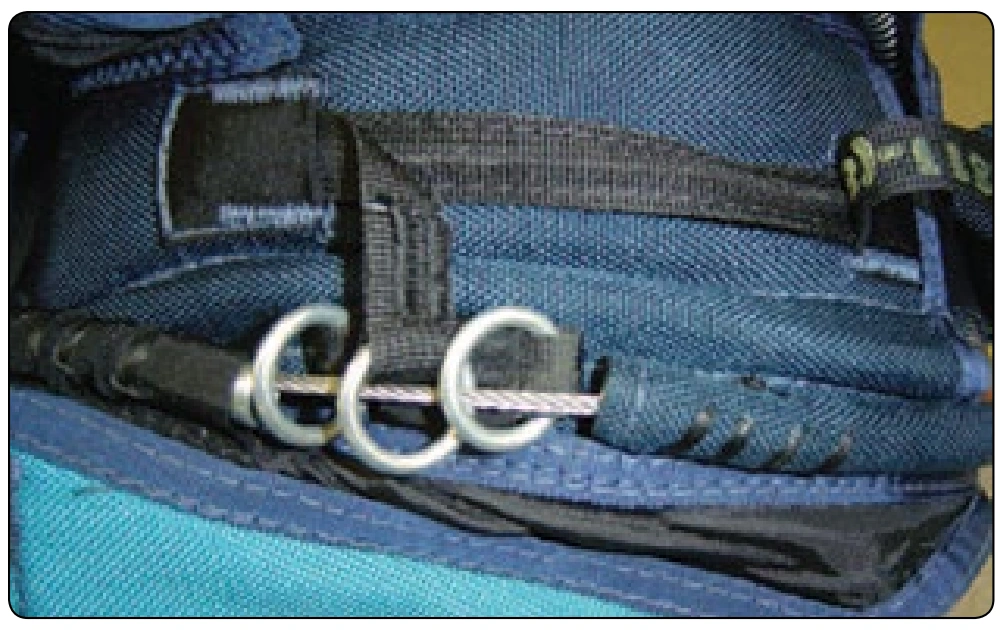
In the past, a Velcro® pathway was used for routing the lanyard. This was either on the shoulder yoke or the reserve riser. Experience has shown that the use of Velcro® generally results in high wear and eventual damage to the webbing. [Figure 2-56] On this design, the lanyard is stiffened with a short piece of coated cable and stowed in two pockets located on the yoke area. [Figure 2-57] It is secure and has no wear points. The ripcord end of the lanyard is routed to the dual guide ring attachment location and the ripcord cable routed through the rings. [Figure 2-58] The ripcord cable is then routed to the reserve closing loop. Figure 2-59 shows the RSL lanyard and ripcord cable at the moment of riser extension and just as the cable is loaded. A point that the rigger should be aware of is the “pigtail” configuration of the reserve ripcord that results from the use of the RSL. [Figure 2-60] Because of the sliding of the ring along the ripcord cable, a curling effect is imparted to the cable. This is a clear indication that the RSL lanyard activated the reserve. The rigger should carefully inspect the ripcord cable for any broken strands.
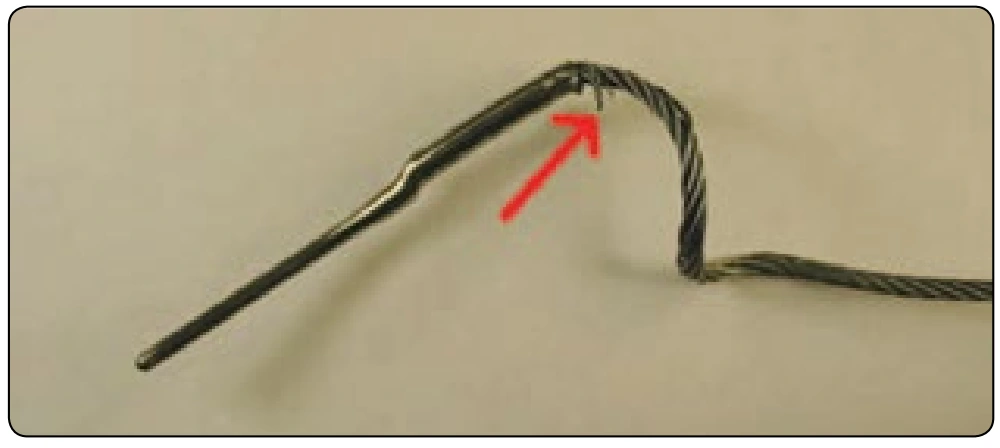
If any are found, the ripcord should be replaced. If not, the cable can be straightened and returned to service.
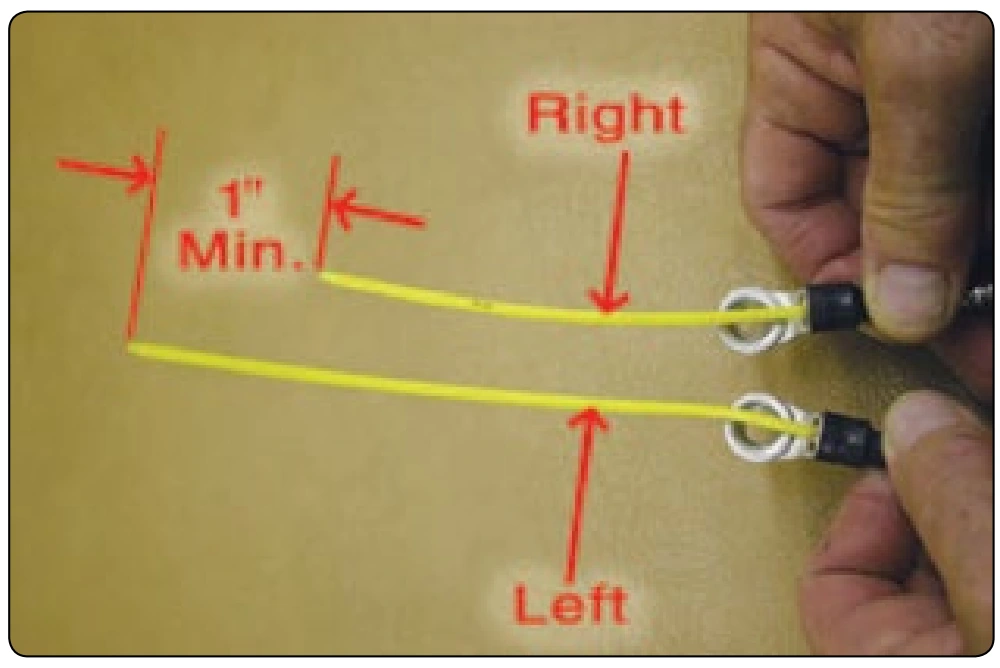
With the single side RSL, it is imperative that the main riser with the RSL attachment leave after the opposite riser. If the opposite riser stays connected while the RSL deploys the reserve, there is the possibility of a main/reserve entanglement. To ensure the correct staging of the cutaway, the release cable of the RSL side must be longer than the cable on the opposite riser. A minimum of 1 inch is the standard differential. [Figure 2-61] If non-compressible housings are not used, the staged separation is not reliable.
Joint Efficiency
Joint efficiency is the percentage of the measurement of strength when applied to the junction or fabrication of two or more materials. An example is the cross seam in a canopy gore where two panels of fabric are joined. The strength of the seam needs to be greater than the strength of the fabric.
To achieve this, there are several factors that need to be considered in the design. These include the following:
- Fabric—the weight and weave of the fabric affects the type of junction used.
- Thread type—this is affected by the weight of the fabric. Generally, the lighter the fabric, the smaller the thread used. Accordingly, a smaller needle is used in order not to damage the weave of the fabric.
- Stitch type—this is determined by the type of seam needed for the design. For the French fell seam normally used in joining the panels of a canopy, the 301 straight stitch is used.
- Stitches per inch—this has a direct correlation to the size of the thread used and the stitch type. There is a fine balance between the security of the seam and overstitching. Too many stitches per inch dramatically affects the strength of the seam by perforating the material. The number of rows of stitching also affects this. While more rows generally increase the strength of the seam, too many perforate the material as well.
- Thread tension—as lighter fabric and thread are used, the thread tension balance becomes more important.
- Reinforcing—the addition of reinforcing through the use of tapes, cords, etc., adds to the strength of the seam. However, their use may also reduce the elasticity of the seam at the same time.
Some of the previous factors also can affect heavier materials, such as tapes and webbings. In working with webbings in harness design, most construction methods have tended to overbuild the junctions. This has been done primarily because the materials have readily accepted heavier threads and stitch patterns.
An area that needs to be addressed is that of re-stitching webbing. Until recently, there was not much study done to determine how much strength is lost in this process. G.S. Dunker, a parachute engineer, conducted a study that evaluated the variables introduced when re-stitching webbing junctions. Some of these variables included the following:
- The treatment or conditioning of the webbing. Condition R webbing has a resin treatment to make it stiffer as opposed to condition U or untreated webbing.
- The size and condition of the needle used in the sewing. Larger needles make larger holes. A blunt needle or one whose point is damaged, will do more damage to the webbing and weaken it.
- The size of the thread used.
- The stitch pattern used and length. A W–W pattern is stronger than a box X pattern.
- The number of times the webbing is re-sewn.
All of these affect the ultimate strength of the webbing junction or stitch pattern.