
Chapter 6
Hand Tools, Sewing Machines, and the Parachute Loft
Each sewing machine is unique and comes with a detailed operator’s manual that explains step-by-step the procedures for sewing. Listed below are some common steps that can be used and are applicable to most machines.
- Before you first sit down in front of the machine, check to see that the power cord is plugged in.
- Many of the modern machines are self-lubricating and have an oil reservoir in a pan below the head. Make sure there is oil of the correct type and to the correct level.
- Next, remove the bobbin case and bobbin from the machine and the upper thread from the needle. This allows you to check to see if the bobbin case is clear and free in operation.
- Without turning the power on, depress the treadle lightly to release the clutch. Turn the balance wheel or drive pulley toward you, and cycle the needle up and down several times to see if the machine turns freely. Listen for any sounds that seem abnormal and notice any feeling of tightness or binding of the machine.
- If everything seems normal, re-thread the needle. Take a full bobbin, place it in the bobbin case, and install it in the shuttle of the machine. [Figures 6-77 and 6-78]
- Cycle the needle down and pick up the bobbin thread. A correctly threaded and timed machine picks up the bobbin thread on the first cycle.
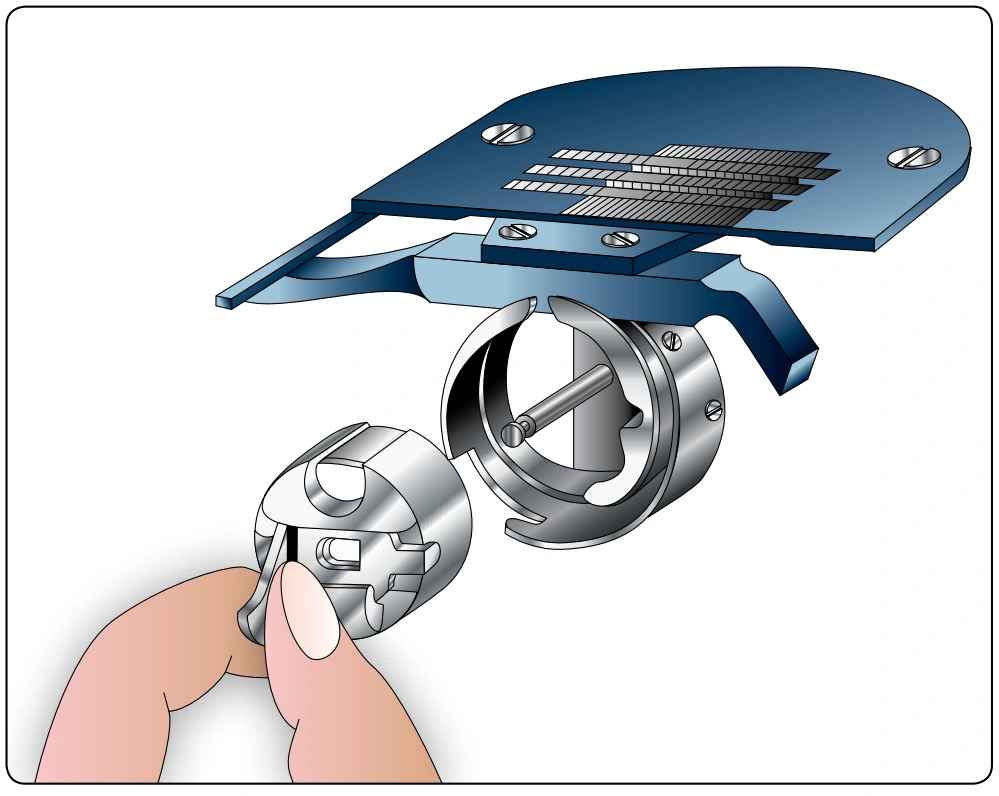
Installing the Needle and Threading the Machine
Most single-needle-type machines have the needle positioned in the needle bar with the long thread groove facing to the left. It is important to always check the threading diagram to make sure the needle is installed correctly and ensure that the needle is installed all the way up to the stop in the needle groove of the needle bar. Check that the long thread groove faces in the direction for that type of machine and that the needle clamp screw is tight. [Figure 6-79]
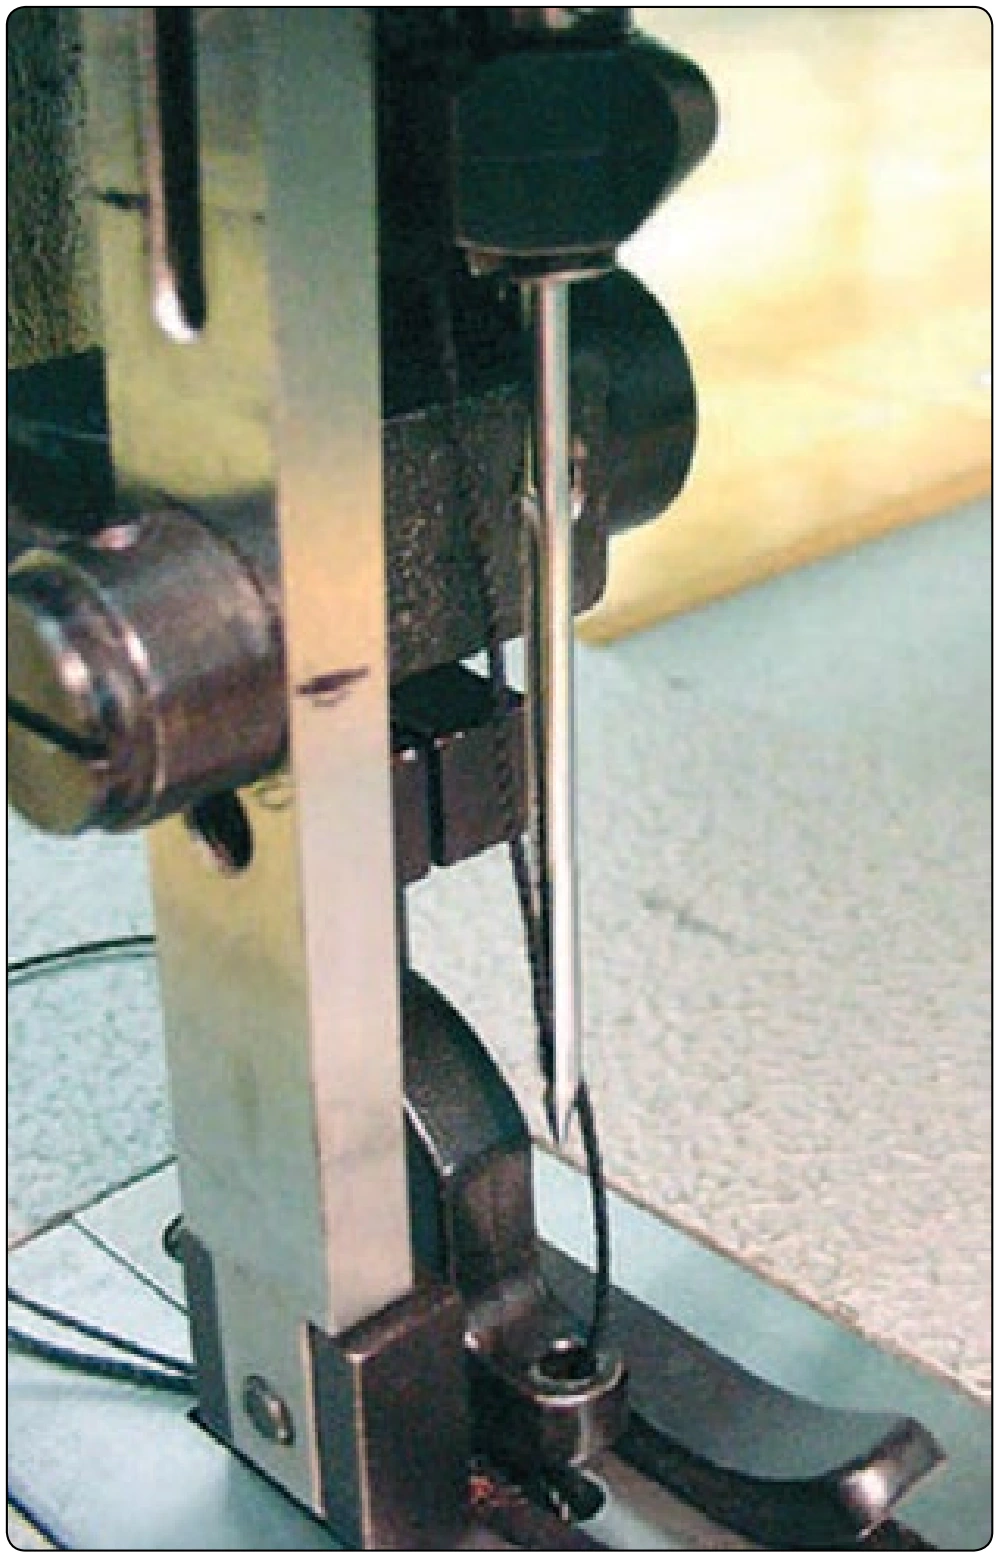
Examples of single-needle machines where the thread groove does not face left are Singer 17W15 308-stitch or Singer 69 bar tack. The thread groove most often faces the bobbin, but not always in the case of a Horizontal Rotary Hook, such as Singer 201-2. Read the manual, if the needle does not pick up the bobbin thread, it may not be installed correctly.
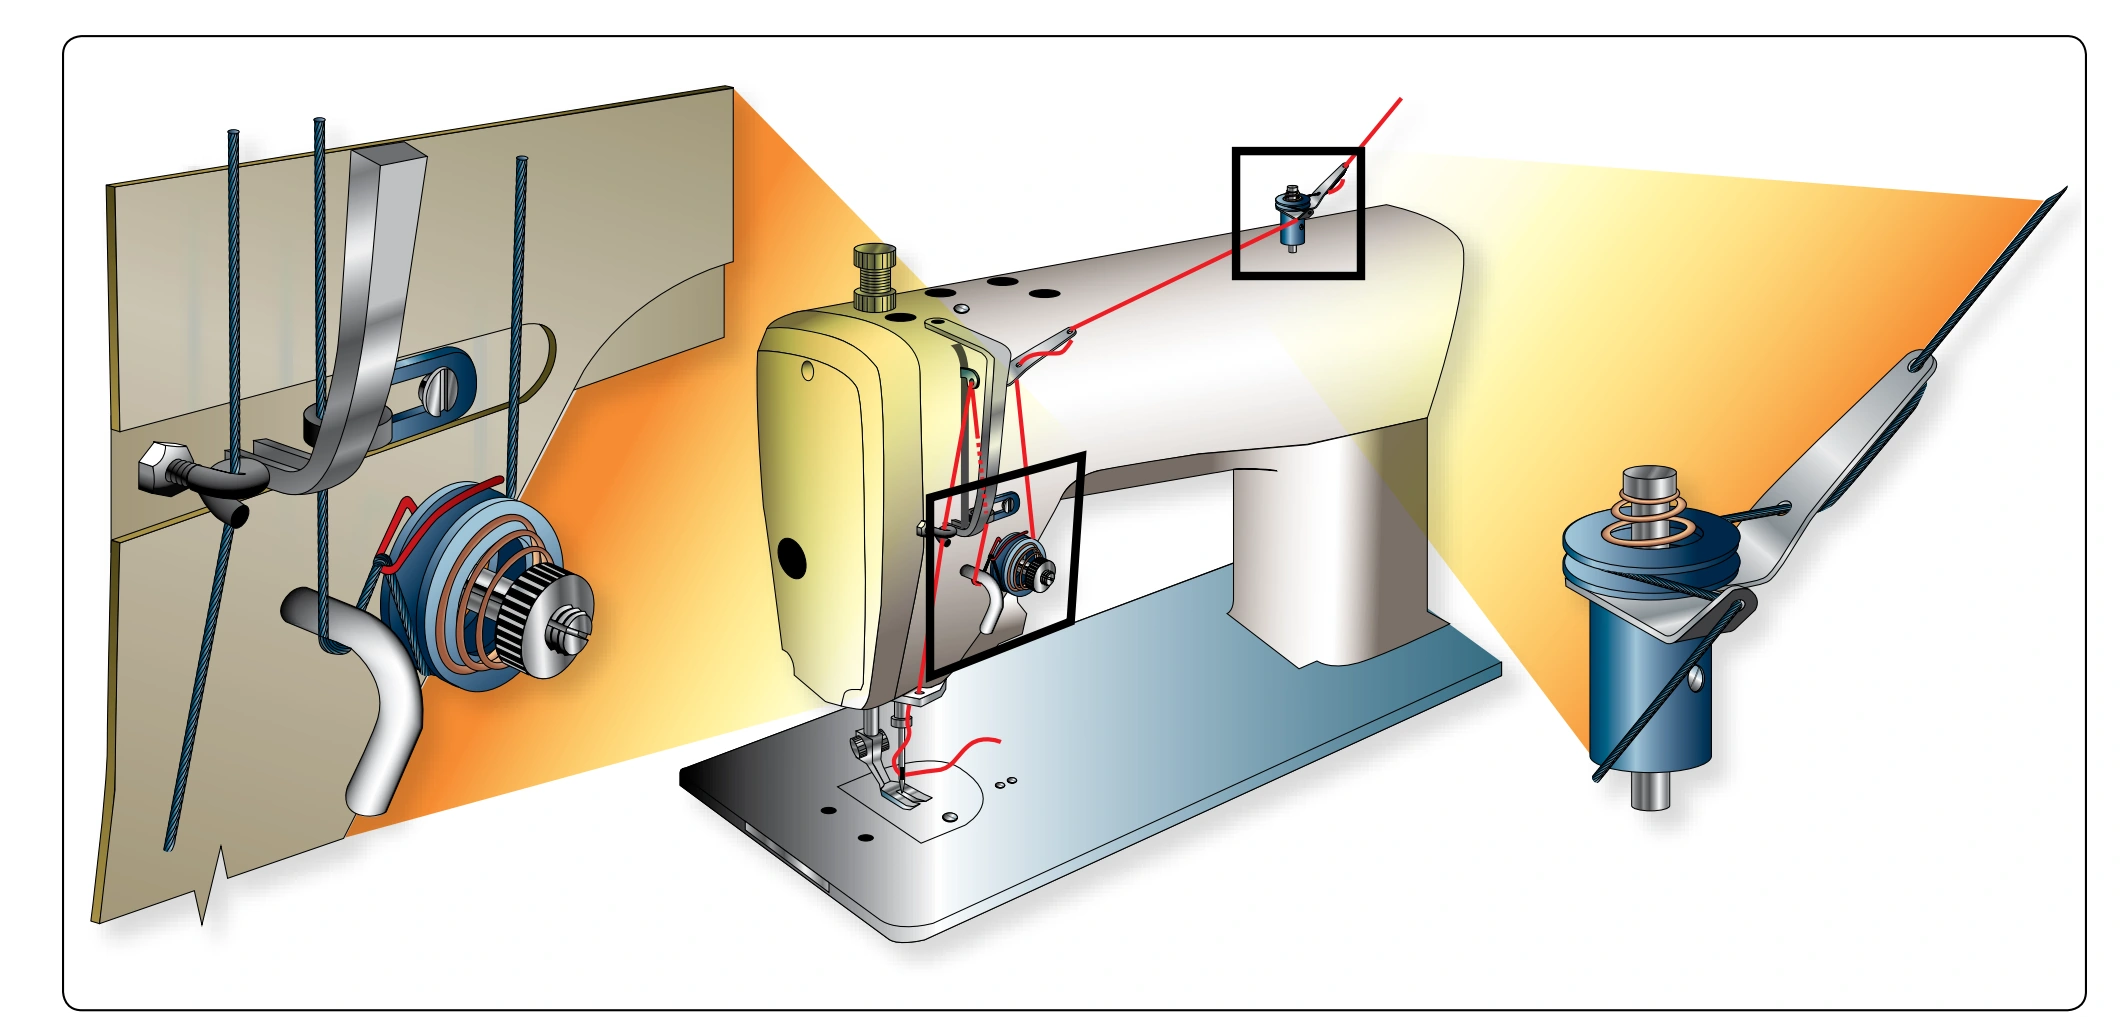
Take a cone of thread and place it on the thread stand. Route the thread upward through the guide at the top of the stand and then to the pre-tension thread guide on top of the arm of the machine. [Figure 6-80] Most modern machines use a similar method of threading. However, there may be additional thread guides of different shapes to route the thread through. This is why the rigger should have a copy of the operator’s manual for proper threading of each machine.
Once the machine is threaded correctly, take a sample of material suitable for the type of machine, thread, and needle. Form several layers and place it under the presser foot. Lower the presser foot while holding the upper and lower threads securely to the rear of the presser foot. Turn the balance wheel again and run a few stitches by hand to see if the machine sews properly. If everything works as expected, turn the power on and begin sewing. If you are unfamiliar with this particular machine, begin slowly until you get the feel of the clutch and speed of the machine. The harder you push, the faster the machine runs. Some industrial machines are able to run very fast. This can intimidate many. If you need to slow the machine down, you can replace the pulley on the motor with one smaller pulley. A parts and repair shop will have or be able to order the pulley you need. Order the smallest pulley that fits the shaft on your motor. You do have to know the make and model of the machine.
Another way to slow a machine is to replace the clutch motor with a rheostat motor. They operate the same way as a dimmer switch for a lamp. The operator sets the speed of the motor, and it does not run faster than what it is set at. When finished sewing, always place a piece of fabric under the presser foot in order to keep the feed dogs from causing damage to the presser foot.
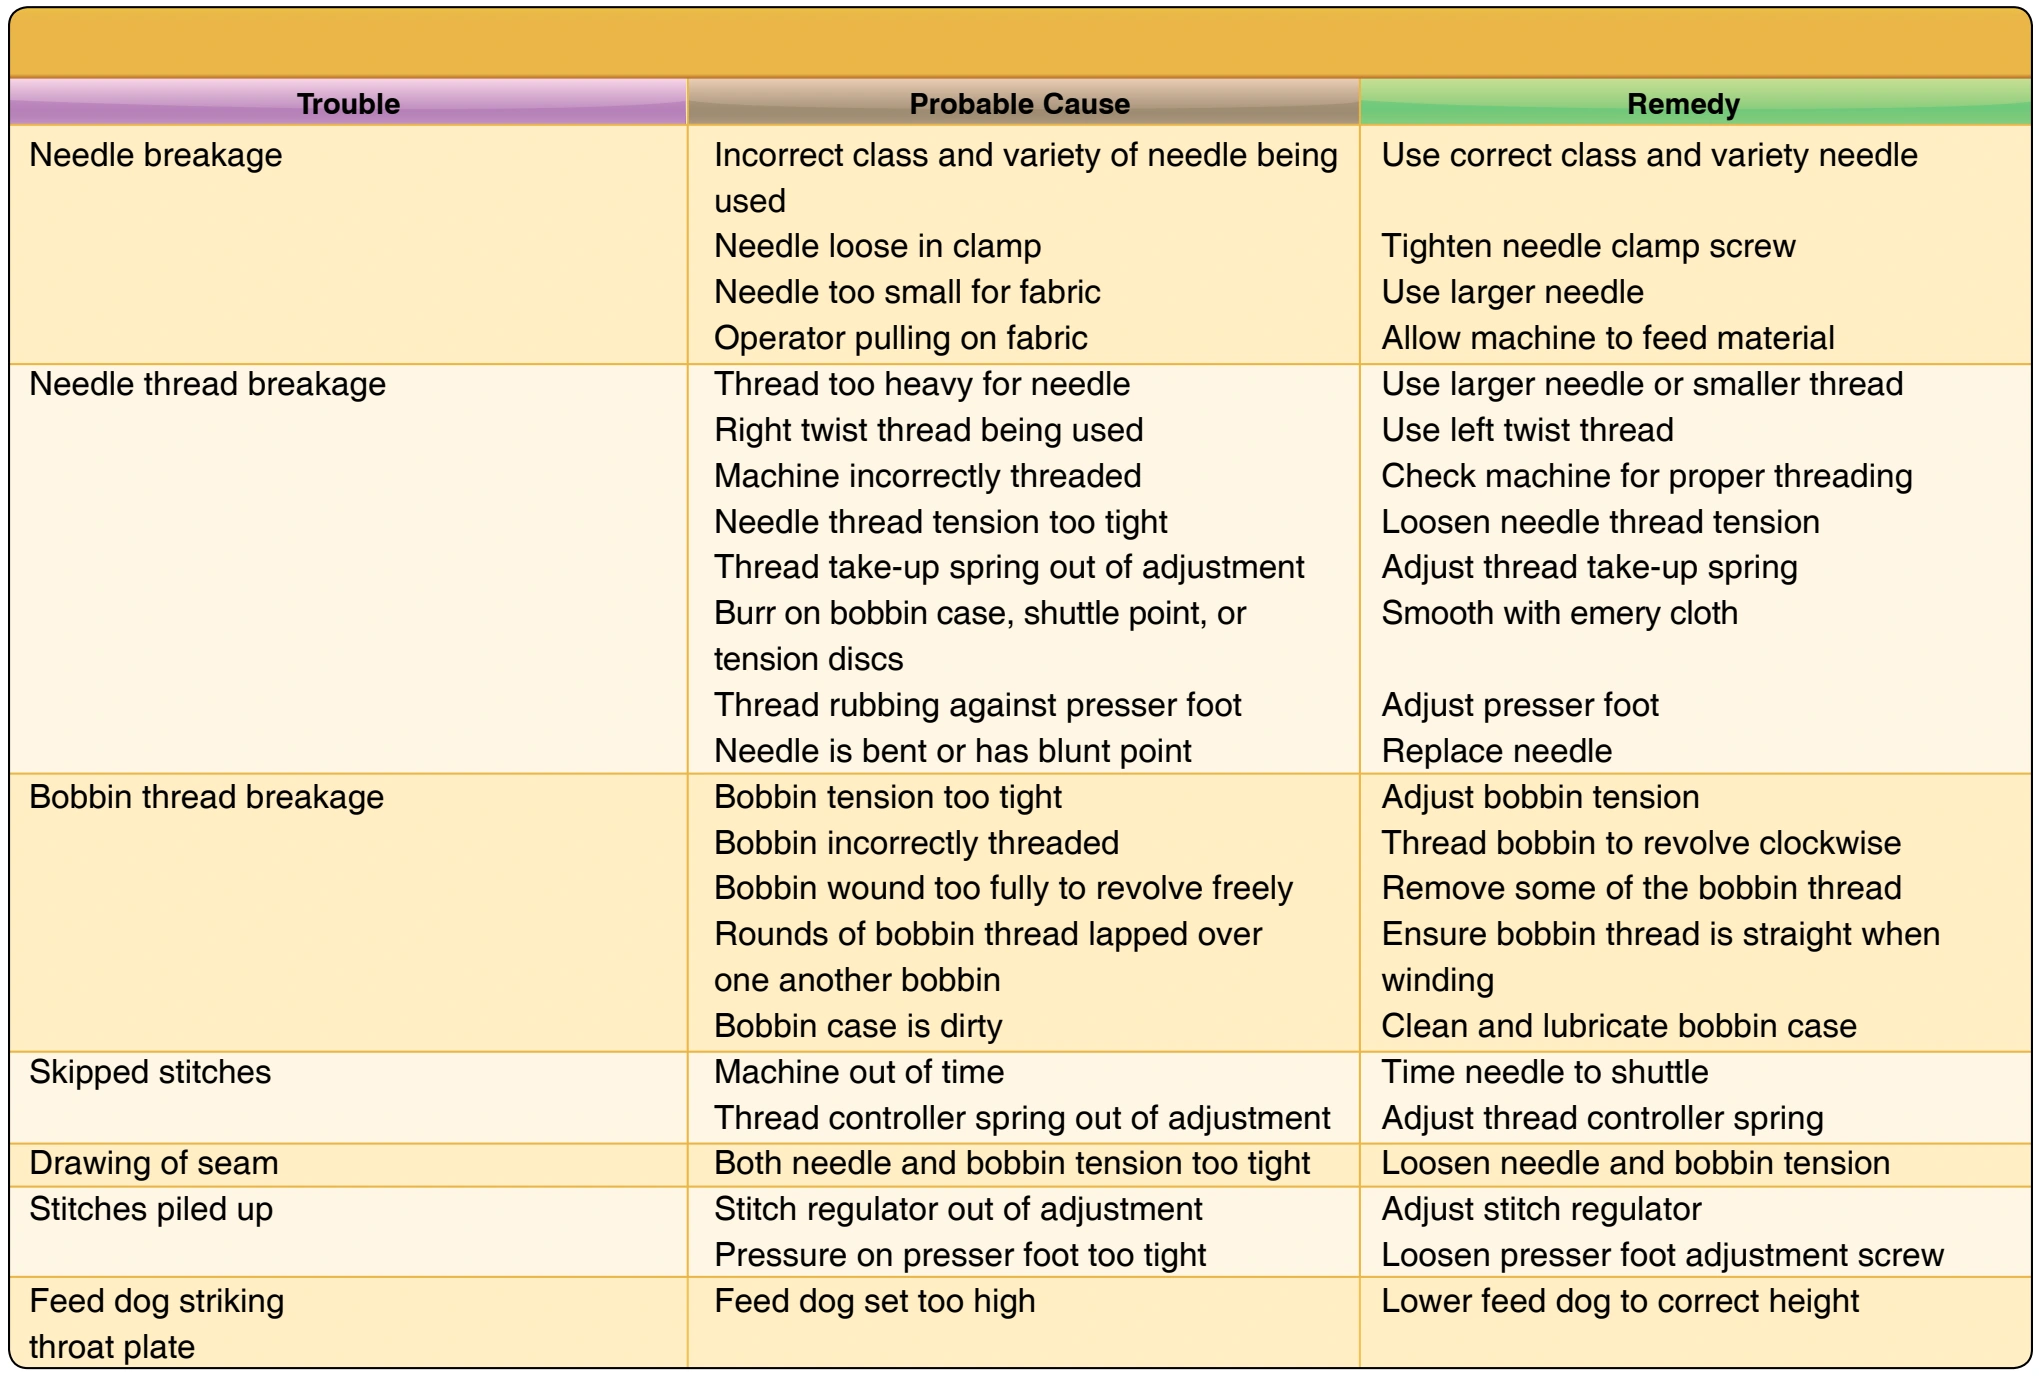
If the machine does not sew correctly, consult the troubleshooting guide to determine what the problem is and how to remedy it. [Figure 6-81] If the machine jams, it is very important to not force it, as you can cause damage to the machine.
Machine Maintenance
The most important part of maintaining your sewing machines is to keep them clean and lubricated. Each machine should be wiped down daily with a clean rag to remove oil and dirt. The amount of use each machine gets dictates the cleaning required. However, on at least a weekly schedule, the moving parts should be cleaned with a small brush to remove dust, lint, dirt, and threads. An air hose or bottle is useful in blowing dirt out of places the brush cannot reach. Be careful when doing this as small particles can be propelled through the air and can get into the eyes. At the very least, the dirt can be blown onto other machines and work.
After cleaning, each machine should be lubricated to ensure smooth operation. For those machines that are self-lubricating, check the level and condition of the oil in the reservoir. For these machines, a number 1 white oil that has a higher viscosity should be used. Depending on the amount of use, the oil should be changed every 6 months to a year. In no case should the oil be changed less than once a year. For machines that require manual lubrication, a number 2 white oil should be used as it has a lower viscosity to better adhere to the moving parts. This should be done daily at the end of the workday. Oiling the machine at this time allows the oil to seep downward through the mechanisms and collect on the bottom.
In the morning before use, take a clean rag and wipe off the excess oil so it does not stain the parachute materials. Pay particular attention to the shuttle race. Keeping this well lubricated ensures smooth operation and a quieter machine. One item that tends to get overlooked is the bobbin winder. The shaft of the winder has a small hole in the top and a drop of oil should be added at least once a week to keep it free.
Sewing Machine Attachments
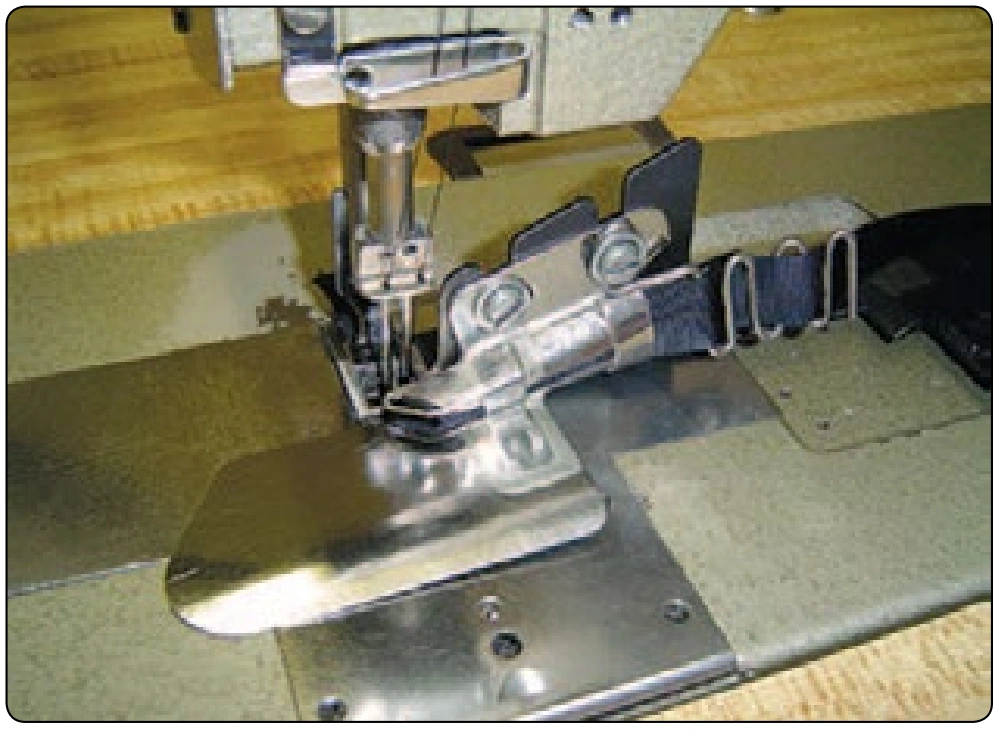
The most common attachment that the rigger uses is a tape folder or “binder.” This attachment folds tape, typically ¾inch Type-3, used for binding the edges of container, bags, or any material needing an edge binder. Used in conjunction with a double-needle machine, it folds the tape in half for a professional appearance and greatly speeds up the work.