
Chapter 5
Preflight and Ground Operations
The primary requirements for safe taxiing are positive control of the aircraft at all times, the ability to recognize potential hazards in time to avoid them, and the ability to stop or turn where and when desired. While on the ground, the throttle directly controls your groundspeed. It is important not to taxi too fast, and be careful no one is in your prop blast. Going too fast can damage the frame or the suspension. The grass you taxi on could have holes and ditches, and damage the suspension. When taxiway centerline stripes are provided, they should be observed unless necessary to clear airplanes or obstructions.
Ground steering is accomplished by controlling the ground steering bar. The ground steering bar may in fact be a bar, handle, wheel, or lever; ground steering controls are as varied as the powered parachutes themselves. Operate the ground steering in a slow and deliberate manner, never jerky or erratic. Some ground steering bars are pushed forward to turn right and pulled back to turn left. Others are just the opposite. Consult the POH for each make and model of aircraft you fly to determine the safe and proper operation of the ground steering.
When taxiing, it is best to slow down before attempting a turn. Sharp, high-speed turns place undesirable side loads on the landing gear and may result in an uncontrollable swerve. If the wing is inflated, the cart will not follow the direction of the wing due to the friction (via the wheels) with the ground. If the cart and the wing are not going in the same direction, you must prevent the wing from gaining enough lift (via cart groundspeed) to pull the cart over on its side. (See Chapter 12 for more details on pull-overs.) Adjust power or apply braking as necessary to control the taxi speed. More engine power may be required to start the powered parachute moving forward, or to start a turn, than is required to keep it moving in any given direction. When using additional power, retard the throttle immediately once the powered parachute begins moving, to prevent excessive acceleration.
When first beginning to taxi the PPC cart, if equipped with brakes, test them for proper operation as soon as the powered parachute is put in motion (typically with a hand control). Apply power to start the powered parachute moving forward slowly, and then retard the throttle and simultaneously apply pressure smoothly to the brakes.
To avoid overheating the brakes when taxiing, keep engine power to a minimum. Rather than continuously riding the brakes to control speed, it is better to apply brakes only occasionally. Other than sharp turns at low speed, the throttle should be at idle before the brakes are applied. It is a common error to taxi with a power setting that requires controlling taxi speed with the brakes. This is the aeronautical equivalent of driving an automobile with both the accelerator and brake pedals depressed at the same time.
When taxiing with an inflated wing (kiting), the ram-air wing will try to weathervane. The wing is designed to be self-centering; its strongest desire is to point into the wind.
Stop the powered parachute with the nosewheel straight ahead to relieve any side load on the nosewheel and to make it easier to start moving ahead.
At nontowered airports, you should announce your intentions on the common traffic advisory frequency (CTAF) assigned to that airport. When operating from an airport with an operating control tower, you must contact the appropriate controller for a clearance to taxi, and a takeoff clearance before taxiing onto the active runway.
After landing, taxiing with the parachute inflated requires you to coordinate movements between the rolling cart on the ground and the flying wing in the air. Cross-controlling by steering the cart one way while failing to steer the wing in the same direction creates a dangerous situation that may end in a rollover. Common errors in taxiing with the wing inflated are:
- Failing to maintain enough forward speed to keep the wing inflated and flying overhead.
- Maintaining too much speed over the ground and thereby lifting the nosewheel off the ground; preventing the nosewheel from being able to control the direction of the cart.
- Not steering the wing along with the cart.
- Attempting to turn the cart too tight for the wing to be able to keep up.
- Failing to take wind into account.
- Attempting to taxi when winds are too high, change in direction, or are gusty.
Wing Inspection
The powered parachute flight instructor will spend a great deal of time explaining the systems of the wing, the proper preflight, and the different methods of staging the wing for inflation by means of different layout techniques. The wing, and its performance, is critical to flight and safety; once again a thorough and systematic preflight procedure is essential.
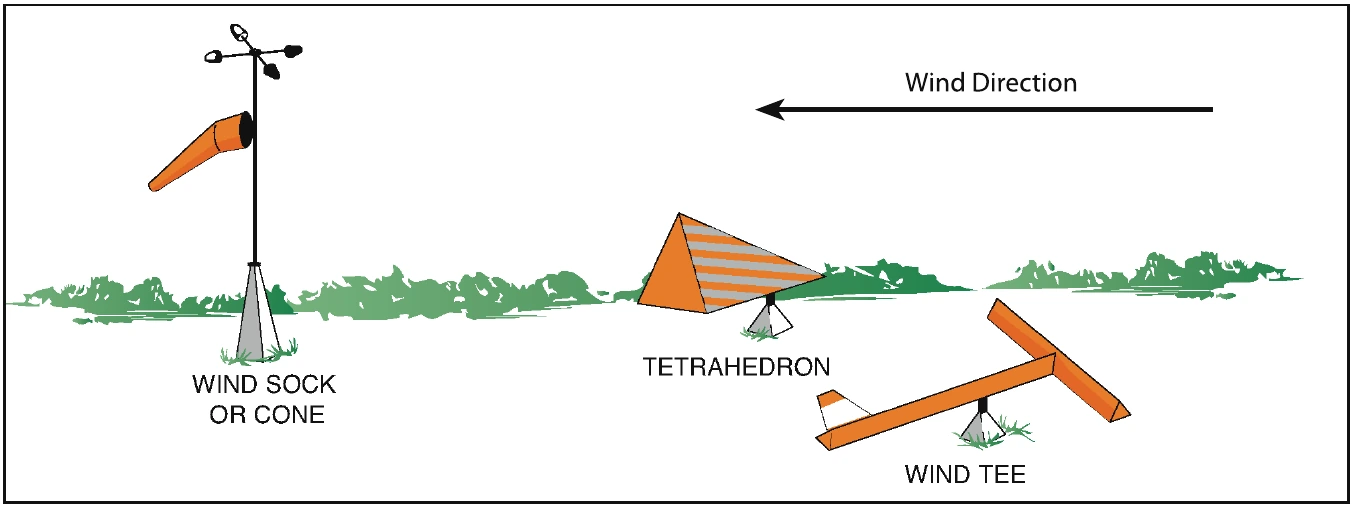
Check the wind direction and manually point the cart directly into the wind. Many PPC pilots use a telescoping rod with a windsock or long strip of narrow rip-stop suspended from the top, displayed from their powered parachute trailer or vehicle to determine wind direction and wind speed. Some pilots prefer handheld wind speed/direction devices. Most conventional airports have some sort of wind indicator (windsock, wind T, etc.) positioned in the segmented circle, as well as electronic weather indicators that accurately measure wind speed and direction at the field. Once the powered parachute engine starts it will be nearly impossible for the pilot to determine the direction of the wind without the aid of a wind direction indicator. [Figure 5-12]
Remove the wing bag from its stored position on the airframe, either on the rear or pilot’s seat, or hanging from the airframe itself. It is critical that the bag not be twisted, rotated or turned when removing it from its storage location, as doing so will twist and entangle the suspension lines. Another determining factor in keeping the suspension lines free from is how you packed the wing away the last time it was flown; the proper procedure for re-bagging the PPC wing will be covered at the end of this chapter.
It is critical for the powered parachute pilot to be able to recognize when the suspension lines are twisted and to know how to untwist them. Most wing bags are clearly marked with an emblem or other marking to identify one side of the bag from the other. Keeping the marked side of the wing bag always facing in the same direction (either facing the cart or facing away from the cart) is a helpful reference to determine if you have twisted the suspension lines while moving the wing into place, either on or behind the cart. The key is to be consistent and methodical in whatever procedure you use. Your flight instructor will offer input on a practical procedure. The height and physical strength of the pilot will also be a factor in determining the best position on the cart to store the wing bag.
Place the wing bag on the ground directly behind the airframe as far back as the riser and support lines will allow, keeping the wing bag in the same configuration that it was removed from the cart. You will have to pull both line sleeves that hold the suspension lines out of the wing bag, and one line sleeve up and around the cart to follow the bag; those lines should run straight from the attach points on the cart to the wing bag after the bag is in position behind the cart. Tilt the wing bag toward the cart to spill the folded wing out of the bag and onto the ground. [Figure 5-13]
With the wing folded behind the cart, you are ready to spread it out and in doing so begin to visually inspect the uninflated wing. Unfold the right side of the wing toward the right and repeat on the left side. As you unfold the wing, it should remain centered directly behind the cart. After the wing is completely unfolded, stand directly behind the cart and hold the leading edge of the wing up in front of you as you face the backside of the cart. You will see an “x” in the lines; this “x” should be positioned directly behind the centerline of the prop on the cart. [Figure 5-14] If it is not, physically pick up the center and drag it into the center position. Then go to the end of the side that will be bunched up and pull out the slack.
Remove the protective sleeves that cover the suspension lines and their components. The protective sleeves are referred to as line sleeves and there is a line sleeve on each set of lines (or two—the right and the left). [Figure 5-15]
While laying out the wing, check for tears in the fabric, torn or loose stitching, abrasions, and deterioration of the fabric from ultraviolet rays. The sun is one of the powered parachute wing’s worst enemies, next to the prop! Certain colors deteriorate faster than others, like red and orange, when exposed to ultraviolet rays from the sun. When the wing is not being used, you should always return it to its wing bag. Take this opportunity to check the wing cells for debris, such as stones, sticks, and bugs; lifting the wing by the trailing edge and gently shaking it will allow most captured debris to fall out of the ram-air openings on the leading edge of the wing.