
Chapter 12
Attitude Instrument Flying
Attitude instrument flying in helicopters is essentially visual flying with the flight instruments substituted for the various reference points on the helicopter and the natural horizon. Control changes, required to produce a given attitude by reference to instruments, are identical to those used in helicopter VFR flight, and your thought processes are the same. Basic instrument training is intended as a building block towards attaining an instrument rating. It will also enable you to do a 180° turn in case of inadvertent incursion into instrument meteorological conditions (IMC).
Flight Instruments
When flying a helicopter with reference to the flight instruments, proper instrument interpretation is the basis for aircraft control. Your skill, in part, depends on your understanding of how a particular instrument or system functions, including its indications and limitations. With this knowledge, you can quickly determine what an instrument is telling you and translate that information into a control response.
Pitot-Static Instruments
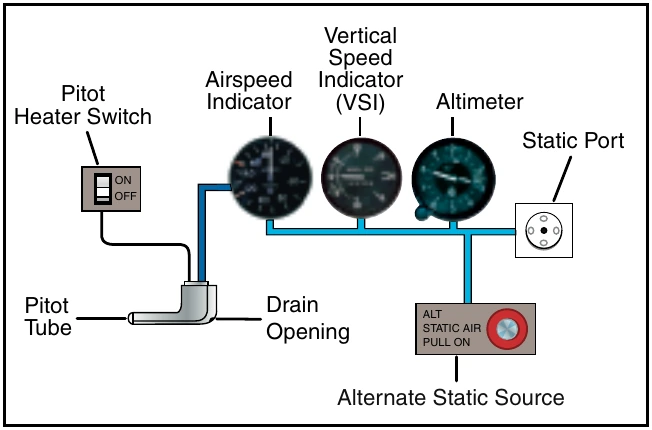
The pitot-static instruments, which include the airspeed indicator, altimeter, and vertical speed indicator, operate on the principle of differential air pressure. Pitot pressure, also called impact, ram, or dynamic pressure, is directed only to the airspeed indicator, while static pressure, or ambient pressure, is directed to all three instruments. An alternate static source may be included allowing you to select an alternate source of ambient pressure in the event the main port becomes blocked. [Figure 12-1]
Airspeed Indicator
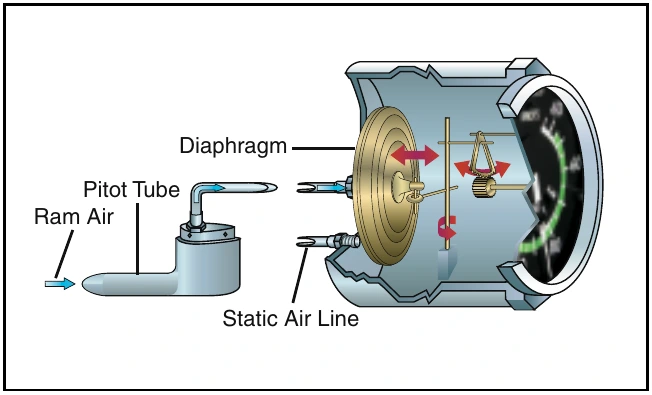
The airspeed indicator displays the speed of the helicopter through the air by comparing ram air pressure from the pitot tube with static air pressure from the static port—the greater the differential, the greater the speed. The instrument displays the result of this pressure differential as indicated airspeed (IAS).
Manufacturers use this speed as the basis for determining helicopter performance, and it may be displayed in knots, miles per hour, or both. [Figure 12-2] When an indicated airspeed is given for a particular situation, you normally use that speed without making a correction for altitude or temperature. The reason no correction is needed is that an airspeed indicator and aircraft performance are affected equally by changes in air density. An indicated airspeed always yields the same performance because the indicator has, in fact, compensated for the change in the environment.
Instrument Check
During the preflight, ensure that the pitot tube, drain hole, and static ports are unobstructed. Before liftoff, make sure the airspeed indicator is reading zero. If there is a strong wind blowing directly at the helicopter, the airspeed indicator may read higher than zero, depending on the wind speed and direction.
As you begin your takeoff, make sure the airspeed indicator is increasing at an appropriate rate. Keep in mind, however, that the airspeed indication might be unreliable below a certain airspeed due to rotor downwash.
Altimeter
The altimeter displays altitude in feet by sensing pressure changes in the atmosphere. There is an adjustable barometric scale to compensate for changes in atmospheric pressure. [Figure 12-3]
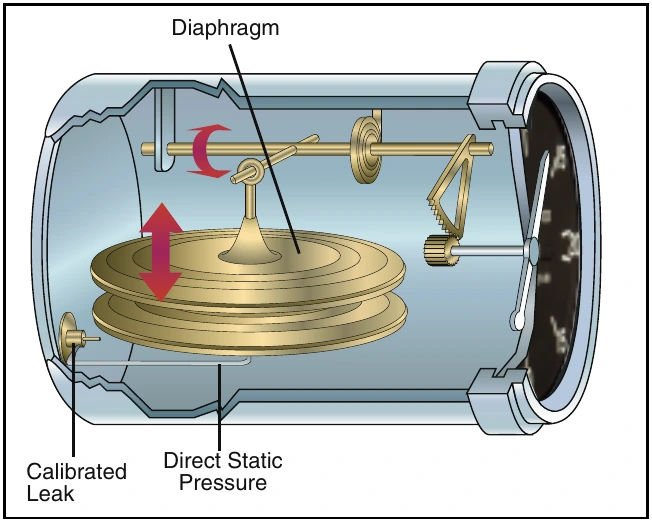
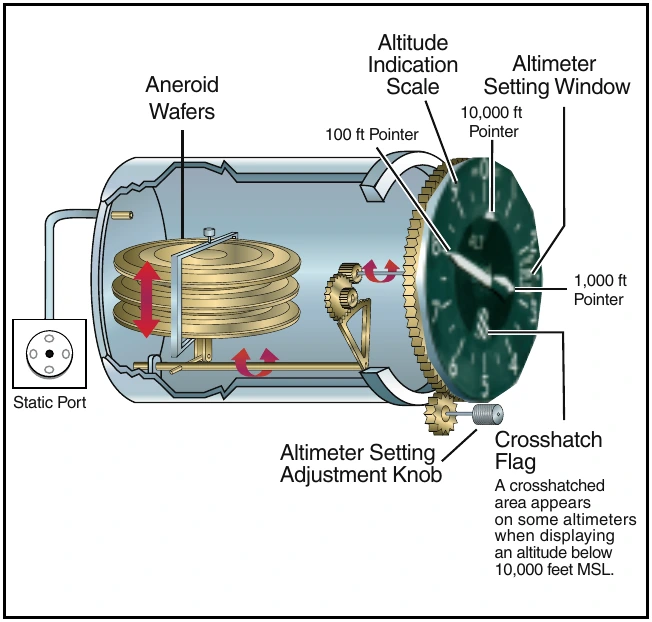
The basis for altimeter calibration is the International Standard Atmosphere (ISA), where pressure, temperature, and lapse rates have standard values. However, actual atmospheric conditions seldom match the standard values. In addition, local pressure readings within a given area normally change over a period of time, and pressure frequently changes as you fly from one area to another. As a result, altimeter indications are subject to errors, the extent of which depends on how much the pressure, temperature, and lapse rates deviate from standard, as well as how recently you have set the altimeter.
The best way to minimize altimeter errors is to update the altimeter setting frequently. In most cases, use the current altimeter setting of the nearest reporting station along your route of flight per regulatory requirements.