
Chapter 3
Aircraft Fabric Covering
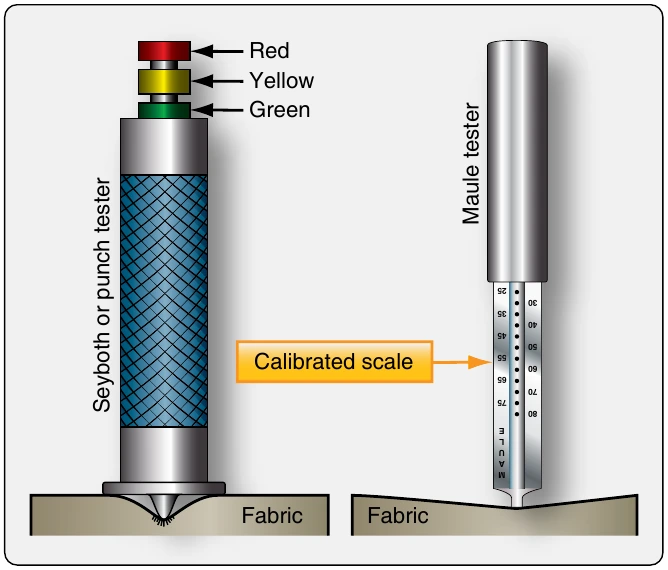
A second type of punch tester, the Seyboth, is not as popular as the Maule because it punctures a small hole in the fabric when the mechanic pushes the shoulder of the testing unit against the fabric. A pin with a color-coded calibrated scale protrudes from the top of the tester and the mechanic reads this scale to determine fabric strength. Since this device requires a repair regardless of the strength of the fabric indicated, it is not widely used.
Seyboth and Maule fabric strength testers designed for cotton- and linen-covered aircraft, not to be used on modern Dacron fabrics. Mechanical devices, combined with other information and experience, help the FAA-certificated mechanic judge the strength of the fabric. [Figure 3-11]
General Fabric Covering Process
It is required to have an IA involved in the process of re-covering a fabric aircraft because re-covering is a major repair or major alteration. Signatures are required on FAA Form 337 and in the aircraft logbook. To ensure work progresses as required, the IA should be involved from the beginning, as well as at various stages throughout the process.
This section describes steps common to various STC and manufacturer covering processes, as well as the differences of some processes. To aid in proper performance of fabric covering and repair procedures, STC holders produce illustrated, step-by-step instructional manuals and videos that demonstrate the correct covering procedures. These training aids are invaluable to the inexperienced technician.
Since modern fabric coverings last indefinitely, a rare opportunity to inspect the aircraft exists during the re-covering process. Inspectors and owner-operators should use this opportunity to perform a thorough inspection of the aircraft before new fabric is installed.
The method of fabric attachment should be identical, as far as strength and reliability are concerned, to the method used by the manufacturer of the aircraft being recovered or repaired. Carefully remove the old fabric from the airframe, noting the location of inspection covers, drain grommets, and method of attachment. Either the envelope method or blanket method of fabric covering is acceptable, but a choice must be made prior to beginning the re-covering process.
Blanket Method vs. Envelope Method
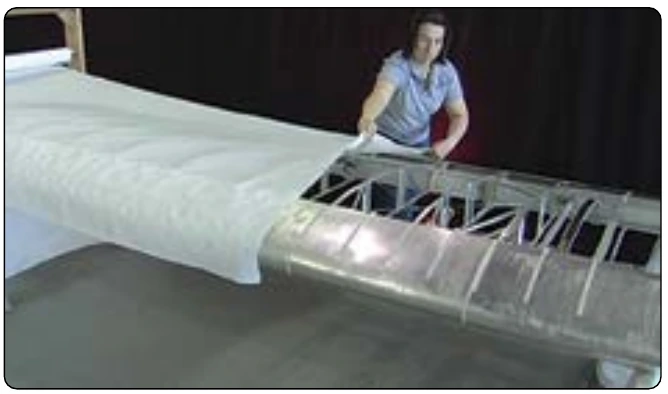
In the blanket method of re-covering, multiple flat sections of fabric are trimmed and attached to the airframe. Certified greige polyester fabric for covering an aircraft can be up to 70 inches in width and used as it comes off the bolt. Each aircraft must be considered individually to determine the size and layout of blankets needed to cover it. A single blanket cut for each small surface (i.e., stabilizers and control surfaces) is common. Wings may require two blankets that overlap. Fuselages are covered with multiple blankets that span between major structural members, often with a single blanket for the bottom. Very large wings may require more than two blankets of fabric to cover the entire top and bottom surfaces. In all cases, the fabric is adhered to the airframe using the approved adhesives, following specific rules for the covering process being employed. [Figure 3-12]
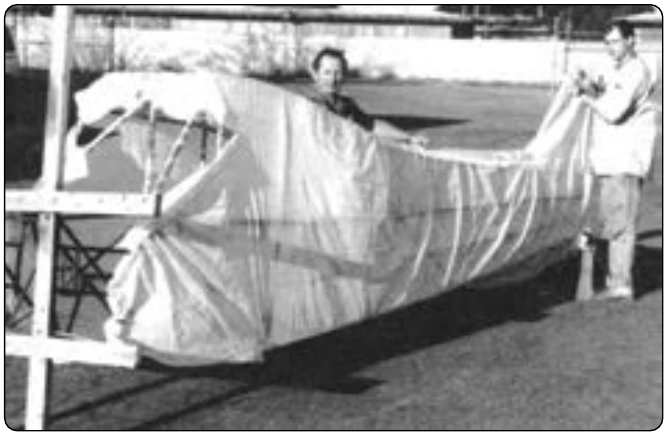
An alternative method of re-covering, the envelope method, saves time by using precut and pre-sewn envelopes of fabric to cover the aircraft. The envelopes must be sewn with approved machine sewing thread, edge distance, fabric fold, etc., such as those specified in AC 43.13-1 or an STC. Patterns are made and fabric is cut and stitched so that each major surface, including the fuselage and wings, can be covered with a single, close-fitting envelope. Since envelopes are cut to fit, they are slid into position, oriented with the seams in the proper place, and attached with adhesive to the airframe. Envelope seams are usually located over airframe structure in inconspicuous places, such as the trailing edge structures and the very top and bottom of the fuselage, depending on airframe construction. Follow the manufacturer’s or STC’s instructions for proper location of the sewn seams of the envelope when using this method. [Figure 3-13]
Preparation for Fabric Covering Work
Proper preparation for re-covering a fabric aircraft is essential. First, assemble the materials and tools required to complete the job. The holder of the STC usually supplies a materials and tools list either separately or in the STC manual. Control of temperature, humidity, and ventilation is needed in the work environment. If ideal environmental conditions cannot be met, additives are available that compensate for this for most re-covering products.
Rotating work stands for the fuselage and wings provide easy, alternating access to the upper and lower surfaces while the job is in progress. [Figure 3-14] They can be used with sawhorses or sawhorses can be used alone to support the aircraft structure while working. A workbench or table, as well as a rolling cart and storage cabinet, are also recommended. Figure 3-15 shows a well conceived fabric covering workshop. A paint spray booth for sprayed-on coatings and space to store components awaiting work is also recommended.
Many of the substances used in most re-covering processes are highly toxic. Proper protection must be used to avoid serious short- and long-term adverse health effects. Eye protection, a proper respirator, and skin protection are vital. As mentioned in the beginning of this chapter, nitrate dope is very flammable. Proper ventilation and a rated fire extinguisher should be on hand when working with this and other covering process materials. Grounding of work to prevent static electricity build-up may be required. All fabric re-covering processes also involve multiple coats of various products that are sprayed onto the fabric surface. Use of a high-volume, low-pressure (HVLP) sprayer is recommended. Good ventilation is needed for all of the processes.
Removal of Old Fabric Coverings
Removal of the old covering is the first step in replacing an aircraft fabric covering. Cut away the old fabric from the airframe with razor blades or utility knife. Care should be taken to ensure that no damage is done to the airframe. [Figure 3-16] To use the old covering for templates in transferring the location of inspection panels, cable guides, and other features to the new covering, the old covering should be removed in large sections. NOTE: any rib stitching fasteners, if used to attach the fabric to the structure, should be removed before the fabric is pulled free of the airframe. If fasteners are left in place, damage to the structure may occur during fabric removal.