
Chapter 3
Aircraft Fabric Covering
Fabric Heat Shrinking
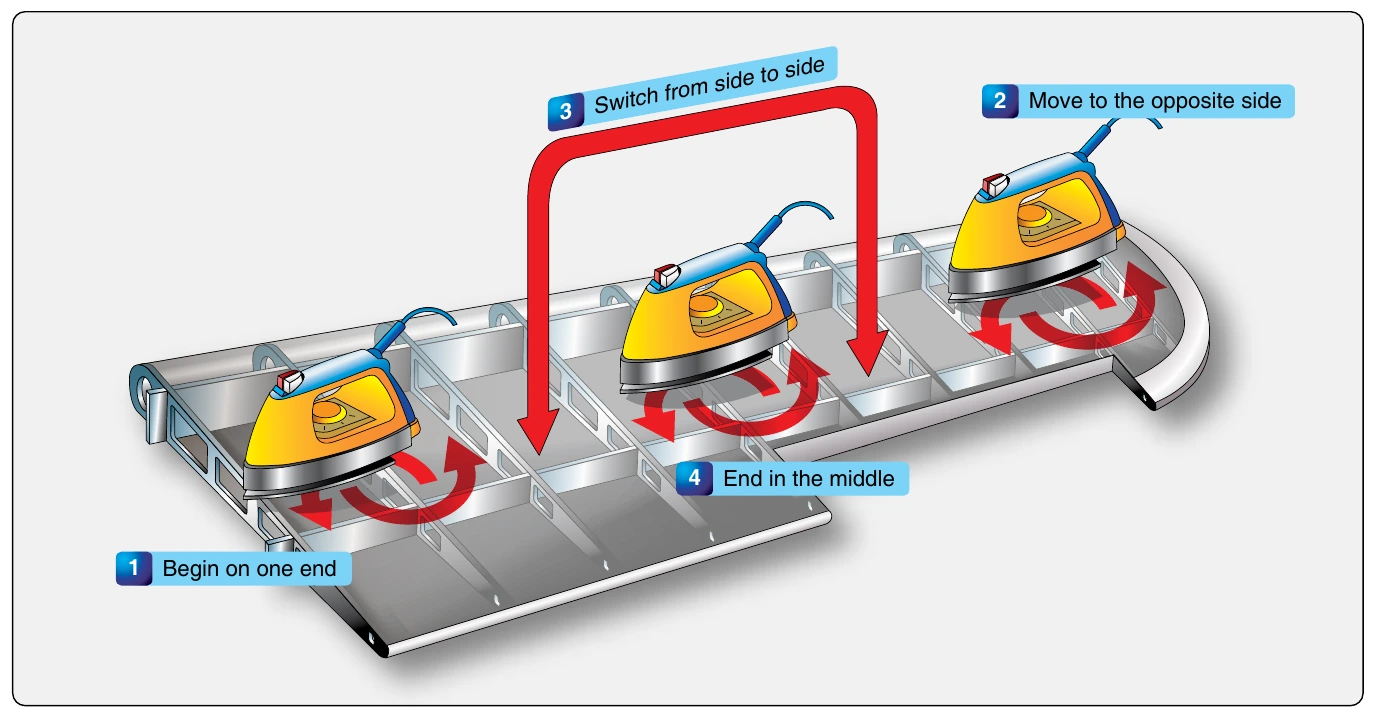
Once the fabric has been glued to the structure, it can be made taut by heat shrinking. This process is done with an ordinary household iron that the technician calibrates before use. A smaller iron is also used to iron in small or tight places. [Figure 3-22] The iron is run over the entire surface of the fabric. Follow the instructions for the work being performed. Some processes avoid ironing seams while other processes begin ironing over structure and move to spanned fabric or vice-versa. It is important to shrink the fabric evenly. Starting on one end of a structure and progressing sequentially to the other end is not recommended. Skipping from one end to the other, and then to the middle, is more likely to evenly draw the fabric tight. [Figure 3-23]
The amount polyester fabric shrinks is directly related to the temperature applied. Polyester fabric can shrink nearly 5 percent at 250 °F and 10 percent at 350 °F. It is customary to shrink the fabric in stages, using a lower temperature first, before finishing with the final temperature setting. The first shrinking is used to remove wrinkles and excess fabric. The final shrinking gives the finished tautness desired. Each process has its own temperature regime for the stages of tautening. Typically ranging from 225 °F to 350 °F, it is imperative to follow the process instructions. Not all fabric covering processes use the same temperature range and maximum temperature. Ensure irons are calibrated to prevent damage at high temperature settings.
Attaching Fabric to the Wing Ribs
Once the fabric has been tautened, covering processes vary. Some require a sealing coat be applied to the fabric at this point. It is usually put on by brush to ensure the fibers are saturated. Other processes seal the fabric later. Whatever the process, the fabric on wings must be secured to the wing ribs with more than just cement. The forces caused by the airflow over the wings are too great for cement alone to hold the fabric in place. As described in the materials section, screws, rivets, clips and lacing hold the fabric in place on manufactured aircraft. Use the same attach method as used by the original aircraft manufacturer. Deviation requires a field approval. Note that fuselage and empennage attachments may be used on some aircraft. Follow the methodology for wing rib lacing described below and the manufacturer’s instructions for attach point locations and any possible variations to what is presented here.
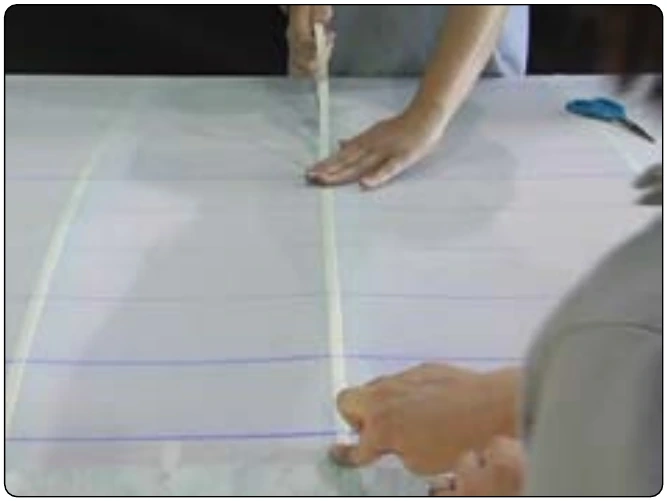
Care must always be taken to identify and eliminate any sharp edges that might wear through the fabric. Reinforcing tape of the exact same width as the rib cap is installed before any of the fasteners. This approved sticky-back tape helps prevent the fabric from tearing. [Figure 3-24] Then, screws, rivets, and clips simply attach into the predrilled holes in the rib caps to hold the fabric to the caps. Rib lacing is a more involved process whereby the fabric is attached to the ribs with cord.
Rib Lacing
There are two kinds of rib lacing cord. One has a round cross-section and the other flat. Which to use is a matter of preference based on ease of use and final appearance. Only approved rib lacing cord can be used. Unless a rib is unusually deep from top to bottom, rib lacing uses a single length of cord that passes completely through the wing from the upper surface to the lower surface thereby attaching the top and bottom skin to the rib simultaneously.
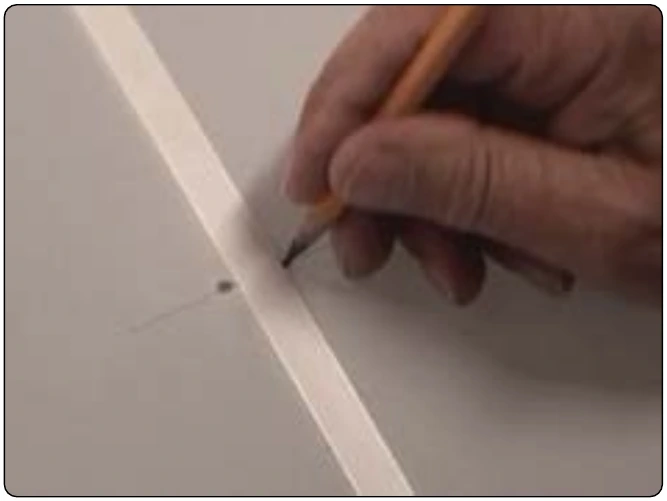
Holes are laid out and pre-punched through the skin as close to the rib caps as possible to accept the lacing cord. [Figure 3-25] This minimizes leverage the fabric could develop while trying to pull away from the structure and prevents tearing. The location of the holes is not arbitrary. The spacing between lacing holes and knots must adhere to manufacturer’s instructions, if available. STC lacing guidance refers to manufacturer’s instructions or to that shown on the chart in Figure 3-26 which is taken from AC 43.13-1. Notice that because of greater turbulence in the area of the propeller wash, closer spacing between the lacing is required there. This slipstream is considered to be the width of the propeller plus one additional rib. Ribs are normally laced from the leading edge to the trailing edge of the wing.
Rib lacing is done with a long curved needle to guide the cord in and out of holes and through the depth of the rib.
The knots are designed not to slip under the forces applied and can be made in a series out of a single strand of lacing. Stitching can begin at the leading edge or trailing edge. A square knot with a half hitch on each side is typically used for the first knot when lacing a rib. [Figure 3-27] This is followed by a series of modified seine knots until the final knot is made and secured with a half hitch. [Figure 3-28] Hidden modified seine knots are also used. These knots are placed below the fabric surface so only a single strand of lacing is visible across the rib cap. [Figure 3-29]
Structure and accessories within the wing may prevent a continuous lacing. Ending the lacing and beginning again can avoid these obstacles. Lacing that is not long enough to complete the rib may be ended and a new starting knot can be initiated at the next set of holes. The lacing can also be extended by joining it with another piece of lacing using the splice knot shown in Figure 3-30.
Occasionally, lacing to just the rib cap is employed without lacing entirely through the wing and incorporating the cap on the opposite side. This is done where ribs are exceptionally deep or where through lacing is not possible, such as in an area where a fuel tank is installed. Changing to a needle with a tighter radius facilitates threading the lacing cord in these areas. Knotting procedures remain unchanged.
Technicians inexperienced at rib lacing should seek assistance to ensure the correct knots are being tied. STC holder videos are invaluable in this area. They present repeated close-up visual instruction and guidance to ensure airworthy lacing. AC 43.13-1, Chapter 2, Fabric Covering, also has in-depth instructions and diagrams as do some manufacturer’s manuals and STC’s instructions.
Rings, Grommets, & Gussets
When the ribs are laced and the fabric covering completely attached, the various inspection rings, drain grommets, reinforcing patches, and finishing tapes are applied. Inspection rings aid access to critical areas of the structure (pulleys, bell cranks, drag/anti-drag wires, etc.) once the fabric skin is in place. They are plastic or aluminum and normally cemented to the fabric using the approved cement and procedures. The area inside the ring is left intact. It is removed only when inspection or maintenance requires access through that ring. Once removed, preformed inspection panels are used to close the opening. The rings should be positioned as specified by the manufacturer. Lacking that information, they should be positioned as they were on the previous covering fabric. Additional rings should be installed by the technician if it is determined a certain area would benefit from access in the future. [Figure 3-31]
Water from rain and condensation can collect under the fabric covering and needs a way to escape. Drain grommets serve this purpose. There are a few different types as described in the materials section above. All are cemented into position in accordance with the approved process under which the work is being performed. Locations for the drain grommets should be ascertained from manufacturer’s data. If not specified, AC 43.13-1 has acceptable location information. Each fabric covering STC may also give recommendations. Typically, drain grommets are located at the lowest part of each area of the structure (e.g., bottom of the fuselage, wings, empennage). [Figure 3-32] Each rib bay of the wings is usually drained with one or two grommets on the bottom of the trailing edge. Note that drain holes without grommets are sometimes approved in reinforced fabric.