
Chapter 7
Advanced Composite Materials
Warp is the longitudinal fibers of a fabric. The warp is the high-strength direction due to the straightness of the fibers. A warp clock is used to describe direction of fibers on a diagram, spec sheet, or manufacturer’s sheets. If the warp clock is not available on the fabric, the orientation is defaulted to zero as the fabric comes off the roll. Therefore, 90° to zero is across the width of the fabric. 90° to zero is also called the fill direction.
Mixing Resins
Epoxy resins, like all multipart materials, must be thoroughly mixed. Some resin systems have a dye added to aid in seeing how well the material is mixed. Since many resin systems do not have a dye, the resin must be mixed slowly and fully for three minutes. Air enters into the mixture if the resin is mixed too fast. If the resin system is not fully mixed, the resin may not cure properly. Make sure to scrape the edges and bottom of the mixing cup to ensure that all resin is mixed correctly.
Do not mix large quantities of quick curing resin. These types of resins produce heat after they are mixed. Smoke can burn or poison you when the resin overheats. Mix only the amount of material that is required. Mix more than one batch if more material is needed than the maximum batch size.
Saturation Techniques
For wet layup repair, impregnate the fabric with resin. It is important to put the right amount of resin on the fabric. Too much or too little resin affects the strength of the repair. Air that is put into the resin or not removed from the fabric also reduces the repair strength.
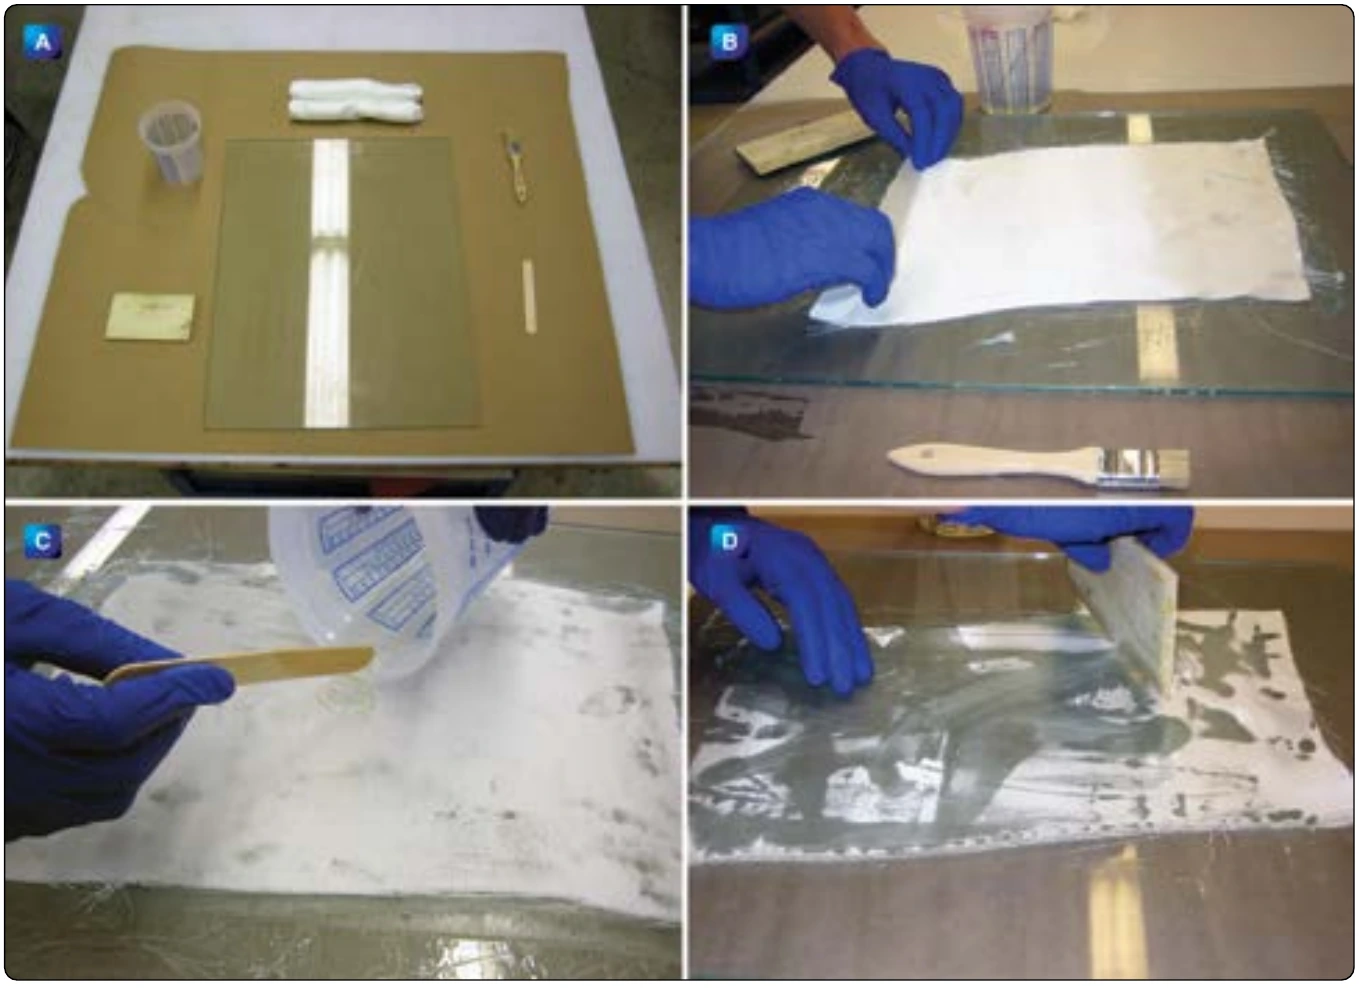
Fabric Impregnation With a Brush or Squeegee
The traditional way of impregnating the fabric is by using a brush or squeegee. The technician puts a mold release compound or a release film on a caul plate so that the plies will not adhere to the caul plate. Place a sheet of fabric on the caul plate and apply resin in the middle of the sheet. Use a brush or squeegee to thoroughly wet the fabric. More plies of fabric and resin are added and the process is repeated until all plies are impregnated. A vacuum bag will be used to consolidate the plies and to bleed off excess resin and volatiles. Most wet layup processes have a room temperature cure but extra heat, up to 150 °F, are used to speed up the curing process. [Figure 7-51]
Fabric Impregnation Using a Vacuum Bag
The vacuum-assisted impregnation method is used to impregnate repair fabric with a two-part resin while enclosed inside a vacuum bag. This method is preferred for tight-knit weaves and when near optimum resin-to-fiber ratio is required. Compared to squeegee impregnation, this process reduces the level of entrapped air within the fabric and offers a more controlled and contained configuration for completing the impregnation process.
Vacuum-assisted impregnation consists of the following steps:
- Place vacuum bag sealing tape on the table surface around the area that is used to impregnate the material. The area should be at least 4 inches larger than the material to be impregnated.
- Place an edge breather cloth next to the vacuum bag sealing tape. The edge breather should be 1–2 inches wide.
- Place a piece of solid parting film on the table. The sheet should be 2-inches larger than the material to be impregnated.
- Weigh the fabric to find the amount of resin mix that is necessary to impregnate the material.
- Lay the fabric on the parting film.
- Put a piece of breather material between the fabric and the edge breather to provide an air path.
- Pour the resin onto the fabric. The resin should be a continuous pool in the center area of the fabric.
- Put vacuum probes on the edge breather.
- Place a second piece of solid parting film over the fabric. This film should be the same size or larger than the first piece.
- Place and seal the vacuum bag, and apply vacuum to the bag.
- Allow 2 minutes for the air to be removed from the fabric.
- Sweep the resin into the fabric with a squeegee. Slowly sweep the resin from the center to the edge of the fabric. The resin should be uniformly distributed over all of the fabric.
- Remove the fabric and cut the repair plies.
Vacuum Bagging Techniques
Vacuum bag molding is a process in which the layup is cured under pressure generated by drawing a vacuum in the space between the layup and a flexible sheet placed over it and sealed at the edges. In the vacuum bag molding process, the plies are generally placed in the mold by hand layup using prepreg or wet layup. High-flow resins are preferred for vacuum bag molding.
Single Side Vacuum Bagging
This is the preferred method if the repair part is large enough for a vacuum bag on one side of the repair. The vacuum bag is taped in place with tacky tape and a vacuum port is placed through the bag to create the vacuum.
Envelope Bagging
Envelope bagging is a process in which the part to be repaired is completely enclosed in a vacuum bag or the bag is wrapped around the end of the component to obtain an adequate seal. It is frequently used for removable aircraft parts, such as flight controls, access panels, etc., and when a part’s geometry and/or the repair location makes it very difficult to properly vacuum bag and seal the area in a vacuum. In some cases, a part may be too small to allow installation of a single-side bag vacuum. Other times, the repair is located on the end of a large component that must have a vacuum bag wrapped around the ends and sealed all the way around. [Figure 7-52]