
Chapter 7
Advanced Composite Materials
Step 4: Prepare the Damaged Area
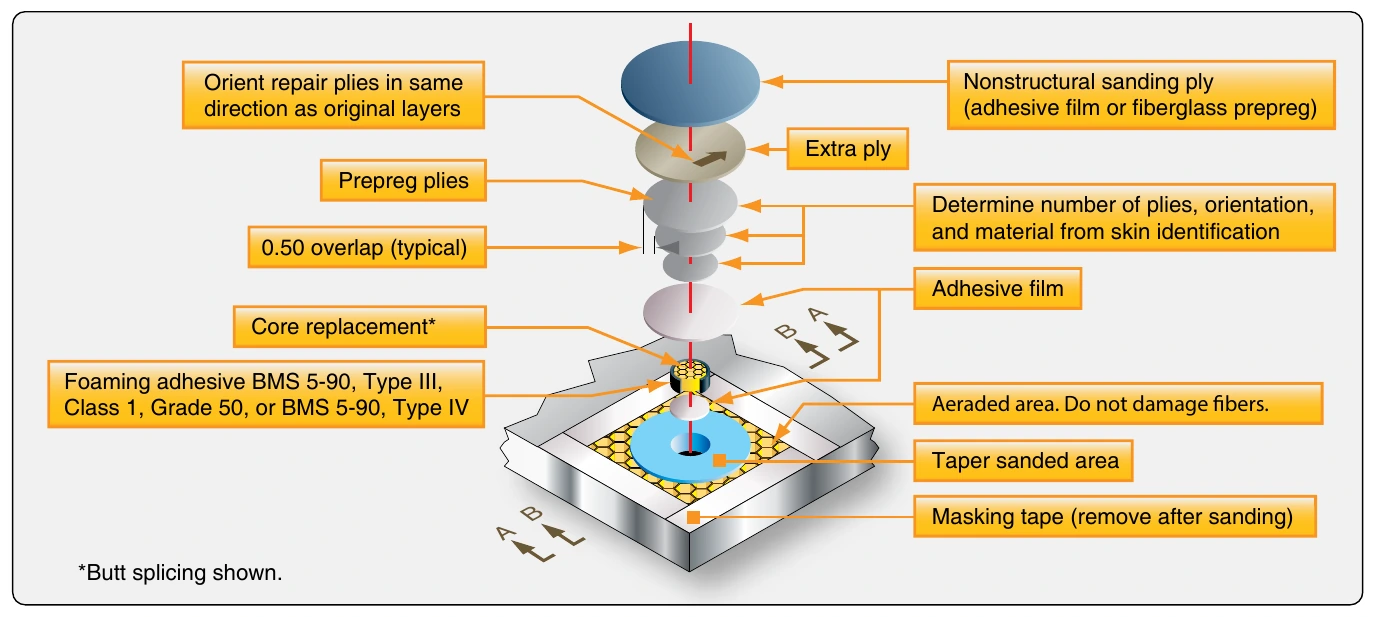
Use a flexible disc sander or a rotating pad sander to taper sand a uniform taper around the cleaned up damage. Some manufacturers give a taper ratio, such as 1:40, and others prescribe a taper distance like a 1-inch overlap for each existing ply of the face sheet. Remove the exterior finish, including conductive coating for an area that is at least 1 inch larger than the border of the taper. Remove all sanding dust with dry compressed air and a vacuum cleaner. Use a clean cloth moistened with approved solvent to clean the damaged area. [Figure 7-58]
Step 5: Installation of Honeycomb Core (Wet Layup)
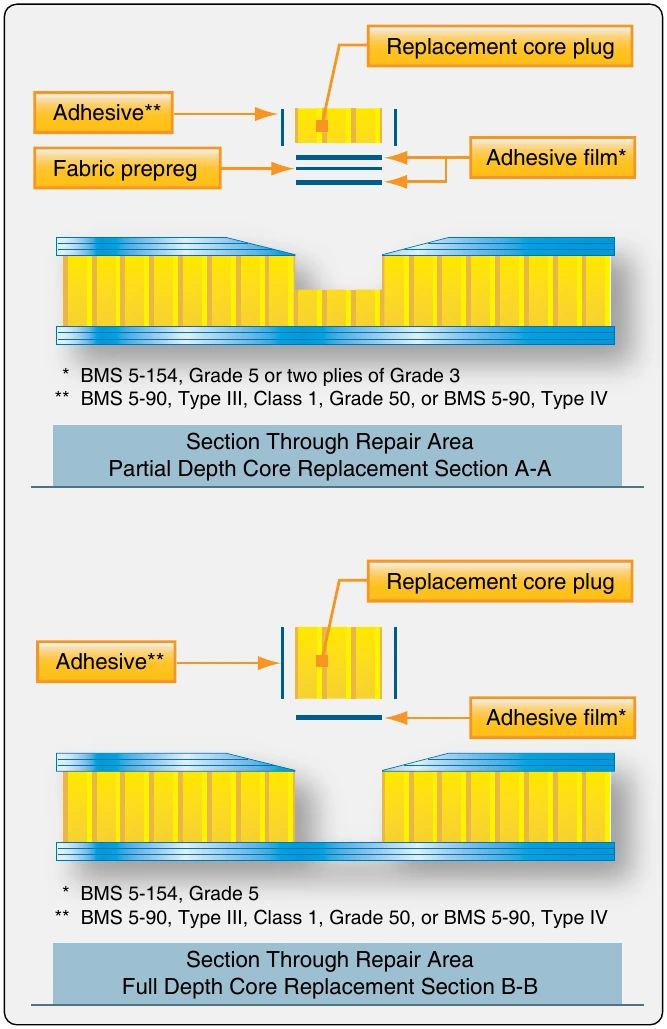
Use a knife to cut the replacement core. The core plug must be of the same type, class, and grade of the original core. The direction of the core cells should line up with the honey comb of the surrounding material. The plug must be trimmed to the right length and be solvent washed with an approved cleaner.
For a wet layup repair, cut two plies of woven fabric that fit on the inside surface of the undamaged skin. Impregnate the fabric plies with a resin and place in the hole. Use potting compound around the core and place it in the hole. For a prepreg repair, cut a piece of film adhesive that fits the hole and use a foaming adhesive around the plug. The plug should touch the sides of the hole. Line up the cells of the plug with the original material. Vacuum bag the repair area and use an oven, autoclave, or heat blanket to cure the core replacement. The wet layup repair can be cured at a room temperature up to 150 °F. The prepreg repair must be cured at 250 °F or 350 °F. Usually, the core replacement is cured with a separate curing cycle and not co-cured with the patch. The plug must be sanded flush with the surrounding area after the cure. [Figure 7-59]
Step 6: Prepare & Install the Repair Plies
Consult the repair manual for the correct repair material and the number of plies required for the repair. Typically, one more ply than the original number of plies is installed. Cut the plies to the correct size and ply orientation. The repair plies must be installed with the same orientation as that of the original plies being repaired. Impregnate the plies with resin for the wet layup repair, or remove the backing material from the prepreg material. The plies are usually placed using the smallest ply first taper layup sequence. [Figure 7-60]
Step 7: Vacuum Bag the Repair
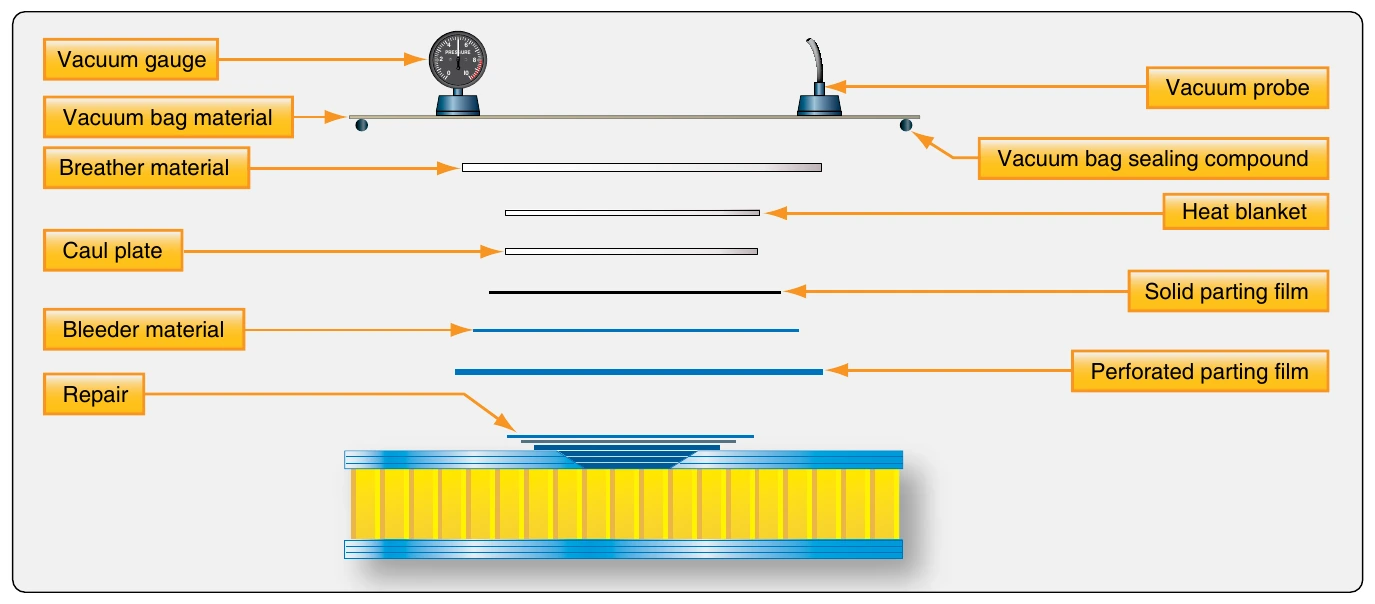
Once the ply materials are in place, vacuum bagging is used to remove air and to pressurize the repair for curing. Refer to Figure 7-61 for bagging instructions.
Step 8: Curing the Repair
The repair is cured at the required cure cycle. Wet layup repairs can be cured at room temperature. An elevated temperature up to 150 °F can be used to speed up the cure.
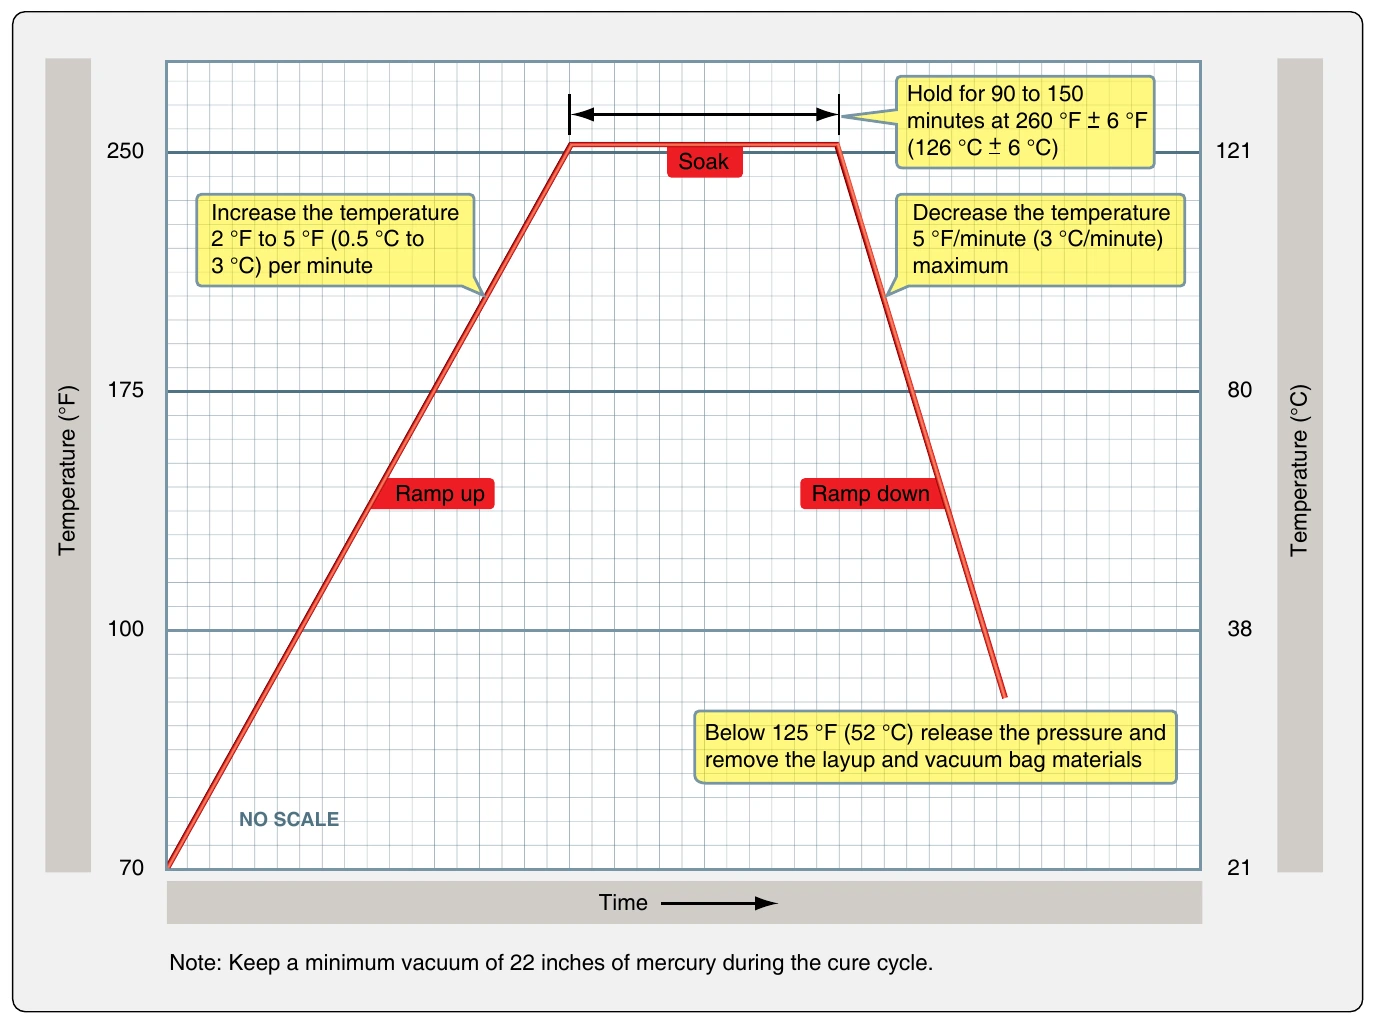
The prepreg repair needs to be cured at an elevated cure cycle. [Figure 7-62] Parts that can be removed from the aircraft could be cured in a hot room, oven, or autoclave. A heating blanket is used for on-aircraft repairs.
Remove the bagging materials after curing and inspect the repair. The repair should be free from pits, blisters, resin-rich and resin-starved areas. Lightly sand the repair patch to produce a smooth finish without damaging the fibers. Apply top finish and conductive coating (lightning protection).
Step 9: Post Repair Inspection
Use visual, tap, and/or ultrasonic inspection to inspect the repair. Remove the repair patch if defects are found. [Figure 7-63]
Perform a balance check if a repair to a flight control surface was made, and ensure that the repaired flight control is within limits of the SRM. Failure to do so could result in flight control flutter, and safety of flight could be affected.