Chapter 7
Repairs, Alterations, and Manufacture
- Verify that the size is correct.
- Binding should be secure.
- Verify the bar tacks are in place at the center of the pocket and at the sides.
Section 7, Manufacturing
The following are miscellaneous procedures used in repairs and alterations found in Section 7, Manufacturing, of this chapter:
- Hand tacking techniques
- Cleaning and washing procedures
Hand Tacking Techniques
- Applicable products: Any systems requiring hand tacking
- Description: Securing housings, hardware, etc., with hand tackings
- Authorized repairmen: FAA Senior or Master Parachute Rigger
- Materials: Nylon supertack tacking thread
- Machines: None
- Equipment: Scissors, assorted hand tacking needles, and modified navy end tab
Procedure
Hand tacking is an integral part of rigging skills. There are numerous places where components or parts are joined. Hardware, housings, cones, and other parts require hand tacking to secure them to their positions. The following figures show typical tacking techniques.
Pilot Chute
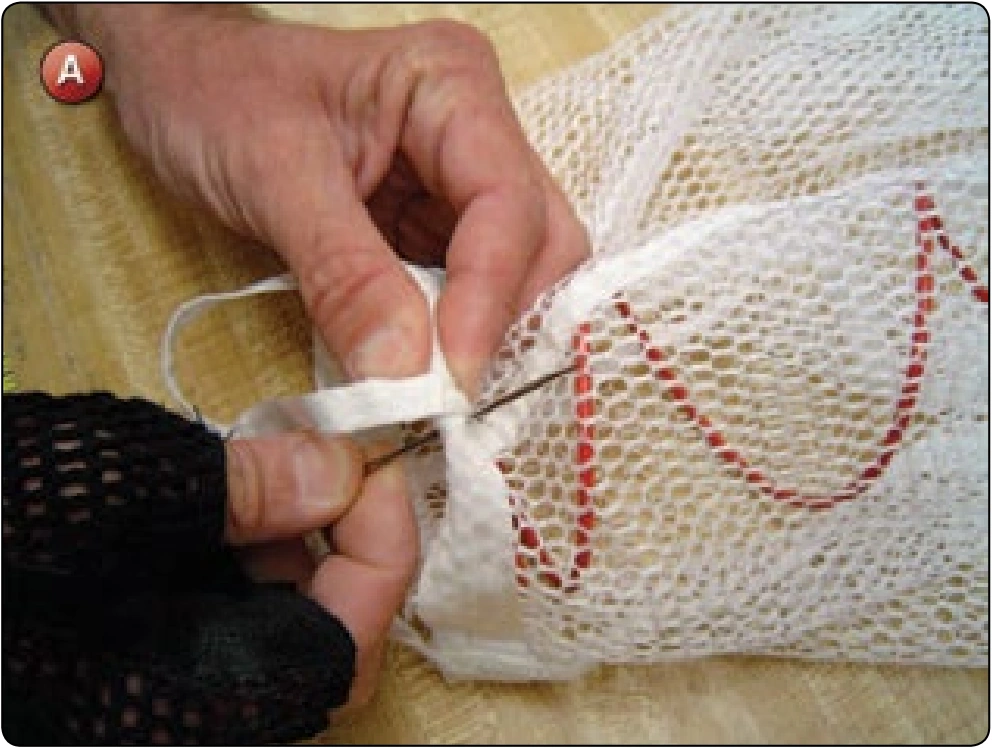
- Take the needle and supertack and pass it through the reinforcing tape at the bottom of the pilot chute mesh capturing the spring coil. [Figure A]
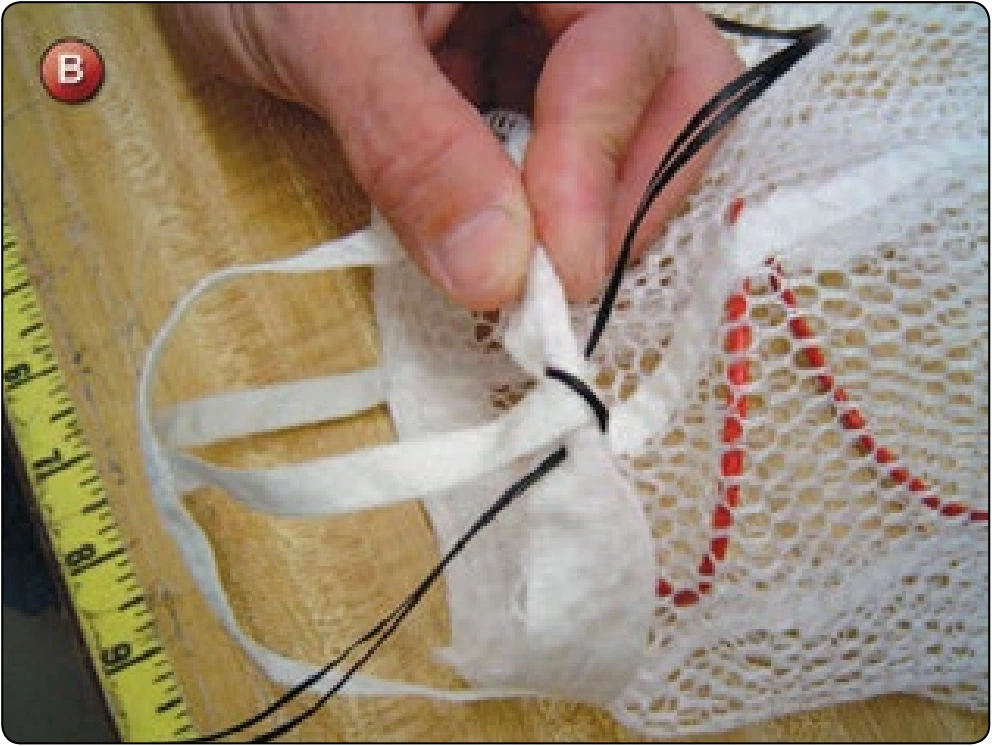
- Cross over the radial seam reinforcing tape and again pass the needle through the reinforcing tape and capturing the spring coil as before. [Figure B]
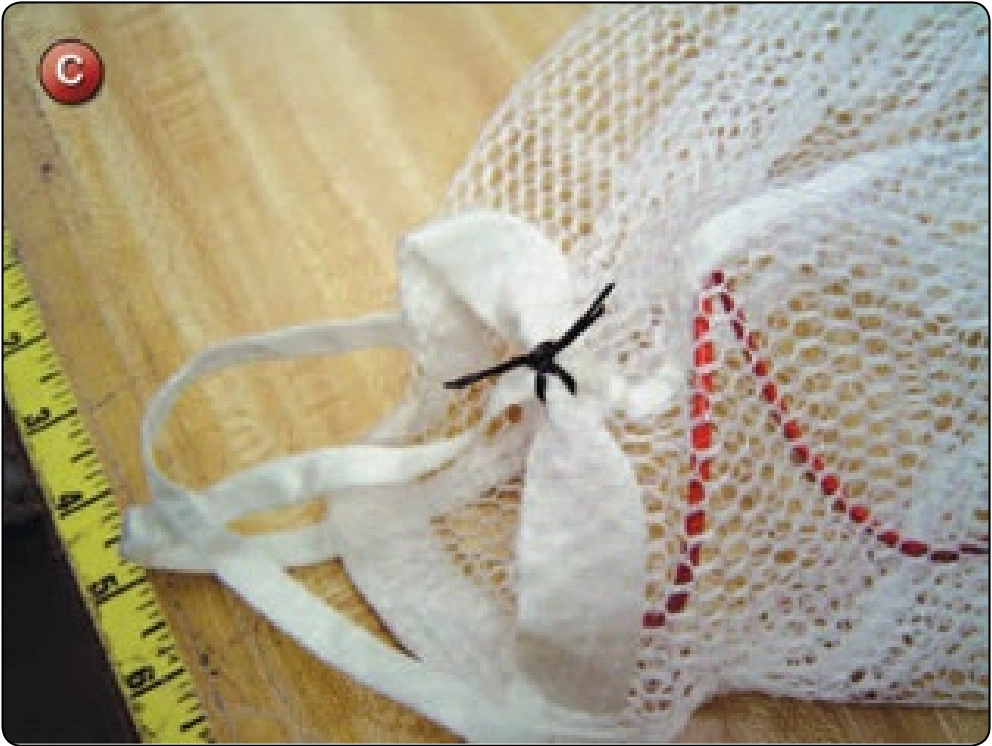
- Secure the ends of the supertack with a surgeon’s knot and locking knot. [Figure C] Trim to a ¾ inch tail.
Housing
- Position the housing end flush with the end of the housing channel.
- Take the needle and supertack and tie an overhand knot approximately 1 inch from the end.
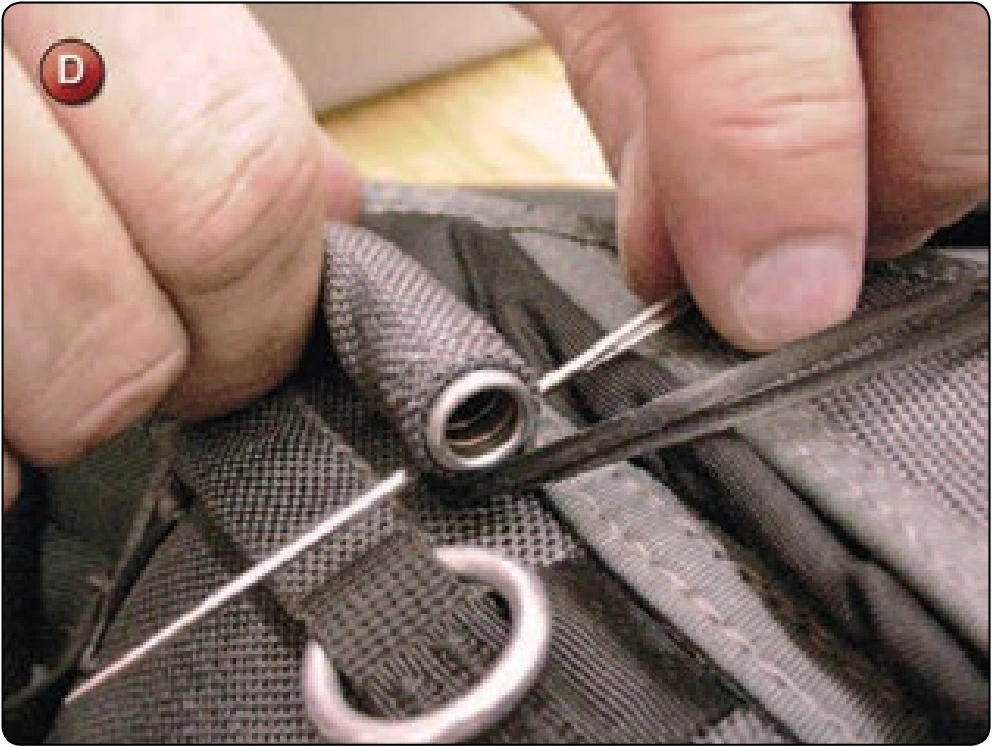
- Pass the needle through the inside of the housing channel and then around the outside below the housing end. [Figure D] The purpose is to choke the end of the channel so that the housing does not protrude from the end.
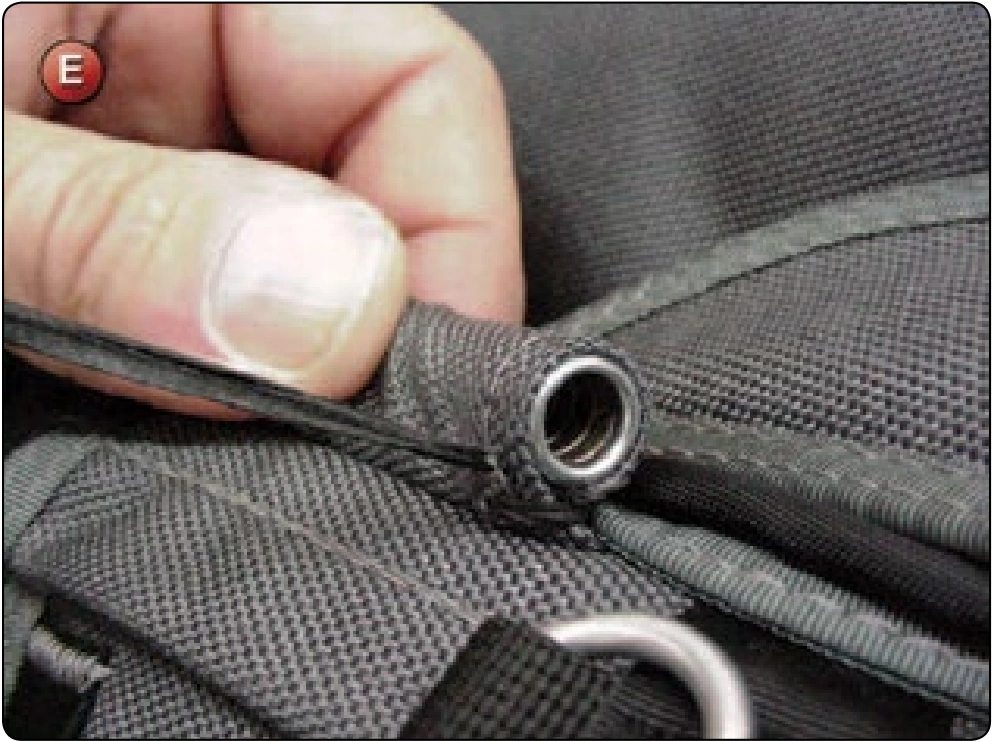
- Next take the needle and pass it through the top of the channel fabric over the housing. [Figure E]
- Take the needle and locate the grooves in the housing. [Figure F] Make three loops through the channel, trapping the supertack in the grooves. [Figure G]
- Secure the running end with a surgeon’s knot and locking knot.
- Twist the supertack together and trim with a ¾ inch tail.