
Chapter 11
Approaches and Landings
Flare is used rather than engine power because the wing is much more responsive in controlling descent and pitch than engine power. When you add flare, the drag on the wing increases and the wing quickly responds by rotating backwards and increasing its pitch angle. In order to achieve the same effect with engine power, you add throttle, the propeller speeds up, and the thrust pushes the cart (which is much heavier than a parachute) forward of the wing. It is easier to change the inertia and positioning of a 25-pound wing than a 500+ pound cart-engine-pilot-fuel assembly.
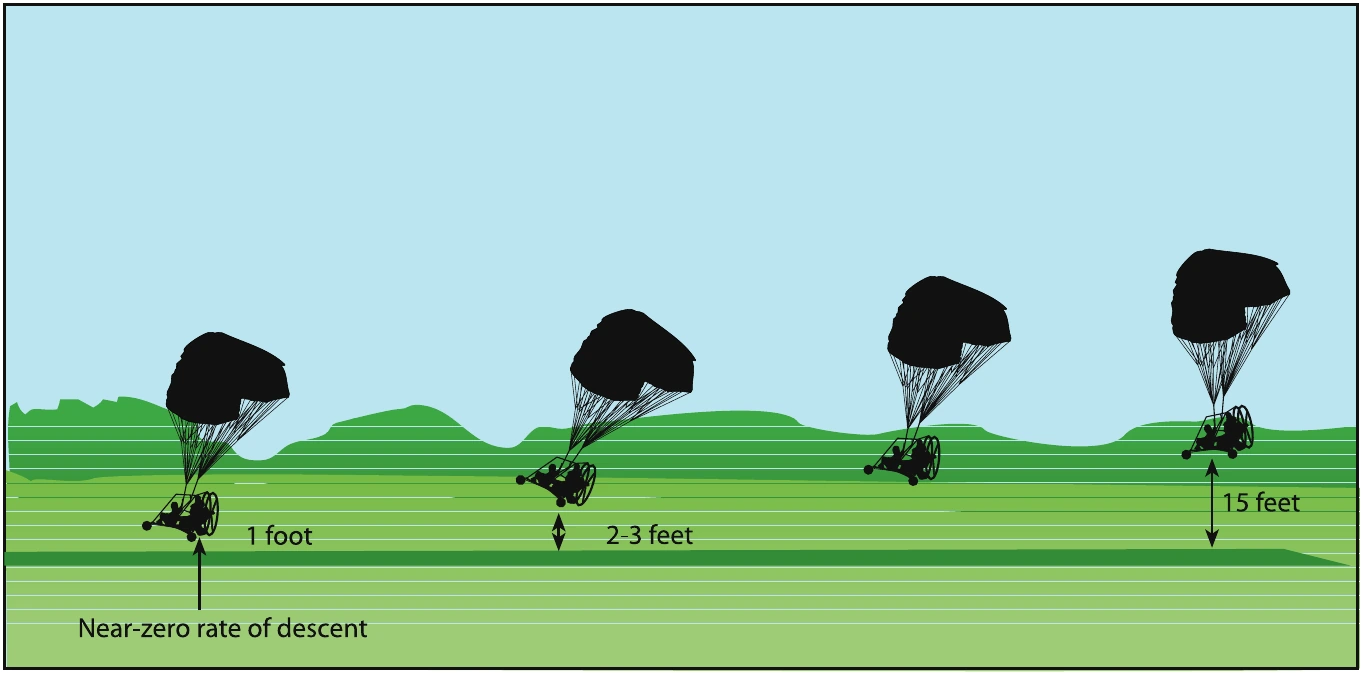
It is extremely important the touchdown occur with the powered parachute’s longitudinal axis exactly parallel to the direction in which the PPC is moving along the surface. Failure to accomplish this imposes side loads on the landing gear. To avoid these side stresses, you should try to not allow the PPC to touch down while drifting.
After-Landing Roll
The landing process must never be considered complete until the powered parachute has been brought to a complete stop, the engine shut down, and the wing collapsed and on the ground. Many accidents have occurred as a result of pilots abandoning their vigilance and positive control after getting the powered parachute on the ground. Some have damaged their parachute by failing to stop the engine before the wing falls into the moving propeller. Other incidents have occurred where the wind has caught a still-inflated wing and rolled the powered parachute over.
Normally as soon as you have landed, you should do four things in this order:
- Release any flare that was used during landing. Once the flare is released, the wing will rotate forward relative to the cart. That decreases both the angle of attack and lift that the landing flare generated. With the flare released, there will be more load put on the front landing gear, which in turn makes the powered parachute easier to ground handle.
- Unless you have the intention to taxi the powered parachute with the parachute inflated, close the throttle.
- Shut down the ignition system. Normally, powered parachutes have two toggle ignition switches. Both toggle switches must be turned off to shut down the engine.
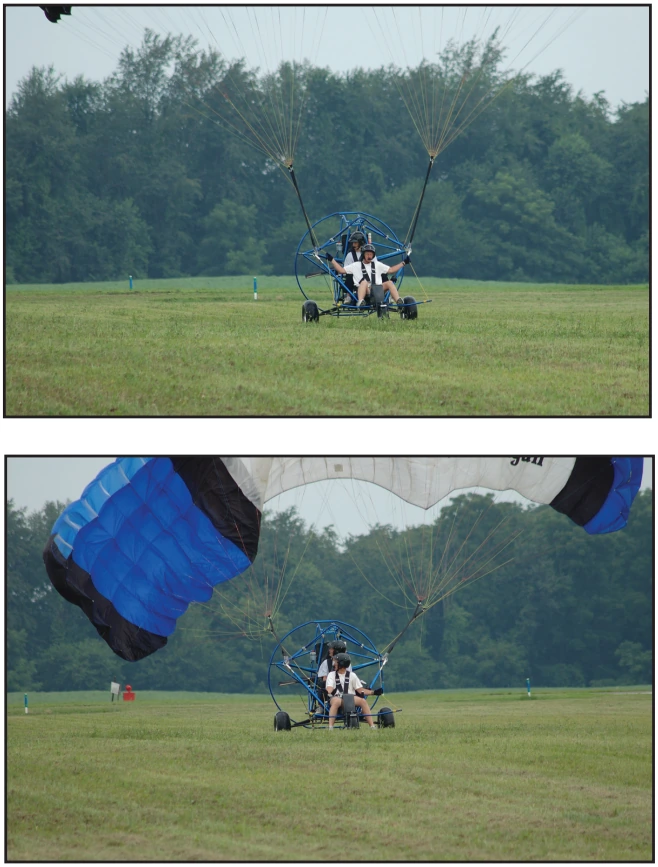
- The parachute needs to be collapsed and grounded. This is done by tugging on the parachute steering lines. One long pull will generally not be adequate. Three or four quick tugs will normally be enough. The wing rotating and collapsing behind the cart will also act as a brake for the powered parachute, much like a drogue chute. [Figure 11-7]
Landings should always be planned to be done directly into the wind. However, if you must land in a crosswind, you may be able to land but you will not be able to takeoff. You can land on higher crosswinds than you can take off.
A wide runway may allow you the capability to land across the runway. However, a narrow runway would not allow this. Therefore, if you must land in a cross-wind, during final approach, crab into the wind and line up on the runway centerline. Approach with this crab and flare as you normally would. Reduce power as your back wheels touch. When your back wheels touch, your front wheel will swing around, straight down the runway. However your wing will still be headed into the wind. Shut the engine down and continue pulling the steering lines to get the canopy down on the ground immediately since you can not taxi in a crosswind.
Stabilized Approach Concept
A stabilized approach is one in which the pilot establishes and maintains a constant angle glidepath towards a predetermined point on the landing runway. It is based on the pilot’s judgment of certain visual clues, and depends on the maintenance of a constant final approach.
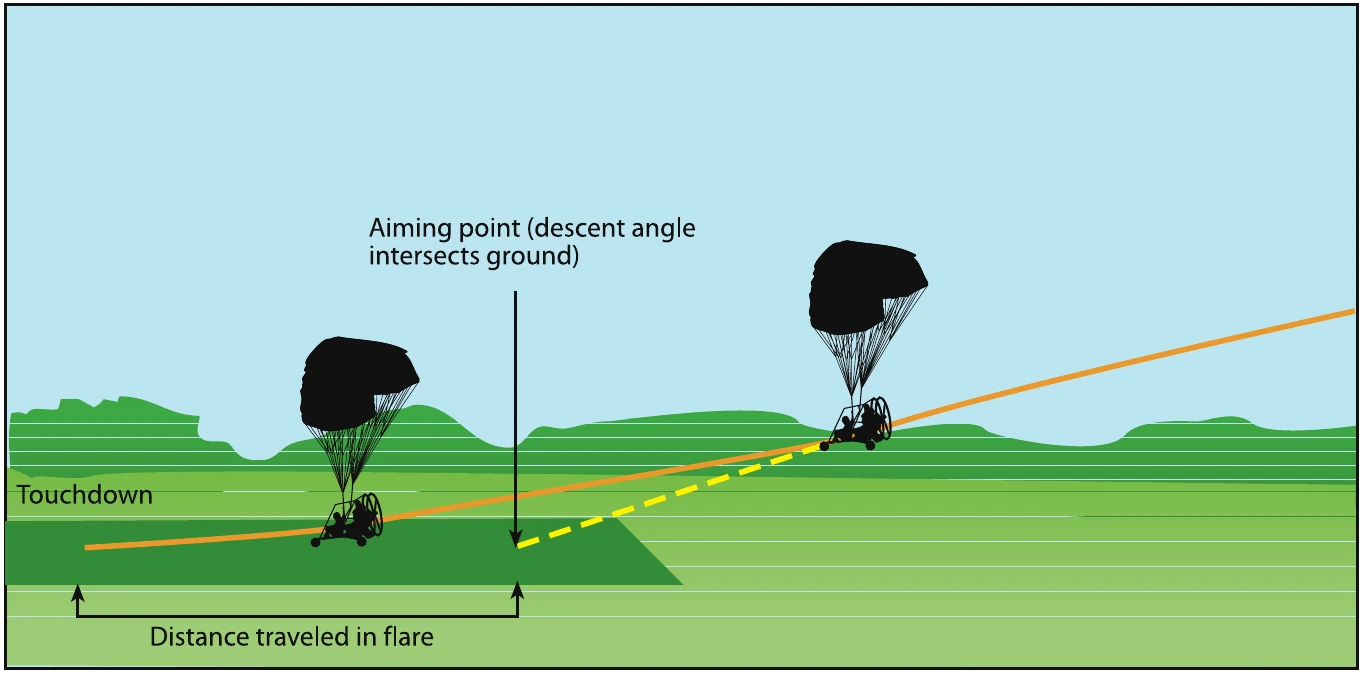
A powered parachute descending on final approach at a constant rate will be traveling in a straight line toward a spot on the ground ahead. This spot will not be the spot on which the powered parachute will touch down, because some float will inevitably occur during the powered roundout and flare.
The point toward which the powered parachute is progressing is termed the “aiming point.” [Figure 11-8] It is the point on the ground at which, if the powered parachute maintains a constant glidepath, and was not rounded out or flared for landing, it would strike the ground. To a pilot moving straight ahead toward an object, it appears to be stationary. It does not “move.” This is how the aiming point can be distinguished—it does not move. However, objects in front of and beyond the aiming point do appear to move as the distance is closed, and they appear to move in opposite directions. During instruction in landings, one of the most important skills a student pilot must acquire is how to use visual cues to accurately determine the true aiming point from any distance out on final approach. From this, the pilot will not only be able to determine if the glidepath will result in an undershoot or overshoot, but, taking into account float during roundout, the pilot will be able to predict the touchdown point to within a very few feet.
For a constant angle glidepath, the distance between the horizon and the aiming point will remain constant. If a final approach descent has been established but the distance between the perceived aiming point and the horizon appears to increase (aiming point moving down away from the horizon), then the true aiming point, and subsequent touchdown point, is farther down the runway. If the distance between the perceived aiming point and the horizon decreases (aiming point moving up toward the horizon), the true aiming point is closer than perceived.
When the powered parachute is established on final approach, the shape of the runway image also presents clues as to what must be done to maintain a stabilized approach to a safe landing.
The objective of a stabilized approach is to select an appropriate touchdown point on the runway, and adjust the glidepath so the true aiming point and the desired touchdown point basically coincide. Immediately after rolling out on final approach, you should adjust the power so the powered parachute is descending directly toward the aiming point. With the approach set up in this manner, you will be free to devote full attention toward outside references. You should not stare at any one place, but rather scan from one point to another, such as from the aiming point to the horizon, to the trees and bushes along the runway, to an area well short of the runway, and back to the aiming point. In this way, you will be more apt to perceive a deviation from the desired glidepath, and whether or not the powered parachute is proceeding directly toward the aiming point.
If the aiming point on the runway is not where you want it, adjust the glidepath. This in turn will move the aiming point. For instance, if you perceive the aiming point is short of the desired touchdown point and will result in an undershoot, increase the engine power. The power change must be made smoothly. This will result in a shallower glidepath with the resultant aiming point moving towards the desired touchdown point. Conversely, if the aiming point is farther down the runway than the desired touchdown point and you suspect it will result in an overshoot, steepen the glidepath by decreasing power.
The closer the powered parachute gets to the runway, the larger (and possibly more frequent) the required corrections may become, resulting in an unstabilized approach.