Chapter 4
Aircraft Metal Structural Repair
- Cut the metal to size, allowing for trimming after forming. Determine the bend allowance for a 90° bend and round the edge of the forming block accordingly.
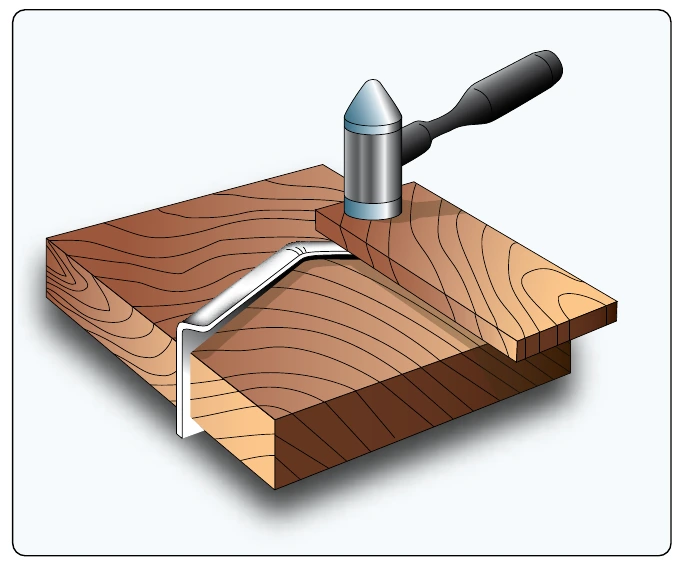
- Clamp the material in the form blocks as shown in Figure 4-151, and bend the exposed flange against the block. After bending, tap the blocks slightly. This induces a setting process in the bend.
- Using a soft-faced shrinking mallet, start hammering near the center and work the flange down gradually toward both ends. The flange tends to buckle at the bend because the material is made to occupy less space. Work the material into several small buckles instead of one large one and work each buckle
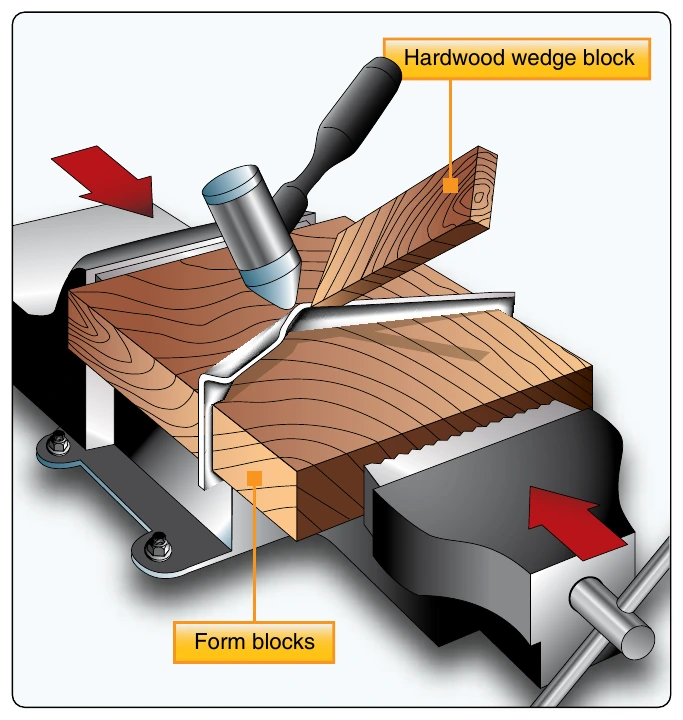
out gradually by hammering lightly and gradually compressing the material in each buckle. The use of a small hardwood wedge block aids in working out the buckles. [Figure 4-152]
- Planish the flange after it is flattened against the form block and remove small irregularities. If the form blocks are made of hardwood, use a metal planishing hammer. If the forms are made of metal, use a soft-faced mallet. Trim the excess material away and file and polish.
Stretching
To form a flanged angle by stretching, use the same forming blocks, wooden wedge block, and mallet as used in the shrinking process and proceed as follows:
- Cut the material to size (allowing for trim), determine bend allowance for a 90° bend, and round off the edge of the block to conform to the desired radius of bend.
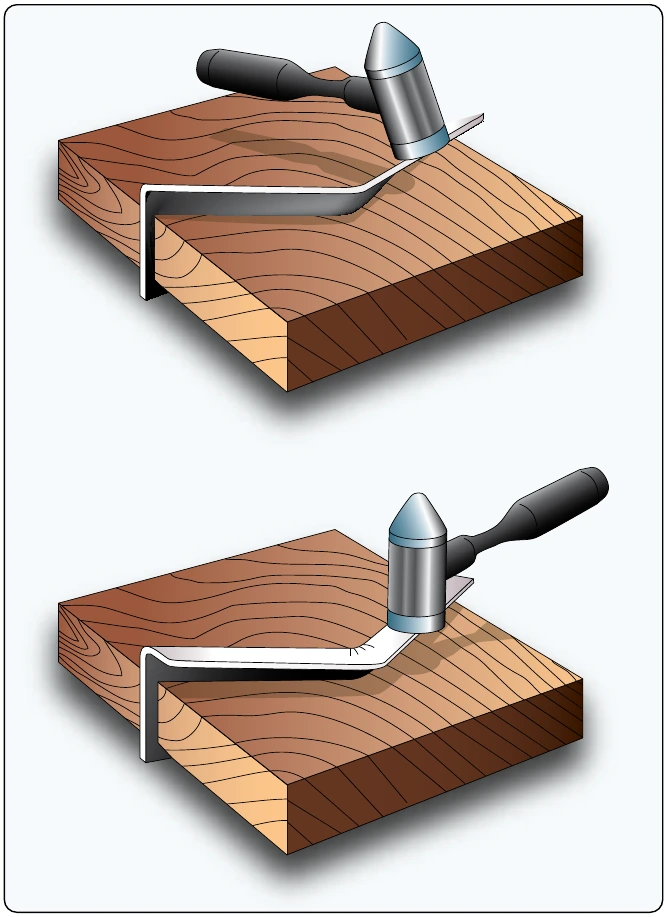
- Clamp the material in the form blocks. [Figure 4-153]
- Using a soft-faced stretching mallet, start hammering near the ends and work the flange down smoothly and gradually to prevent cracking and splitting. Planish the flange and angle as described in the previous procedure, and trim and smooth the edges, if necessary.
Curved Flanged Parts
Curved flanged parts are usually hand formed with a concave flange, the inside edge, and a convex flange, the outside edge. The concave flange is formed by stretching, while the convex flange is formed by shrinking. Such parts are shaped with the aid of hardwood or metal forming blocks. [Figure 4-154] These blocks are made in pairs and are designed specifically for the shape of the area being formed. These blocks are made in pairs similar to those used for straight angle bends and are identified in the same manner. They differ in that they are made specifically for the particular part to be formed, they fit each other exactly, and they conform to the actual dimensions and contour of the finished article.
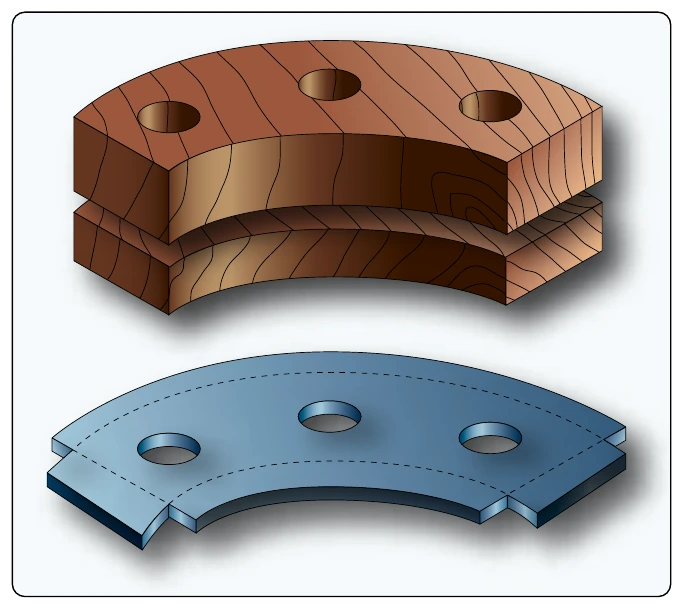
The forming blocks may be equipped with small aligning pins to help line up the blocks and to hold the metal in place or they may be held together by C-clamps or a vise. They also may be held together with bolts by drilling through form blocks and the metal, provided the holes do not affect the strength of the finished part. The edges of the forming block are rounded to give the correct radius of bend to the part, and are undercut approximately 5° to allow for spring-back of the metal. This undercut is especially important if the material is hard or if the bend must be accurate.
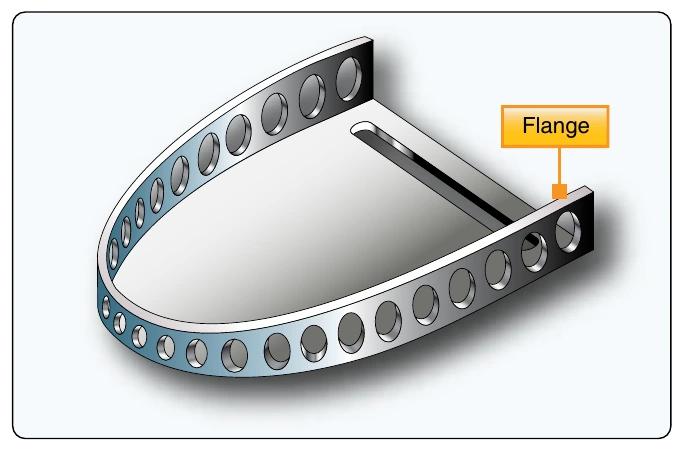
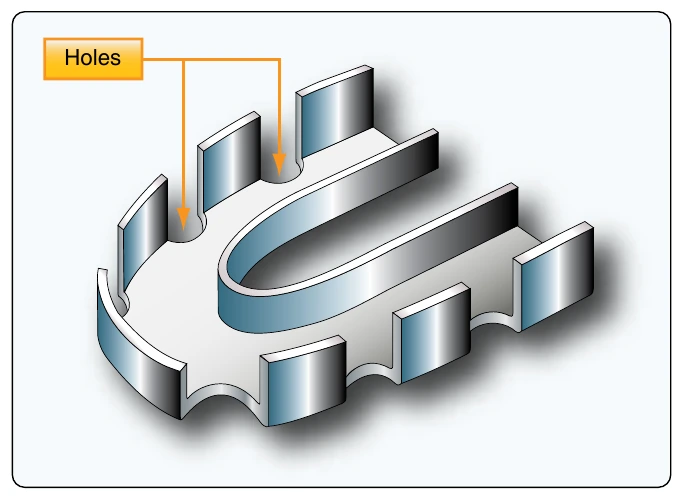
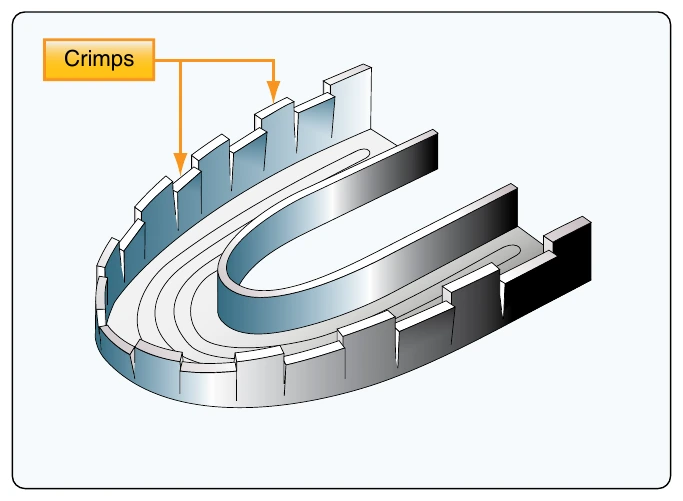
The nose rib offers a good example of forming a curved flange because it incorporates both stretching and shrinking (by crimping). They usually have a concave flange, the inside edge, and a convex flange, the outside edge. Note the various types of forming represented in the following figures. In the plain nose rib, only one large convex flange is used. [Figure 4-155] Because of the great distance around the part and the likelihood of buckles in forming, it is rather difficult to form. The flange and the beaded (raised ridge on sheet metal used to stiffen the piece) portion of this rib provide sufficient strength to make this a good type to use. In Figure 4-156, the concave flange is difficult to form, but the outside flange is broken up into smaller sections by relief holes. In Figure 4-157, note that crimps are placed at equally spaced intervals to absorb material and cause curving, while also giving strength to the part.
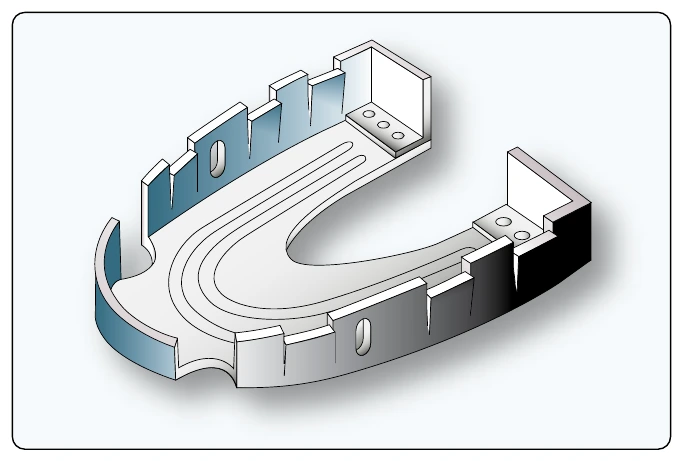
In Figure 4-158, the nose rib is formed by crimping, beading, putting in relief holes, and using a formed angle riveted on each end. The beads and the formed angles supply strength to the part. The basic steps in forming a curved flange follow: [Figures 4-159 and 160]
- Cut the material to size, allowing about 1⁄4-inch excess material for trim and drill holes for alignment pins.
- Remove all burrs (jagged edges). This reduces the possibility of the material cracking at the edges during the forming process.