
Chapter 4
Engine Ignition & Electrical Systems
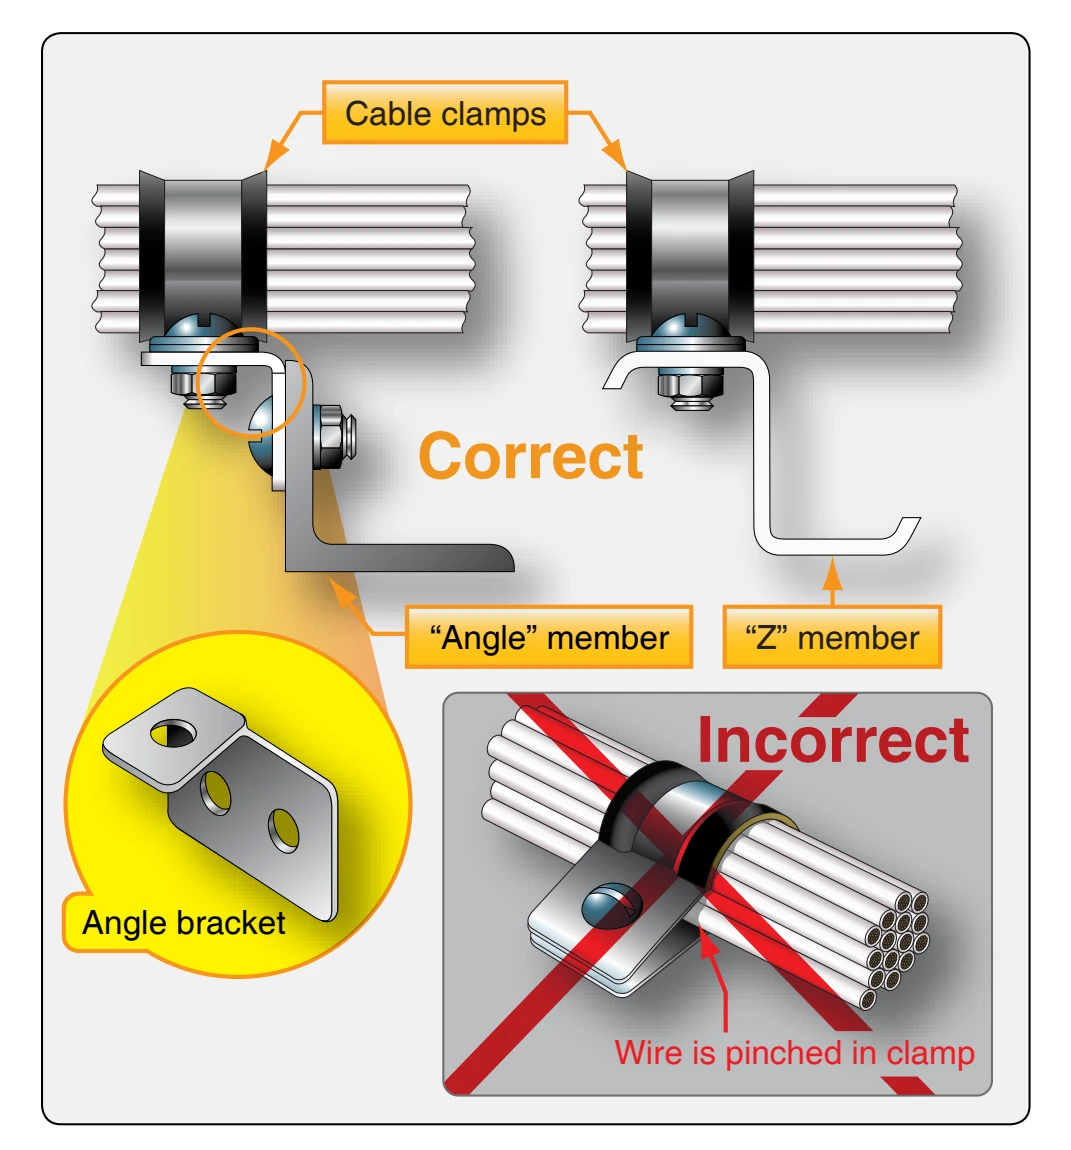
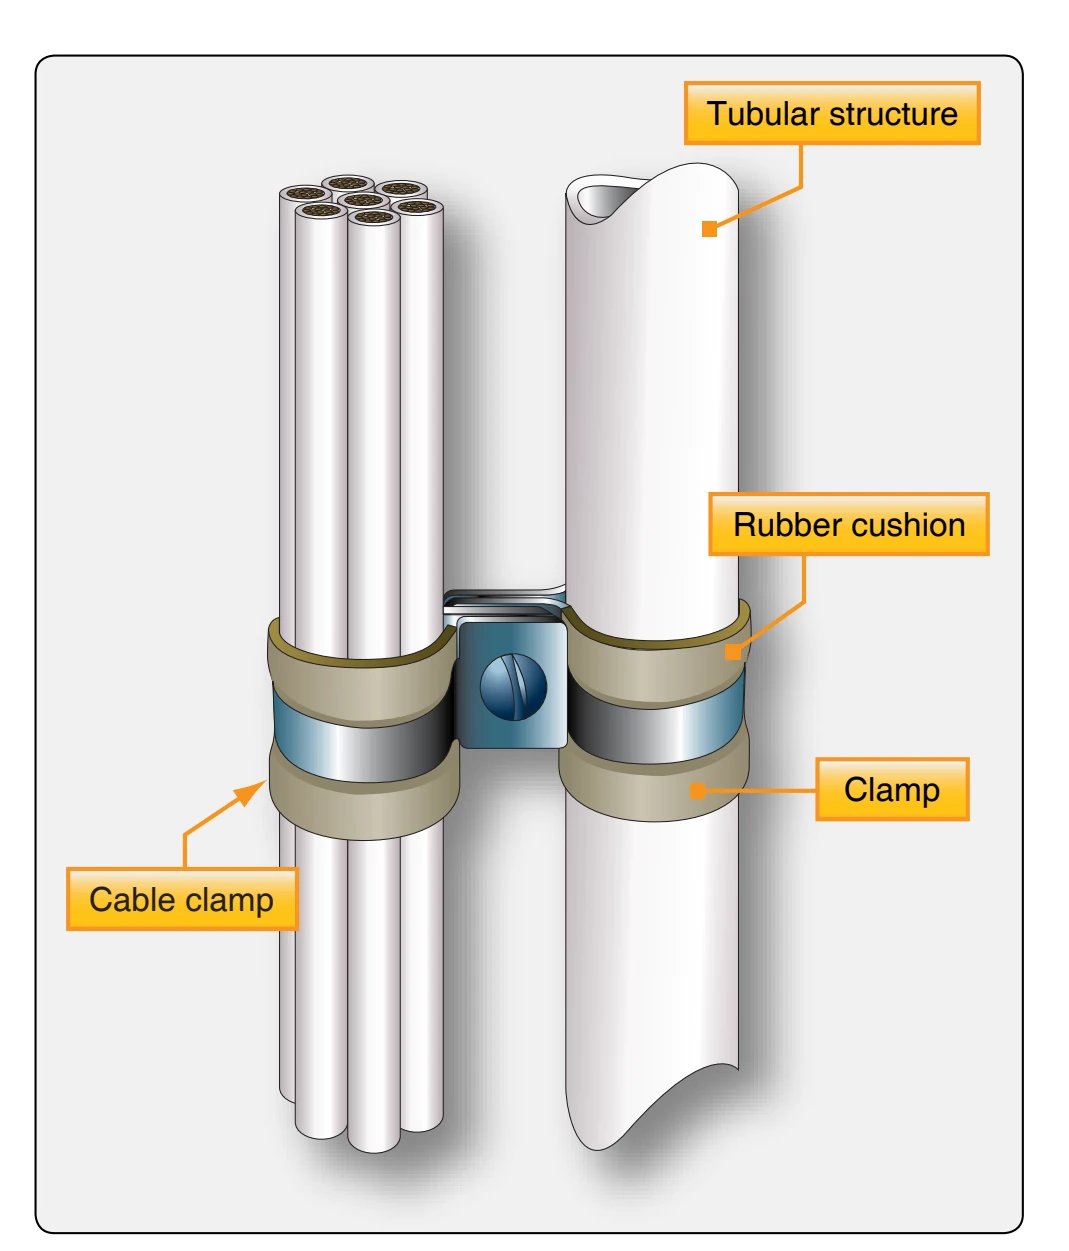
Clamps can be used with rubber cushions to secure wire bundles to tubular structures. [Figure 4-102] Such clamps must fit tightly but should not be deformed when locked in place.
Lacing & Tying Wire Bundles
Wire groups and bundles are laced or tied with cord to provide ease of installation, maintenance, and inspection. This section describes and illustrates recommended procedures for lacing and tying wires with knots that hold tightly under all conditions. For the purposes of this discussion, the following terms are defined:
- Tying is the securing together of a group or bundle of wires by individual pieces of cord tied around the group or bundle at regular intervals.
- Lacing is the securing together of a group or bundle of wires by a continuous piece of cord forming loops at regular intervals around the group or bundle.
The material used for lacing and tying is either cotton or nylon cord. Nylon cord is moisture- and fungus-resistant, but cotton cord must be waxed before using to give it these necessary protective characteristics.
Single-Cord Lacing
Figure 4-103 shows the steps in lacing a wire bundle with a single cord. The lacing procedure is started at the thick end of the wire group or bundle with a knot consisting of a clove hitch with an extra loop. The lacing is then continued at regular intervals with half hitches along the wire group or bundle and at each point where a wire or wire group branches off. The half hitches should be spaced so that the bundle is neat and secure.
The lacing is ended by tying a knot consisting of a clove hitch with an extra loop. After the knot is tied, the free ends of the lacing cord should be trimmed to approximately 3⁄ inch.
8
Double-Cord Lacing
Figure 4-104 illustrates the procedure for double-cord lacing. The lacing is started at the thick end of the wire group or bundle with a bowline-on-a-bight knot. [Figure 4-104A] At regular intervals along the wire group or bundle, and at each point where a wire branches off, the lacing is continued using half hitches, with both cords held firmly together. The half hitches should be spaced so that the group or bundle is neat and secure. The lacing is ended with a knot consisting of a half hitch, continuing one of the cords clockwise and the other counterclockwise and then tying the cord ends with a square knot. The free ends of the lacing cord should be trimmed to approximately 3⁄ inch.
8
Lacing Branch-Offs
Figure 4-105 illustrates a recommended procedure for lacing a wire group that branches off the main wire bundle. The branch-off lacing is started with a knot located on the main bundle just past the branch-off point. Continue the lacing along the branched-off wire group using regularly spaced half hitches. If a double cord is used, both cords should be held snugly together. The half hitches should be spaced to lace the bundle neatly and securely. End the lacing with the regular terminal knot used in single- or double-cord lacing, as applicable, and trim the free ends of the lacing cord neatly.
Tying
All wire groups or bundles should be tied where supports are more than 12 inches apart. Ties are made using waxed cotton cord, nylon cord, or fiberglass cord. Some manufacturers permit the use of pressure-sensitive vinyl electrical tape. When permitted, the tape should be wrapped three turns around the bundle and the ends heat sealed to prevent unwinding of the tape. Figure 4-106 illustrates a recommended procedure for tying a wire group or bundle. The tie is started by wrapping the cord around the wire group to tie a clove-hitch knot. Then, a square knot with an extra loop is tied and the free ends of the cord trimmed.