
Chapter 8
Engine Removal & Replacement
An aircraft engine and its accessories that have been in storage must undergo careful depreservation and inspection before they may be installed in an aircraft. This involves more than removing an engine from its container and bolting it to the aircraft. If the engine is stored in a pressurized metal container, the air valve should be opened to bleed off the air pressure. Depending upon the size of the valve, the air pressure should bleed off in somewhat less than 30 minutes.
Prepare the container for opening by removing the bolts that hold the two sections together. Then, attach a hoist to the “hoisting points” and lift the top section clear of the container and place it away from the work area. If the engine is installed in a wooden shipping case, it is necessary to carefully break the seal of the protective envelope and fold it down around the engine. Remove the dehydrating agent or desiccant bags and the humidity indicator from the outside of the engine. Also, remove and set safely aside any accessories that are not installed on the engine but are mounted on a special stand or otherwise installed inside the protective envelope with the engine.
Depreservation of an Engine
After the engine has been secured to an engine stand, all covers must be removed from the points where the engine was sealed or closed with ventilatory covers, such as the engine breathers, exhaust outlets, and accessory mounting-pad cover plates. As each cover is removed, inspect the uncovered part of the engine for signs of corrosion. Also, as the dehydrator plugs are removed from each cylinder, make a very careful check of the walls of any cylinder for which the dehydrator plug color indicates an unsafe condition. Care is emphasized in the inspection of the cylinders, even if it is necessary to remove a cylinder.
On radial engines, the inside of the lower cylinders and intake pipes should be carefully checked for the presence of excessive corrosion-preventive compound that has drained from throughout the interior of the engine and settled at these low points. This excessive compound could cause the engine to become damaged from a hydraulic lock (also referred to as liquid-lock) when a starting attempt is made.
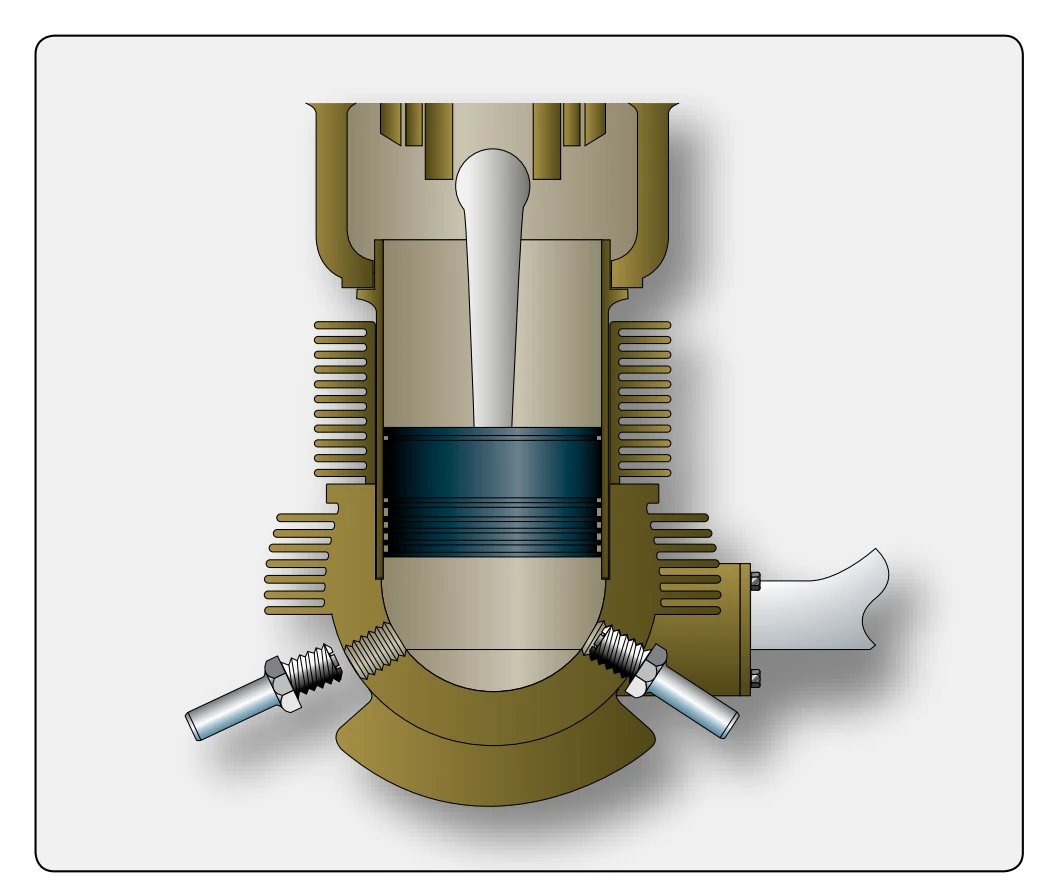
The check for excessive corrosion-preventive compound in the cylinders of reciprocating engines can be made as the dehydrator plugs are removed from each cylinder. Much of the compound drains from the spark plug holes of the lower cylinders of a radial engine when the dehydrator plugs are removed. But some of the mixture remains in the cylinder head below the level of the spark plug hole and can be removed with a hand pump. [Figure 8-3] A more positive method is to remove the lower intake pipes and open the intake valve of the cylinder by rotating the crankshaft. This latter method allows the compound to drain from the cylinder through the open intake valve. If excessive compound is present in an upper cylinder, it can be removed with a hand pump.
The oil screens should be removed from the engine and thoroughly washed in an approved solvent to remove all accumulations that could restrict the oil circulation and cause engine failure. After the screens are cleaned, immerse them in clean oil and then reinstall them in the engine.
When the cover has been removed from the intake area, the silica gel desiccant bags (used to remove moisture from the engine in storage) must be removed from the engine area. If the engine uses a propeller, remove the protective covering from the propeller shaft and wash all corrosion-preventive compounds from both the inside and outside surfaces of the shaft. Then, coat the propeller shaft lightly with engine oil. Turbine engines require the removal of several covers on many external areas on the engine.
As a final check, see that the exterior of the engine is clean. Usually a quantity of compound runs out of the engine when the dehydrator plugs and oil screens are removed. To clean the engine, spray it with an approved commercial solvent.
Inspection & Depreservation of Accessories
An engine’s performance is no better than that of its accessories. Though the engine has been completely overhauled and is in top condition, any oversight or error in installing the accessories can result in improper engine operation or even irreparable damage to it.
Before depreserving any of the accessories enclosed with the engine, consult the storage data usually stenciled on the outside of the engine container or the records enclosed with the engine to determine how long the engine and accessories were in storage. Certain accessories that normally accompany an engine from overhaul are considered unsafe for use if their time in storage has exceeded a specified period. This time varies according to the limits prescribed by the manufacturer.
Any accessory that has been removed from an old engine that can be installed on the new one must be given a thorough inspection to determine its condition. This inspection includes a check for general condition, cleanliness, absence of corrosion, and absence of wear as evidenced by excessive play in the moving parts.
Some accessories must be replaced, regardless of their operating time, if the engine is being changed because of internal failure. Such accessories may have been contaminated by metal particles carried into their operating mechanisms by the engine oil that lubricates them.
Before installing any replacement accessory, check it visually for signs of corrosion and for freedom of operation. Always wipe the mounting pad, flange, and coupling clean before mounting the accessory, and install the proper gasket between the mounting pad and the accessory mounting flange. Lubricate the accessory drive shaft if so indicated in the manufacturer’s instructions.
Inspection & Replacement of Powerplant External Units & Systems
The engine nacelle must be cleaned thoroughly before it is inspected. The design of an engine nacelle varies with different aircraft. Basically, it is a framework covered with removable cowling, in which the engine is mounted. This assembly is attached to the aircraft and incorporates an insulating firewall between the engine and the airframe. The interconnecting wiring, tubing, and linkages between the engine and its various systems and controls pass through the firewall.
Inspect the complete engine nacelle for condition of the framework and the sheet-metal cowling and riveted plates that cover the nacelle. The engine mounting frame assembly should be checked for any distortion of the steel tubing, such as bends, dents, flat spots, corrosion, or cracks. Use the dye penetrant inspection method to reveal a crack, porous area, or other defects.
The engine mounting bolts are usually checked for condition by magnetic particle inspection or other approved processes. While the bolts are removed, the bolt holes should be checked for elongation caused by the movement of an improperly tightened bolt.