
Chapter 5
Inspection and Packing
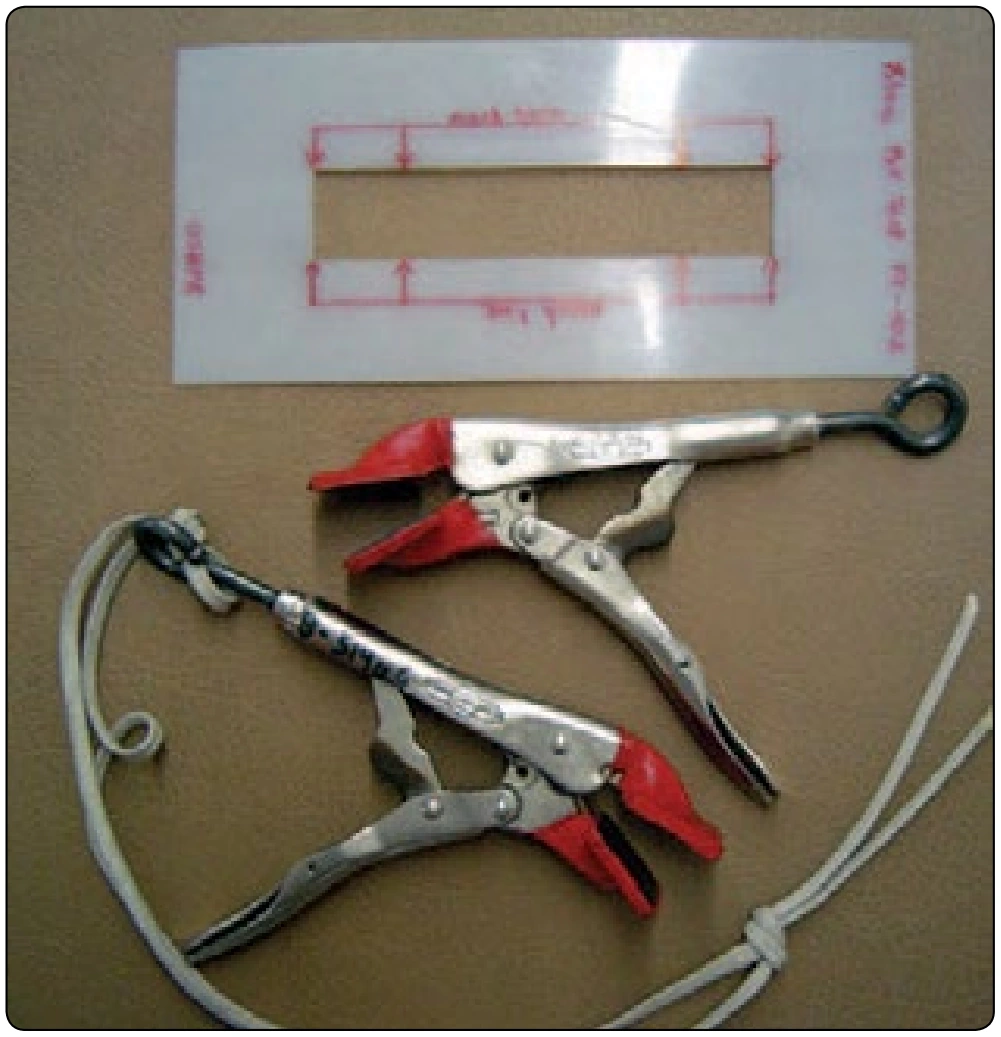
- The manufacturer may call for the tensile testing of the fabric after inspection of the canopy for obvious visual damage. This is very important because there was a fabric deterioration problem with certain parachutes several years ago. An AD was issued, and while the exact cause was never determined, a side benefit was the development and adoption of a non-destructive fabric pull test method. This method was adopted by the PIA as Technical Standard (TS)-108, Parachute Canopy Fabric Pull Test, Non-Destructive Method. This method of testing canopy fabric for strength has been adopted by several canopy manufacturers as suitable for testing their canopies. However, the rigger must be careful in using this test method. The proper equipment is essential for accurate testing and the type of material must be known in order to test to the correct strength. The testing equipment is shown in Figure 5-12. The full standard can be found in Appendix I of this handbook.
- Along with the pull test, the AD also requires testing the canopy mesh with a solution of Bromo Cresol Green indicator to determine the presence of an acid condition. The Bromo Cresol Green indicator is a dark blue liquid in its standard state. It turns yellow when it contacts acid—the stronger the acid, the brighter the yellow. If the test is positive, the canopy needs to be treated to neutralize the condition. The AD highlights the manufacturer’s service bulletin as to how to comply with this test and procedure.
- If the canopy has a deployment device, such as a diaper, check that it is securely attached, particularly after use. Check the grommets, line stow bands, elastics, or other line stow devices. Pay particular attention to where the stitching attaches to the canopy fabric. This area can be particularly prone to damage during opening.
Suspension Lines and Connector Links
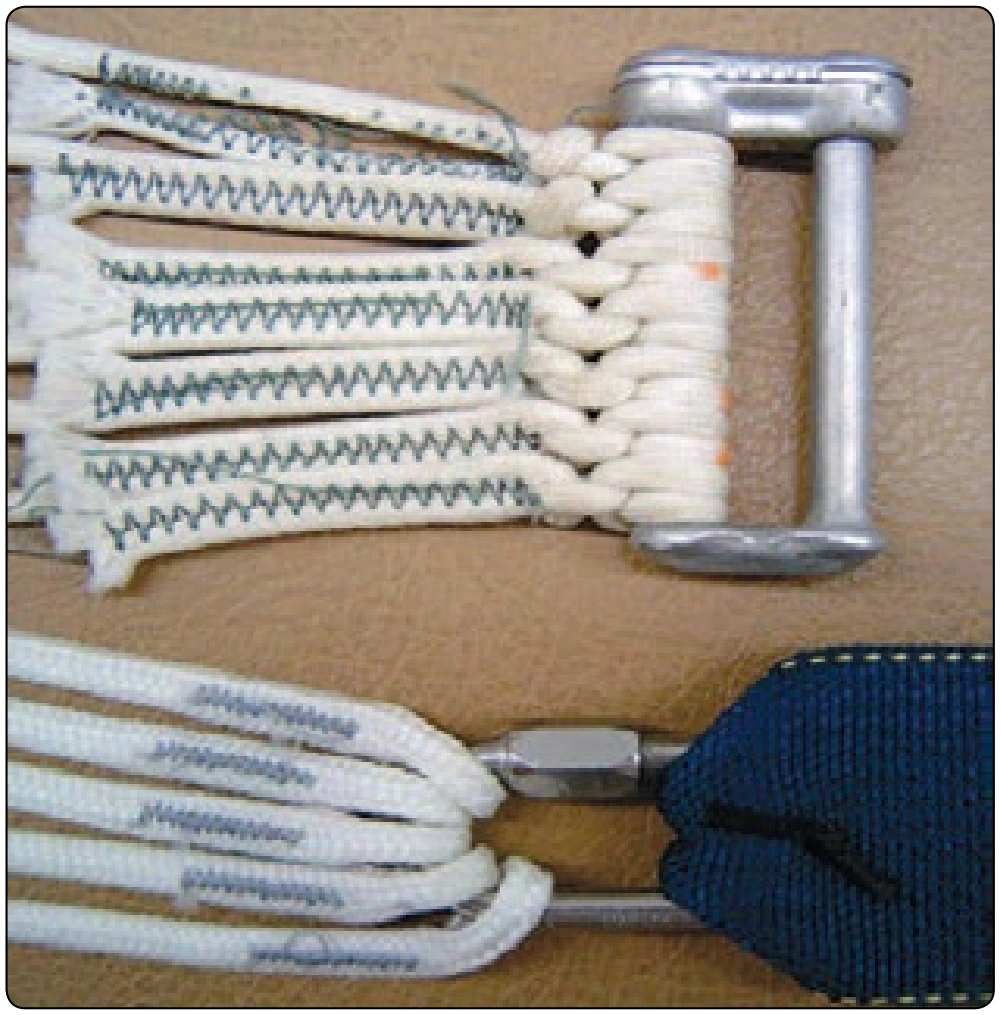
- The lines, their attachment points, and the associated stitching should be checked for damage or missing stitches. With the older sheath and core nylon lines, such as Type-III found on military surplus canopies, the zigzag stitching at the links are prone to raveling. The more modern non-continuous line canopies use Dacron® or nylon braided lines. The common attachment at the links for these lines uses the “finger-trap” method to secure the lines to the link with a bar tack securing the lines. Most manufacturers now use a contrasting color thread for the bar tack in order to make inspection easier. Make sure all bar tacks are in place. Figure 5-13 shows both methods of line attachment to the links.
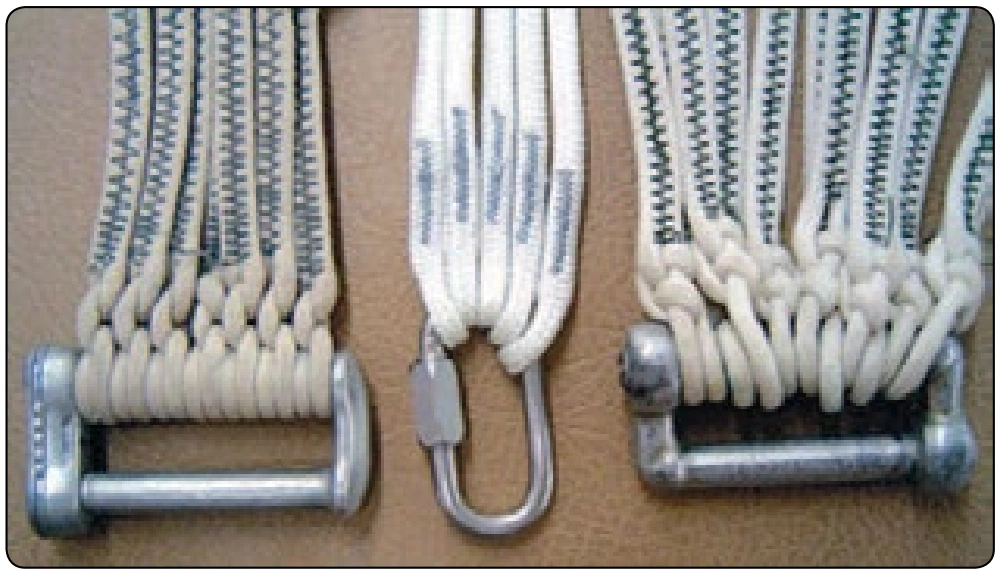
- There are three basic types of separable connector links in common use today for round canopies: the standard “L” bar type, MS-22002; the Navy speed link, MS-22021, and the Quick link, commonly called the Maillon Rapide® link (named after the French company that first manufactured them). [Figure 5-14] The older military surplus canopies are usually found with the two types of MIL-SPEC connector links. Modern sport canopies usually are found with the Rapide® links because of their compatibility with the modern, low-bulk suspension lines.
- With the MIL-SPEC links, check the tightness of the screws that hold the links together. With the speed links, make sure the knurled side of the end cap is facing up and the plates face outboard on the riser. The screw should be checked for tightness at each repack.
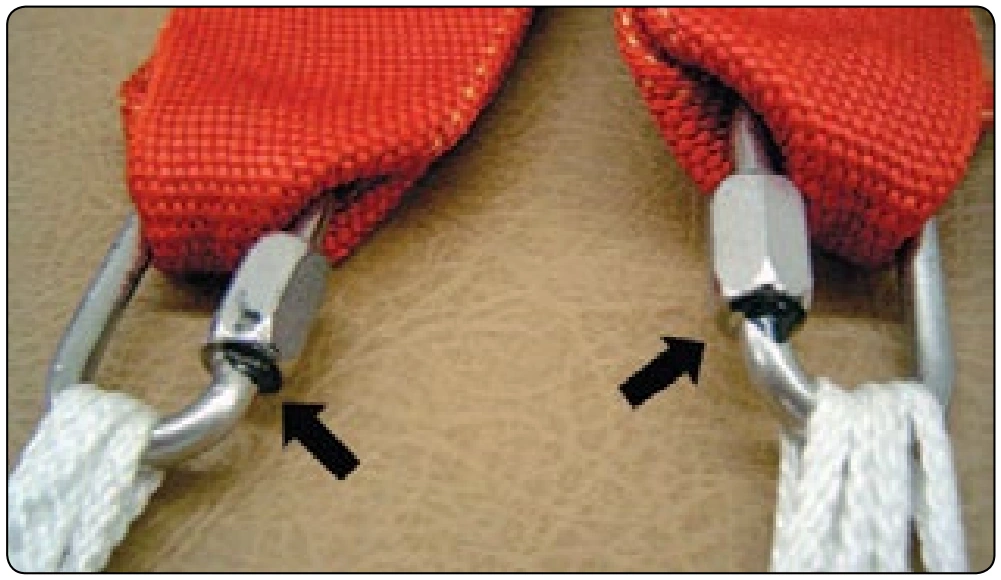
- If the canopy is equipped with Rapide® links, they should be oriented on the riser with the barrel inboard and to the bottom so it tightens upward. The link should be tightened hand tight, then approximately one quarter turn further. The actual force recommended for a number 5 link is approximately 30 inch-pounds. Most riggers do not possess the force gauge to measure this, so they use the quarter turn guide. After tightening the links, a “telltale” should be applied to the barrel. [Figure 5-15] A telltale is a marker, usually nail polish, that provides a breakable seal to show if the barrel has moved. If the seal is broken, the rigger knows the link may be loose. In doing a repack, if the telltale is intact, the rigger should not loosen the link and retighten it because continual tightening can strip the threads, causing the link to fail.
Harness
- Starting at the riser end, check the webbing for any wear or damage and inspect the stitching at the riser ends. If the canopy has steering lines and a guide ring on the riser, make sure the ring is secure and the steering line is attached to the steering toggle correctly. With a round canopy, make sure the steering line has sufficient slack in it when under tension. If the line is too tight, it can fail at opening because of too much stretch.
- Continue down the risers. If canopy releases are installed, check their operation. With the Capewell cable release, open the release and make sure there is no dirt or sand in the mechanism. Also, check for wear, particularly on the cable ring.
- Check all of the harness webbing for wear from chafing, abrasion, and sunlight degradation. Pay particular attention to the buffer and chafing strips where used to prevent wear from the hardware. These buffers are there to provide early warning before the load-bearing webbing starts to wear. Check the elastic keepers so the running ends of the straps can be properly stowed.
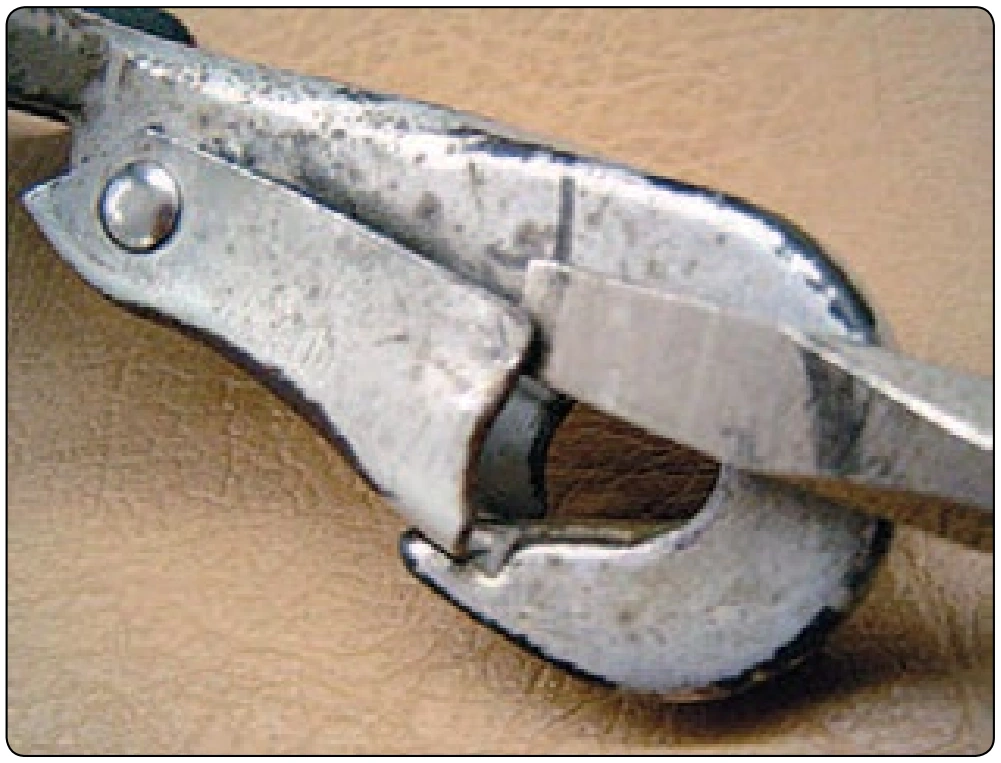
- Check all of the hardware, paying particular attention to the leg snaps. Quick ejectors are particularly prone to failure of the springs. Obviously, those with broken springs should be replaced. B-12 snaps are prone to having the gate sides bent to the point they do not close properly. This gate may be repaired with a screwdriver and pliers. [Figure 5-16] Straightening the side of the gate allows the snap to close properly.
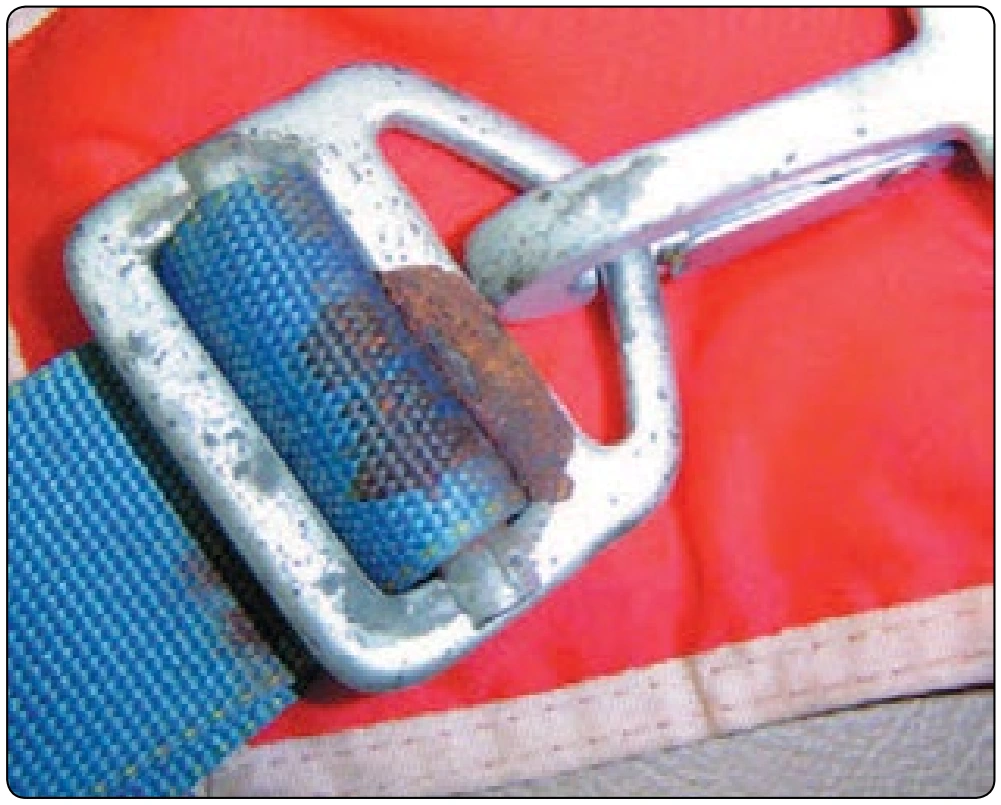
- An area of concern for many riggers, one for which there is not much guidance, is how much plating wear and associated corrosion of the hardware is allowable. This depends on the location of the damage. If it is a solid ring or buckle, and the damage has occurred from dragging or abrasion in an area that is not in contact with webbing, one solution is to clean the rust with a fine emery cloth and cover it with clear nail polish. This keeps the area from continued rusting. It does not, however, prevent further damage caused by the original rusting. If the rusting is caused by two pieces of hardware interacting with each other, the problem is more serious. If allowed to continue, the rust pattern may cause the two pieces to fuse together under the most severe conditions. In this case, the hardware must be removed and replaced. If the hardware in contact with webbing, such as a leg strap adapter, and becomes corroded, it must be replaced. This problem frequently arises when the parachute is exposed to salt water and not properly rinsed. The hardware rusts inside the leg strap webbing causing accelerated wear and must definitely be replaced. [Figure 5-17]
- The ripcord housing and pocket should be checked for wear and fit of the ripcord. On the housing, check the ends and the ferrules. On more modern assemblies, these ferrules are brass and more susceptible to wear than the MILSPEC types. Look inside to make sure there are no obstructions to interfere with the ripcord.
The ripcord pocket may be elastic, Velcro®, or a military style with a spring to hold in the ripcord.
Whichever type, make sure the ripcord is held securely, yet at the same time make sure it is not too tight so the ripcord can be removed easily. Also, check the tackings that hold the housing and pocket.
Container
- As stated in the beginning of this chapter, the initial external inspection of the container should alert the rigger to any damage inside. Note any holes, abrasion, or fraying of the pack material.
- Check the grommets for sharp edges and pulling out of the material from under the grommet. Cones should have the stitching secure. Check the plating on the cones in the area of the eye. Sharp edges can cause a cone lock. Eyelets should have the tacking secure. Snap fasteners should be securely set in the material. Check for wear and security of the opposing parts. Make sure that “pull-the-dot” types are set correctly for direction. Stiffeners, both metal and plastic, should not be bent or cracked. There should be no sharp edges. Pack opening bands (POBs), if used, should be in good shape and not stretched out. Make sure the hooks are in good shape, too. On the military style POBs, it may be necessary to retack the pull tabs at the end. Metal frames, if used, should be straight. Buffers at the corners should be in good condition. Tackings, if used, should be secure.
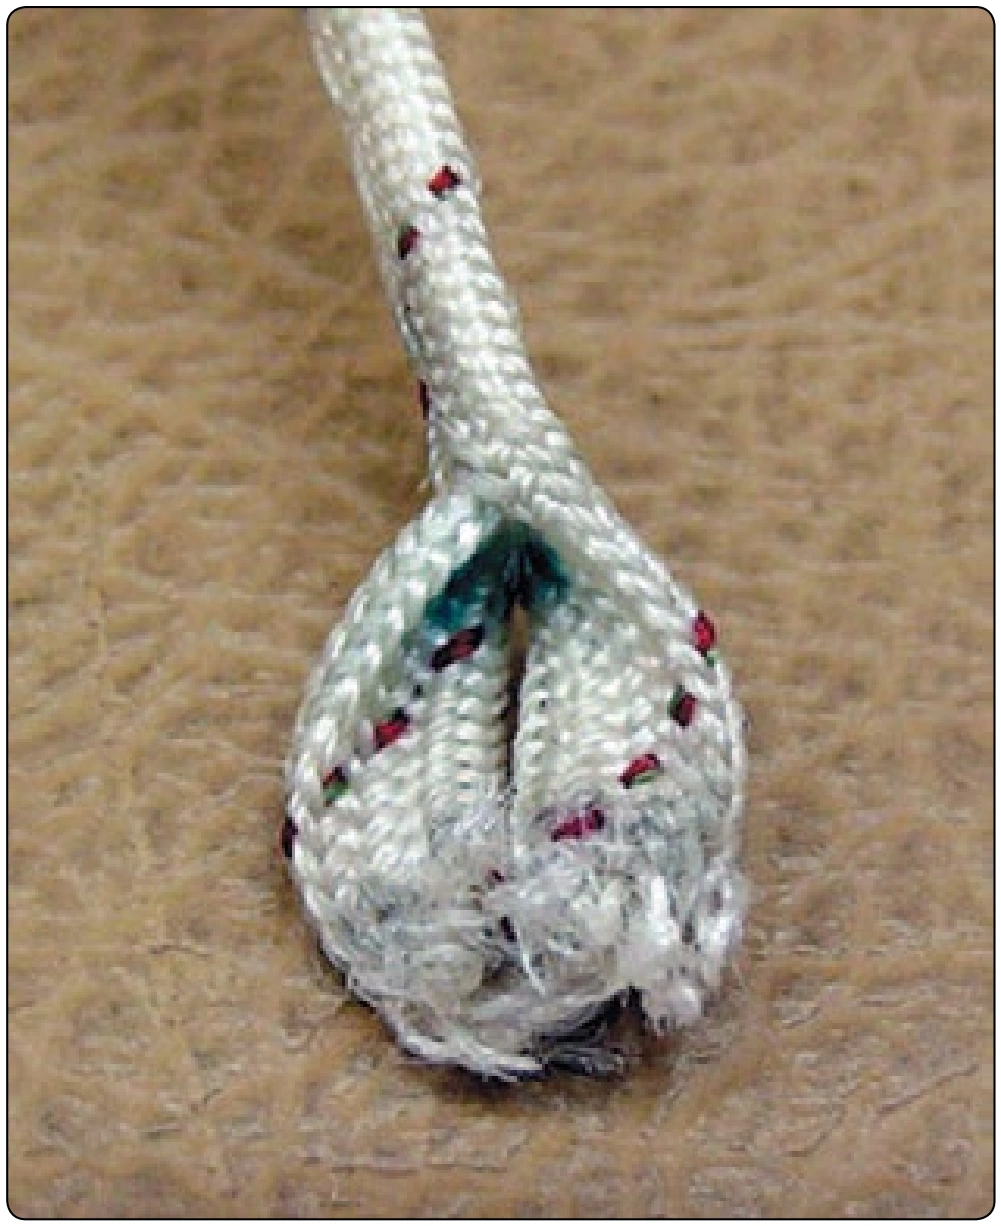
- The container-closing loop is an extremely important part of the container system. A worn loop may fail, which would cause a premature opening of the container. With the parachute still in a packed condition, check for the correct length. If the loop is made too long or stretched during use, the pilot chute can extend and move off center. This may result in a poor launch or a pack job that is uncomfortable for the user. After determining that the loop is of the correct material and length, check the eye(s) of the loop on the inside for wear. It is not uncommon for the loop to appear to be in good condition when viewed from the outside but worn partially through when examined from the inside. [Figure 5-18] Many riggers simply replace the loops at each repack, regardless of the condition.
Ripcord
There are a number of things that need to be inspected to approve the ripcord: