
Chapter 7
Repairs, Alterations, and Manufacture
Disassembly
- The first thing the rigger must do is to complete a measurement of the lines of the canopy. The chart in Figure A shows a matrix for measuring the lines of the canopy. Simply fill in the boxes for each dimension measured.
- Start by laying the canopy on the left side, anchor the connector links, and flake it out as if for packing. Most canopy lines are measured from the inside of the connector links, which is called the zero point.
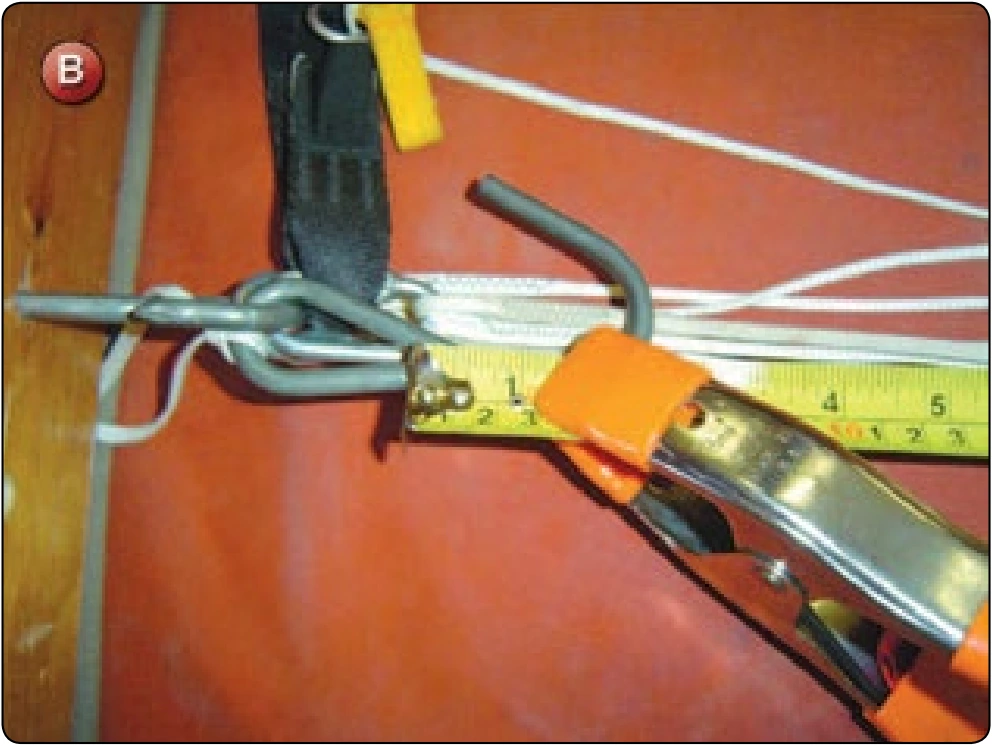
- Anchor the end of the tape measure even with the zero mark at the end of the lines using the pony clamp. [Figure B]
- Start with the top outside right front corner line of the canopy. This line will be line 1A. Depending on the number of cells to the canopy, on a 7-cell canopy, the left corner line will be line 8A. On a 9-cell canopy, this line will be line 10A. Make sure that the canopy is oriented correctly so that the measurement sequence follows the boxes on the chart.
- Measure all the A lines first and then proceed to the B, C, and D line groups. The lines should be measured under approximately 10 pounds of tension. As the rigger moves through the lines and changes riser groups, the end of the tape measure should be moved to the corresponding connector link and re-clamped.
- Measure the control line groups and fill in the boxes.
Reassembly
- Compare the measurements to the original line lengths as in the manual.
- Depending on the type of canopy and type of line used, most canopies tend to have the center A lines stretch due to the load on opening. The outside lines that attach to the stabilizers and the control lines tend to shrink due to the friction generated by the slider on opening. The key concept to remember is that the length of the lines is not the critical dimension. What is most important is the trim differential, which determines the angle of attack of the canopy. The trim differential is the difference in the line length between the A, B, C, and D lines. The most accurate method of measuring this is to use the A lines as the base dimension and then measure A-B, A-C, and A-D. This method takes into consideration the tolerance allowed. This dimension is what makes the canopy open and fly correctly. If the overall length of the lines is 2–3 inches longer or shorter, but the trim is correct, there is probably no appreciable effect on the canopy. With this in mind, it may be desirable to “shortline” the canopy during the trim process in order to not have to replace any main lines.
- Because of the fact that the cascaded main lines may stretch at different rates, the adjustment to be made to the lines that have stretched (i.e., gotten longer) needs to be done at the canopy end and not at the connector link.
- Remove the bar tacks or zigzag stitching at the canopy end of the lines.
- Adjust the line length as needed to return to the original dimensions. Re-tie the knots or finger-trap as necessary and re-sew as per the original.
- For the lines that may have shrunk in length, it may be possible to gain as much as 2–3 inches of line adjustment by utilizing the extra line that is fingertrapped into each line attachment point. Depending on the type of line used on the canopy, the amount of excess line finger-trapped may vary. Dacron lines can have as little as 2–3 inches inserted into the fingertrap and hold securely. The smaller and more slippery Spectra® line is recommended to have at least 6 inches of line inserted into the finger-trap. So, depending on the amount of line that is needed to be gained for the trim adjustment, the rigger may be able to adjust each end of the line to gain the necessary adjustment.
- If this needed line can be gained, remove the bar tacks or zigzag at each end of the line and reattach after adjusting the length. Before permanently attaching, the rigger should simply tie the lines in place and check the trim. If everything is within limits, then re-tie or finger-trap and re-stitch with bar tacks or zigzag as per the original.
Inspection
- Check final trim dimensions against original
- Check continuity so there are no twists or crossed lines
- Verify all junctions are either knotted or finger-trapped and sewn as per the original
Section 2, Container
Container repairs share some techniques with canopy repairs, such as single-side patches. Most repairs, however, involve replacement of panels or flaps, Velcro®, grommets, plastic stiffeners, worn binding tape, and broken hand tackings. Even more so than canopy repairs, the cosmetic results of the container repair are most important to the customer and, thus, the rigger. A shoddy repair to the container is immediately obvious each time the user puts on the parachute. Even if it is functional, it has to look good to instill confidence in the user.
The following are repairs found in Section 2, Container:
- Container fabric panel repair
- Container grommet replacement
- Container Velcro® replacement
- Container plastic stiffener replacement
- Main container side flap replacement
- Bottom of container (BOC) pocket replacement
- 3-ring release housing replacement
Container Fabric Panel Repair
- Applicable products: All types of parachute container systems.
- Description: Application of a patch repair to container panels.
- Authorized repairmen: FAA Senior or Master Parachute Rigger
- Materials: E thread—color to match; fabric—type and color to match; nylon tapes—assorted types and widths, such as Type-3, Type-4, or Type-12
- Machines: 301 straight stitch—medium duty 7–11 SPI and 308 zigzag—medium duty 7–11 SPI
- Equipment: Scissors, seam ripper or scalpel, marking pencil, 6-inch ruler, hot knife, hot glue gun, butane lighter, ripstop tape (optional), and straight pins
Procedure
Besides holding the canopy, the container’s main function is to protect the canopy from damage. To that end, a certain amount of wear and damage is to be expected. The most common repairs involve re-stitching broken threads and binding tape repairs. Other damage involves tears, punctures, and fabric abrasion. The appropriate repair varies according to need. There are five primary repair procedures to basic panel repairs: re-stitching, binding tape repair, hidden patches, overlay patches, and single-side fabric patches.
Disassembly
- Remove all extraneous parts from the container, including canopies, handles, toggles, etc.
- Inspect the damaged area to determine which repair method is appropriate.
Reassembly
Restitching