
Chapter 14
Aircraft Fuel Systems
Welded Tanks
Welded tank repairs are usually done by welding. These tanks can be constructed from steel or weldable aluminum, such as 3003S or 5052SO. The tank is removed from the aircraft for the repair. It must be treated to remove any fuel vapors that remain in the tank before it is welded. This is critical to avoid serious injury from explosion should the fuel vapor ignite. The manufacturer usually gives a procedure for doing this. Some common methods for purging the tank include steam cleaning, hot water purging, and inert gas purging. Most procedures involve running the steam, water, or gas through the tank for a stated period of time. Adapters may need to be fashioned or purchased for the fill port to enable proper cleaning. Follow the manufacturer’s procedure for the proper time to keep the cleaning medium in the tank and for prepping the tank for welding in general.
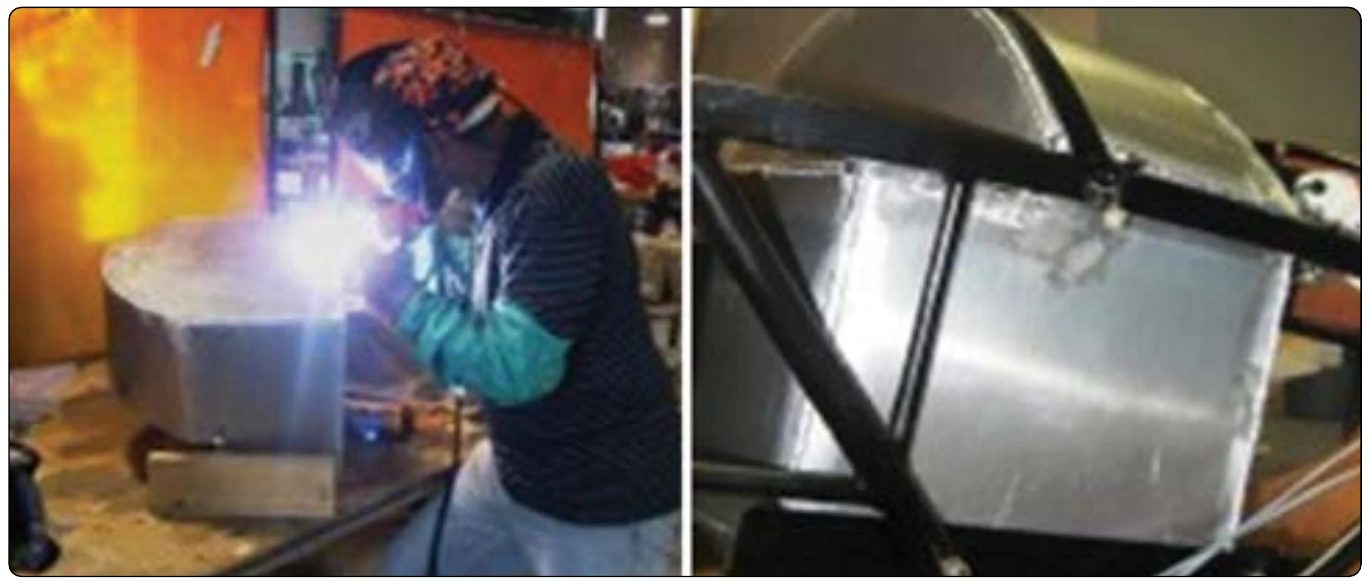
After a seam or a damaged area is welded, you must clean the tank of any flux or debris that may have fallen into the tank. Water rinsing and acid solutions are commonly used. A leak check to ensure the repair is sound follows a welded repair. This can be done by pressurizing the tank with a specified amount of air pressure and using a soapy solution on all seams and the repaired area. Bubbles form should air escape. The amount of air pressure used for a leak check is very low. One half to 3.5 psi is common. Use an accurate regulator and pressure gauge to prevent overpressurization that could deform or otherwise damage the tank. Tanks ordinarily supported by aircraft structure when installed should be similarly supported or reinstalled in the airframe before pressurization. Figure 14-90 shows an aircraft fuel tank being welded and the repaired tank installed in the frame of an antique aircraft.
Riveted Tanks
Riveted tanks are often repaired by riveting. The seams and rivets are coated with a fuel resistant compound when assembled to create a leak-free container. This practice is followed during a patch repair, or when repairing a seam, which may require replacing the rivets in the seam. Some minor leak repairs may only require the application of addition compound. Follow manufacturer’s instructions. The compound used may be heat sensitive and require inert gas purging to prevent degradation from hot water or steam purging. Again, follow all manufacturer guidance to insure a safe airworthy repair.
Soldered Tanks
Terneplate aircraft fuel tanks that are assembled by soldering are also repaired by soldering. All patches have a minimum amount that must overlap the damaged area. Flux used in soldering must be removed from the tank after the repair with techniques similar to that used on a welded tank. Follow manufacturer’s instructions.
Bladder Tanks
Bladder fuel tanks that develop leaks can also be repaired. Most commonly, they are patched using patch material, adhesive, and methods approved by the manufacturer. As with soldered tanks, the patch has a required overlap of the damaged area. Damage that penetrates completely through the bladder is repaired with an external, as well as internal, patch.
Synthetic bladder tanks have a limited service life. At some point, they seep fuel beyond acceptable limits and need to be replaced. Bladder tanks are usually required to remain wetted with fuel at all times to prevent drying and cracking of the bladder material. Storage of bladder tanks without fuel can be accomplished by coating the tanks with a substance to prevent drying, such as clean engine oil that can be flushed from the tank when ready to return to service. Follow all manufacturer’s instructions for the care and repair of these common tanks. It is important to ensure that bladder tanks are correctly secured in place with the proper fasteners when reinstalling them in the aircraft after a repair.
Integral Tanks
Occasionally, an integral tank develops a leak at an access panel. This can often be repaired by transferring fuel to another tank so the panel can be removed and the seal replaced. Use of the proper sealing compound and bolt torque are required.
Other integral fuel tank leaks can be more challenging and time consuming to repair. They occur when the sealant used to seal the tank seams loses its integrity. To repair, fuel needs to be transferred or defueled out of the tank. You must enter large tanks on transport category aircraft. Preparing the tank for safe entry requires a series of steps outlined by the aircraft manufacturer. These include drying the tank and venting it of dangerous vapors. The tank is then tested with a combustible-gas indicator to be certain it can be entered safely. Clothing that does not cause static electricity and a respirator is worn.
An observer is stationed outside of the tank to assist the technician in the tank. [Figure 14-91] A continuous flow of ventilating air is made to flow through the tank. A checklist for fuel tank preparation for entry taken from a transport category maintenance manual is shown in Figure 14-92. The details of the procedures are also given in the manual.
Once the location of the leak is determined, the tank sealant is removed, and new sealant is applied. Remove old sealant with a nonmetallic scraper. Aluminum wool can be used to remove the final traces of the sealant. After cleaning the area with the recommended solvent, apply new sealant as instructed by the manufacturer. Observe cure time and leak checks as recommended before refilling the tank.
Fire Safety
Fuel vapor, air, and a source of ignition are the requirements for a fuel fire. Whenever working with fuel or a fuel system component, the technician must be vigilant to prevent these elements from coming together to cause a fire or explosion. A source of ignition is often the most controllable. In addition to removing all sources of ignition from the work area, care must be exercised to guard against static electricity. Static electricity can easily ignite fuel vapor, and its potential for igniting fuel vapor may not be as obvious as a flame or an operating electrical device. The action of fuel flowing through a fuel line can cause a static buildup as can many other situations in which one object moves past another. Always assess the work area and take steps to remove any potential static electricity ignition sources.
AVGAS is especially volatile. It vaporizes quickly due to its high vapor pressure and can be ignited very easily. Turbine engine fuel is less volatile but still possesses enormous capacity to ignite. This is especially true if atomized, such as when escaping out of a pressurized fuel hose or in a hot engine compartment on a warm day. Treat all fuels as potential fire hazards in all situations. As was discussed, empty fuel tanks have an extreme potential for ignition or explosion. Although the liquid fuel has been removed, ignitable fuel vapor can remain for a long period of time. Purging the vapor out of any empty fuel tank is an absolute necessity before any repair is initiated.
A fire extinguisher should be on hand during fuel system maintenance or whenever fuel is being handled. A fuel fire can be put out with a typical carbon dioxide (CO2) fire extinguisher. Aim the extinguisher nozzle at the base of the flame and spray in a sweeping motion to have the agent fall over the flames to displace the oxygen and smother the fire. Dry chemical fire extinguishers rated for fuel can also be used. These leave behind a residue that requires cleanup that can be extensive and expensive. Do not use a water-type extinguisher. Fuel is lighter than water and could be spread without being extinguished. Additional precautions used to prevent fire are discussed below in the fueling–defueling section of this chapter.