
Chapter 15
Ice & Rain Protection
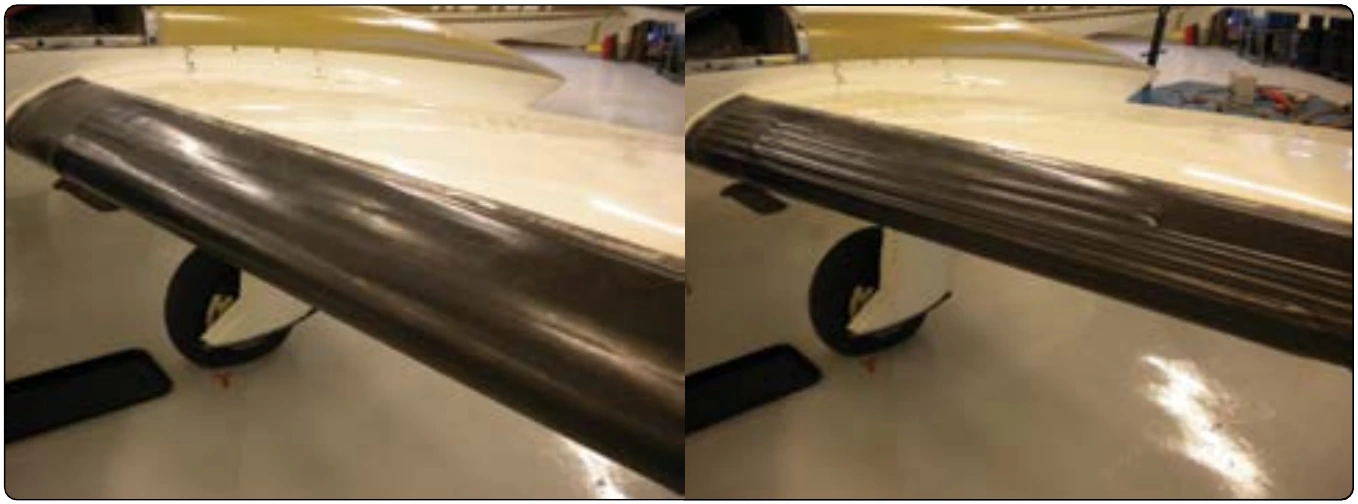
When gluing the deice boots to the leading edge of wings and stabilizers, the manufacturer’s instruction must be strictly followed. The glue is typically a contact cement normally spread on both the airfoil and the boot and allowed to become tacky before mating the surfaces. Clean, paint-free surfaces are required for the glue to adhere properly. Removal of old boots is performed by re-softening the cement with solvent.
Inspection, Maintenance, & Troubleshooting of Rubber Deicer Boot Systems
Maintenance on pneumatic deicing systems varies with each aircraft model. The instructions of the airframe or system components manufacturer should be followed in all cases. Depending on the aircraft, maintenance usually consists of operational checks, adjustments, troubleshooting, and inspection.
Operational Checks
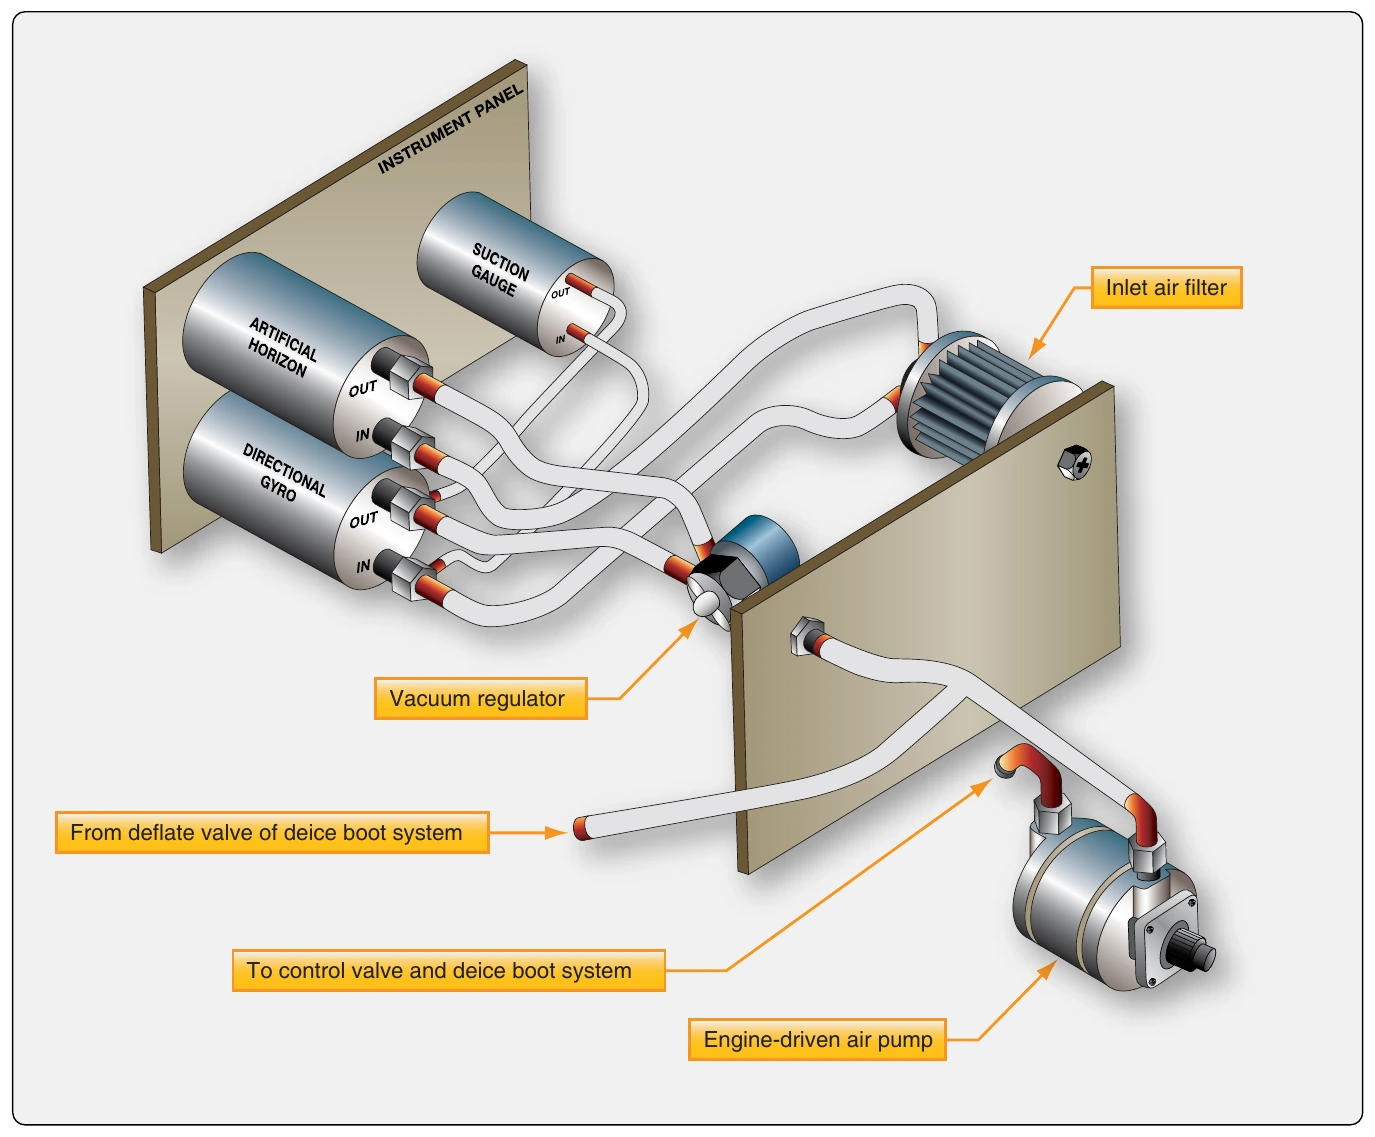
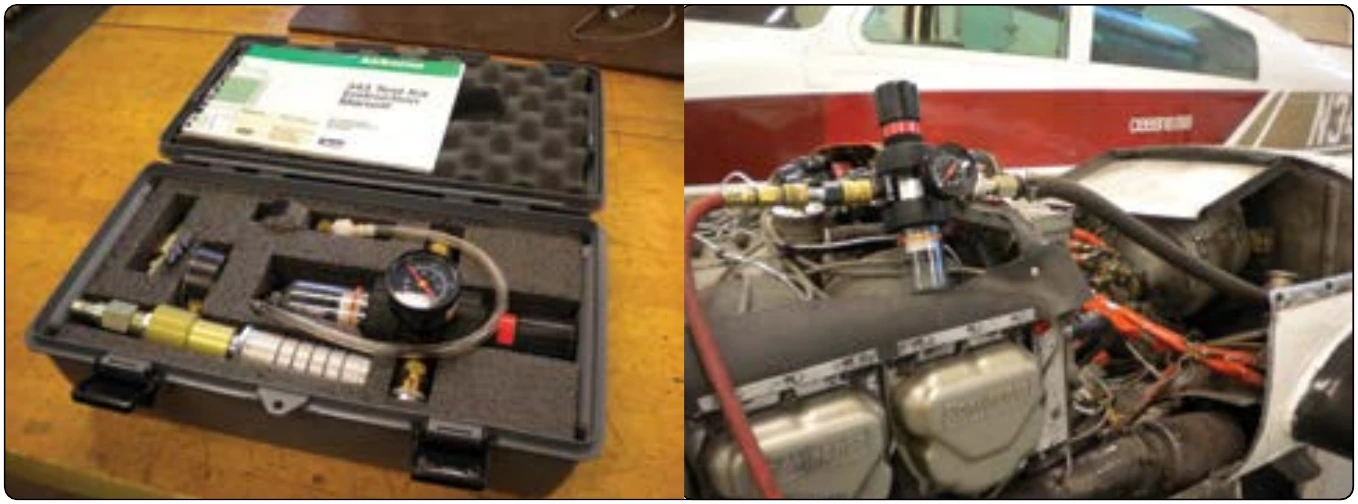
An operational check of the system can be made by operating the aircraft engines or by using an external source of air. Most systems are designed with a test plug to permit ground checking the system without operating the engines. When using an external air source, make certain that the air pressure does not exceed the test pressure established for the system. Before turning the deicing system on, observe the vacuum-operated instruments. If any of the gauges begin to operate, it is an indication that one or more check valves have failed to close and that reverse flow through the instruments is occurring. Correct the difficulty before continuing the test. If no movement of the instrument pointers occurs, turn on the deicing system. With the deicer system controls in their proper positions, check the suction and pressure gauges for proper indications. The pressure gauge fluctuates as the deicer tubes inflate and deflate. A relatively steady reading should be maintained on the vacuum gauge. It should be noted that not all systems use a vacuum gauge. If the operating pressure and vacuum are satisfactory, observe the deicers for actuation. With an observer stationed outside the aircraft, check the inflation sequence to be certain that it agrees with the sequence indicated in the aircraft maintenance manual. Check the timing of the system through several complete cycles. If the cycle time varies more than is allowable, determine the difficulty and correct it. Inflation of the deicers must be rapid to provide efficient deicing. Deflation of the boot being observed should be completed before the next inflation cycle. [Figure 15-32]
Adjustments
Examples of adjustments that may be required include adjusting the deicing system control cable linkages, adjusting system pressure relief valves, and deicing system vacuum (suction) relief valves. A pressure relief valve acts as a safety device to relieve excess pressure in the event of regulator valve failure. To adjust this valve, operate the aircraft engines and adjust a screw on the valve until the deicing pressure gauge indicates the specified pressure at which the valve should relieve. Vacuum relief valves are installed in a system that uses a vacuum pump to maintain constant suction during varying vacuum pump speeds. To adjust a vacuum relief valve, operate the engines. While watching the vacuum (suction) gauge, an assistant should adjust the suction relief valve adjusting screw to obtain the correct suction specified for the system.
Troubleshooting
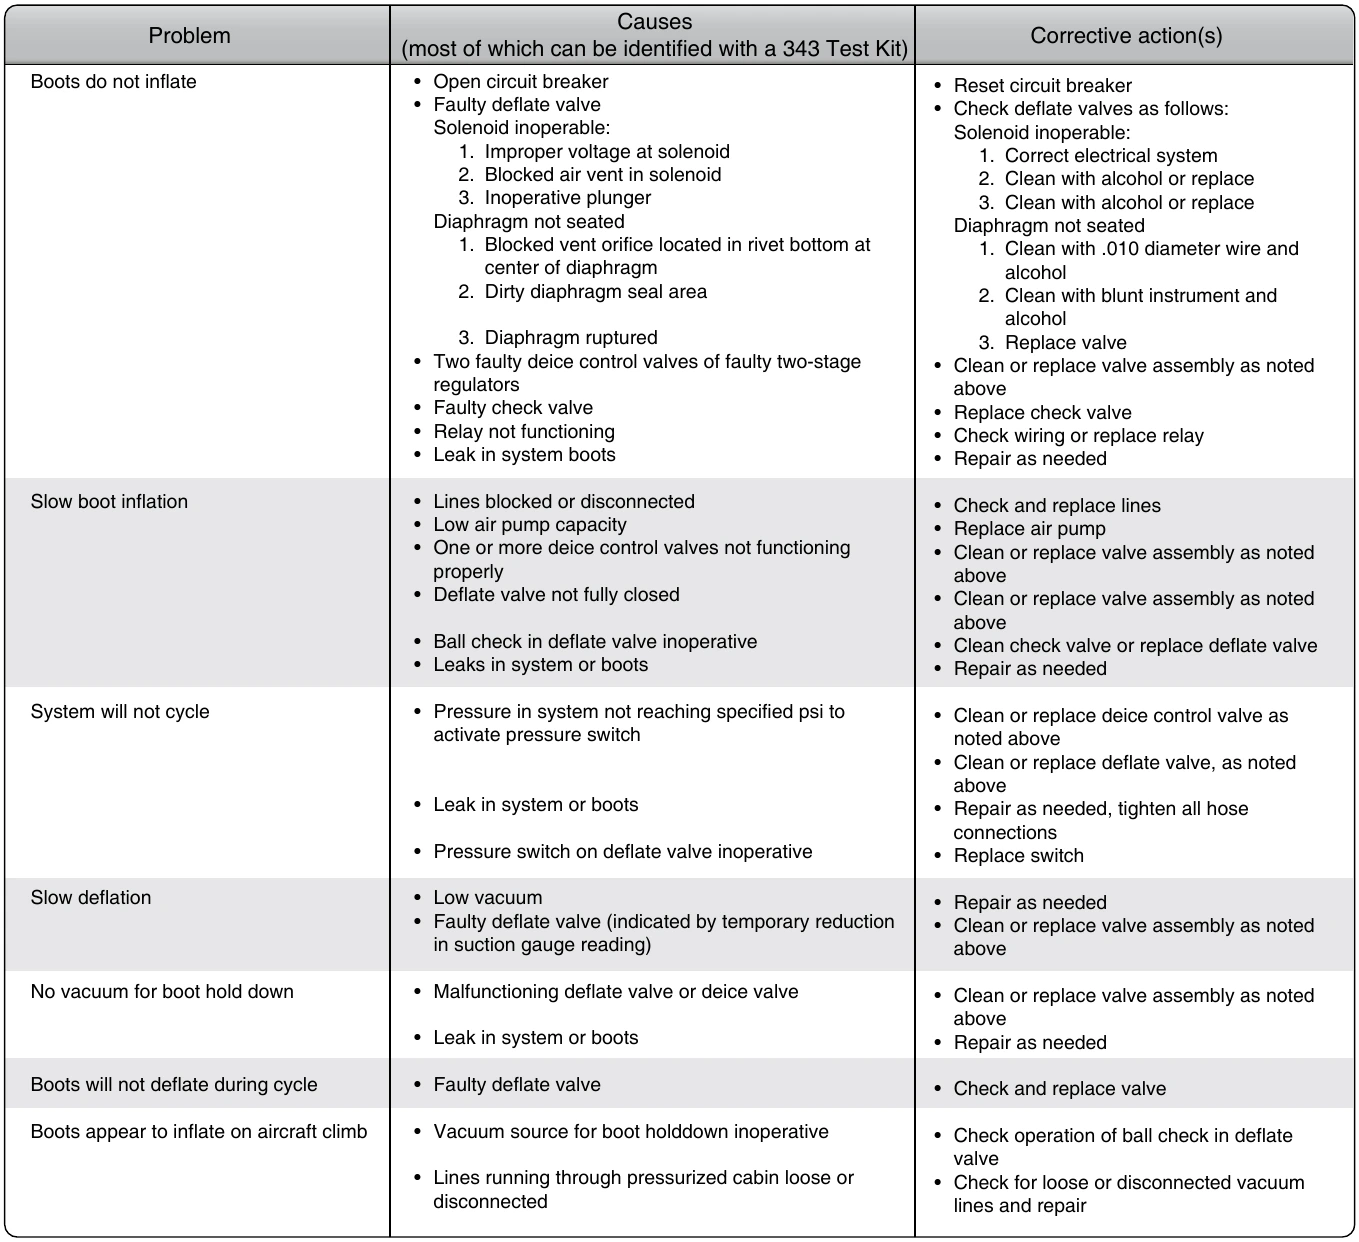
Not all troubles that occur in a deicer system can be corrected by adjusting system components. Some troubles must be corrected by repair or replacement of system components or by tightening loose connections. Several troubles common to pneumatic deicing systems are shown in the left-hand column of the chart in Figure 15-33. Note the probable causes and the remedy of each trouble listed in the chart. In addition to using troubleshooting charts, operational checks are sometimes necessary to determine the possible cause of trouble.
Inspection
During each preflight and scheduled inspection, check the deicer boots for cuts, tears, deterioration, punctures, and security; during periodic inspections, go a little further and check deicer components and lines for cracks. If weather cracking of rubber is noted, apply a coating of conductive cement. The cement, in addition to sealing the boots against weather, dissipates static electricity so that it does not puncture the boots by arcing to the metal surfaces.
Deice Boot Maintenance
The life of the deicers can be greatly extended by storing them when they are not needed and by observing these rules when they are in service:
- Do not drag gasoline hoses over the deicers.
- Keep deicers free of gasoline, oil, grease, dirt, and other deteriorating substances.
- Do not lay tools on or lean maintenance equipment against the deicers.
- Promptly repair or resurface the deicers when abrasion or deterioration is noted.
- Wrap deice boots in paper or canvas when storing.
Thus far, preventive maintenance has been discussed. The actual work on the deicers consists of cleaning, resurfacing, and repairing. Cleaning should ordinarily be done at the same time the aircraft is washed, using a mild soap and water solution. Grease and oil can be removed with a cleaning agent, such as naptha, followed by soap and water scrubbing. Whenever the degree of wear is such that it indicates that the electrical conductivity of the deicer surface has been destroyed, it may be necessary to resurface the deicer. The resurfacing substance is a black, conductive neoprene cement. Prior to applying the resurfacing material, the deicer must be cleaned thoroughly and the surface roughened. Cold patch repairs can be made on a damaged deicer. The deicer must be relieved of its installed tension before applying the patch. The area to be patched must be clean and buffed to roughen the surface slightly. Patches are glued in place. Follow manufacturer’s instructions for all repairs.