Chapter 4
Aircraft Metal Structural Repair
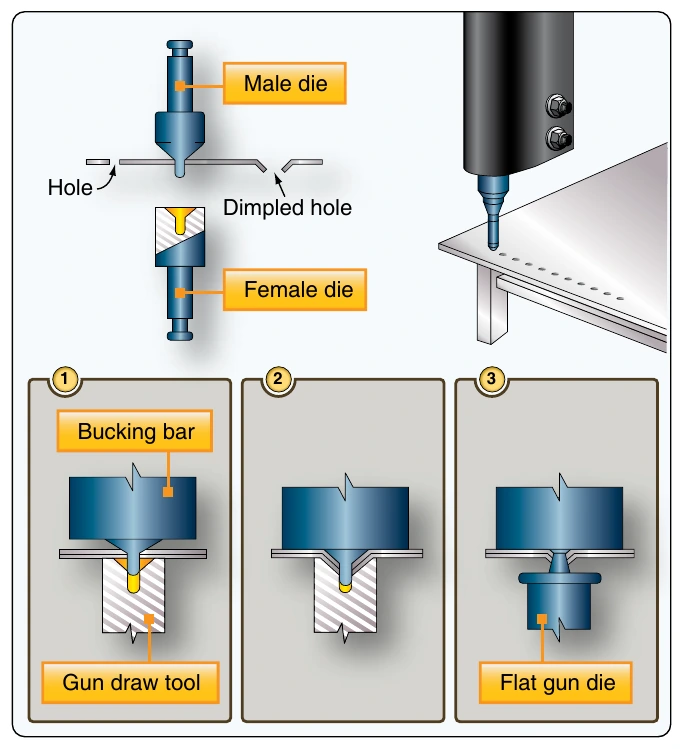
When dimpling, rest the female die on a solid surface. Then, place the material to be dimpled on the female die. Insert the male die in the hole to be dimpled and, with a hammer, strike the male die until the dimple is formed. Two or three solid hammer blows should be sufficient. A separate set of dies is necessary for each size of rivet and shape of rivet head. An alternate method is to use a countersunk head rivet instead of the regular male punch die, and a draw set instead of the female die, and hammer the rivet until the dimple is formed.
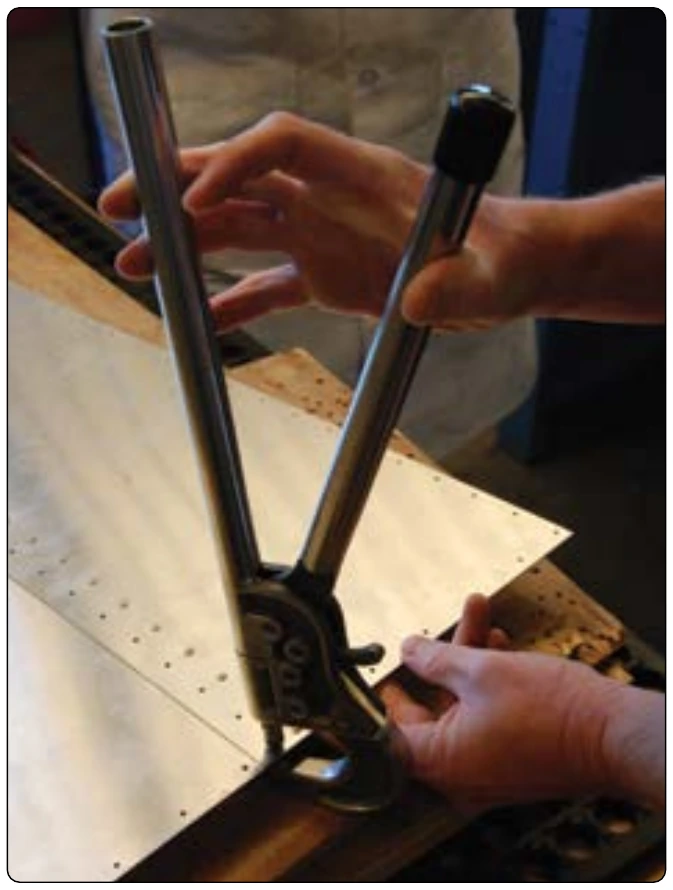
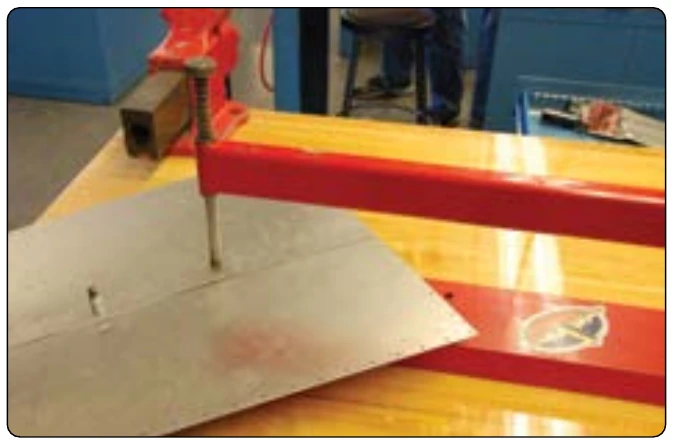
Dimpling dies for light work can be used in portable pneumatic or hand squeezers. [Figure 4-93] If the dies are used with a squeezer, they must be adjusted accurately to the thickness of the sheet being dimpled. A table riveter is also used for dimpling thin skin material and installing rivets. [Figure 4-94]
Coin Dimpling
The coin dimpling, or coin pressing, method uses a countersink rivet as the male dimpling die. Place the female die in the usual position and back it with a bucking bar. Place the rivet of the required type into the hole and strike the rivet with a pneumatic riveting hammer. Coin dimpling should be used only when the regular male die is broken or not available. Coin pressing has the distinct disadvantage of the rivet hole needing to be drilled to correct rivet size before the dimpling operation is accomplished. Since the metal stretches during the dimpling operation, the hole becomes enlarged and the rivet must be swelled slightly before driving to produce a close fit. Because the rivet head causes slight distortions in the recess, and these are characteristic only to that particular rivet head, it is wise to drive the same rivet that was used as the male die during the dimpling process. Do not substitute another rivet, either of the same size or a size larger.
Radius Dimpling
Radius dimpling uses special die sets that have a radius and are often used with stationary or portable squeezers. Dimpling removes no metal and, due to the nestling effect, gives a stronger joint than the non-flush type. Adimpled joint reduces the shear loading on the rivet and places more load on the riveted sheets.
Dimpling is required for sheets that are thinner than the minimum specified thickness for countersinking. However, dimpling is not limited to thin materials. Heavier parts may be dimpled without cracking by specialized hot dimpling equipment. The temper of the material, rivet size, and available equipment are all factors to be considered in dimpling. [Figure 4-95]
Hot Dimpling
Hot dimpling is the process that uses heated dimpling dies to ensure the metal flows better during the dimpling process. Hot dimpling is often performed with large stationary equipment available in a sheet metal shop. The metal being used is an important factor because each metal presents different dimpling problems. For example, 2024-T3 aluminum alloy can be satisfactorily dimpled either hot or cold, but may crack in the vicinity of the dimple after cold dimpling because of hard spots in the metal. Hot dimpling prevents such cracking.
7075-T6 aluminum alloys are always hot dimpled. Magnesium alloys also must be hot dimpled because, like 7075-T6, they have low formability qualities. Titanium is another metal that must be hot dimpled because it is tough and resists forming. The same temperature and dwell time used to hot dimple 7075-T6 is used for titanium.
100° Combination Predimple & Countersink Method
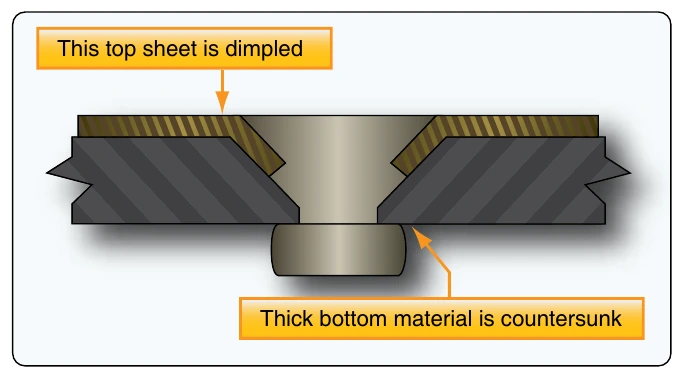
Metals of different thicknesses are sometimes joined by a combination of dimpling and countersinking. [Figure 4-96] A countersink well made to receive a dimple is called a subcountersink. These are most often seen where a thin web is attached to heavy structure. It is also used on thin gap seals, wear strips, and repairs for worn countersinks.
Dimpling Inspection
To determine the quality of a dimple, it is necessary to make a close visual inspection. Several features must be checked. The rivet head should fit flush and there should be a sharp break from the surface into the dimple. The sharpness of the break is affected by dimpling pressure and metal thickness. Selected dimples should be checked by inserting a fastener to make sure that the flushness requirements are met. Cracked dimples are caused by poor dies, rough holes, or improper heating. Two types of cracks may form during dimpling:
- Radial cracks—start at the edge and spread outward as the metal within the dimple stretches. They are most common in 2024-T3. A rough hole or a dimple that is too deep causes such cracks. A small tolerance is usually allowed for radial cracks.
- Circumferential cracks—downward bending into the