
Chapter 7
Repairs, Alterations, and Manufacture
- Restitch the corner of the main container as per the original configuration.
Inspection
- Check the orientation of the pocket with the opening to the right (unless for left-handed deployment).
- Check the stitching and corner reinforcing.
Ring Release Housing Replacement
- Applicable products: All harness and container systems equipped with a 3-ring release system
- Description: Replacement of damaged or missing 3-ring release housings
- Authorized repairmen: FAA Senior or Master Parachute Rigger
- Materials: Nylon supertack, 3-ring housings of the correct length, heat shrink tubing - ½ inch diameter, Owner’s Manual for the harness and container assembly (if available)
- Machines: None
- Equipment: Scissors, seam ripper or scalpel, marking pencil, 6-inch ruler, hand tacking needle, heat gun, crimping tool (optional)
Procedure
Replacement of the 3-ring housings may be necessary due to wear, damage, or stretching of the housings. Correct installation and tacking of the housings are important to ensure proper operation of the 3-ring release system.
Disassembly
- Inspect the original installation to determine the exact routing of the housings. Some systems have dedicated channels and/or loops through which they are routed. In others, the housings are routed under or over back straps or reserve ripcord housings. If necessary, draw a diagram of the routing or take a picture so that the replacement housings are routed correctly.
- Remove any tackings or clamps that hold the housings together and/or to the container. Remove the housings from the system.
Reassembly
- Install the replacement housings into their respective locations as per the original installation. Usually the longer housing is installed first and then the shorter one.
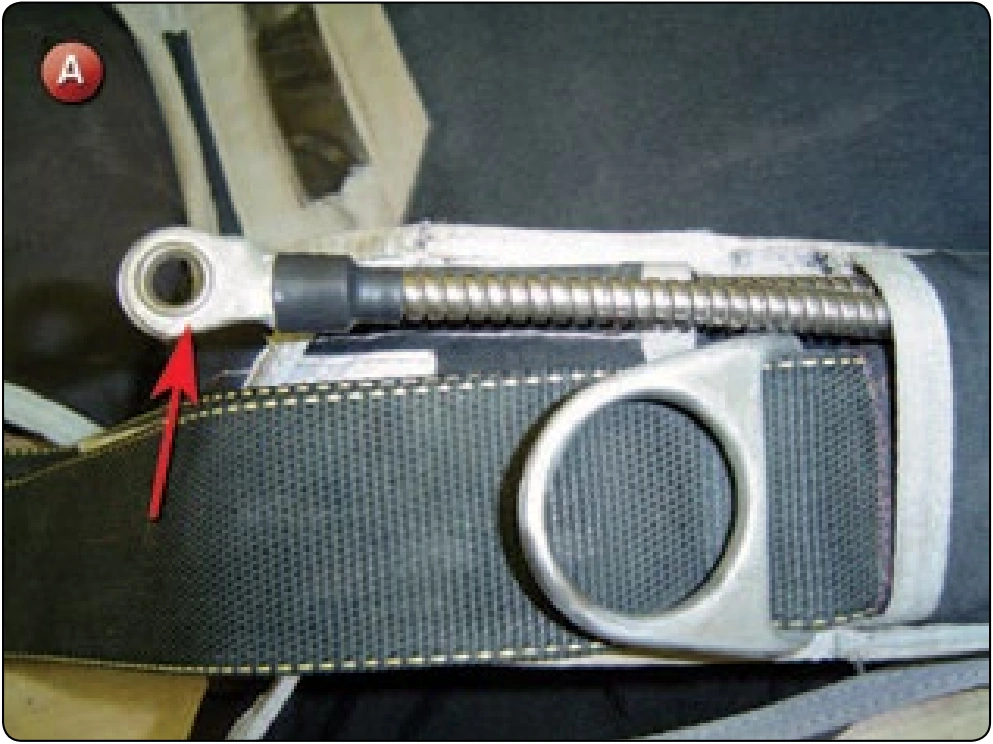
- Make sure that the flat side of the housing terminal end is orientated outward so that it lays flat against the rear of the main riser when the 3-ring release is assembled correctly. [Figure A]
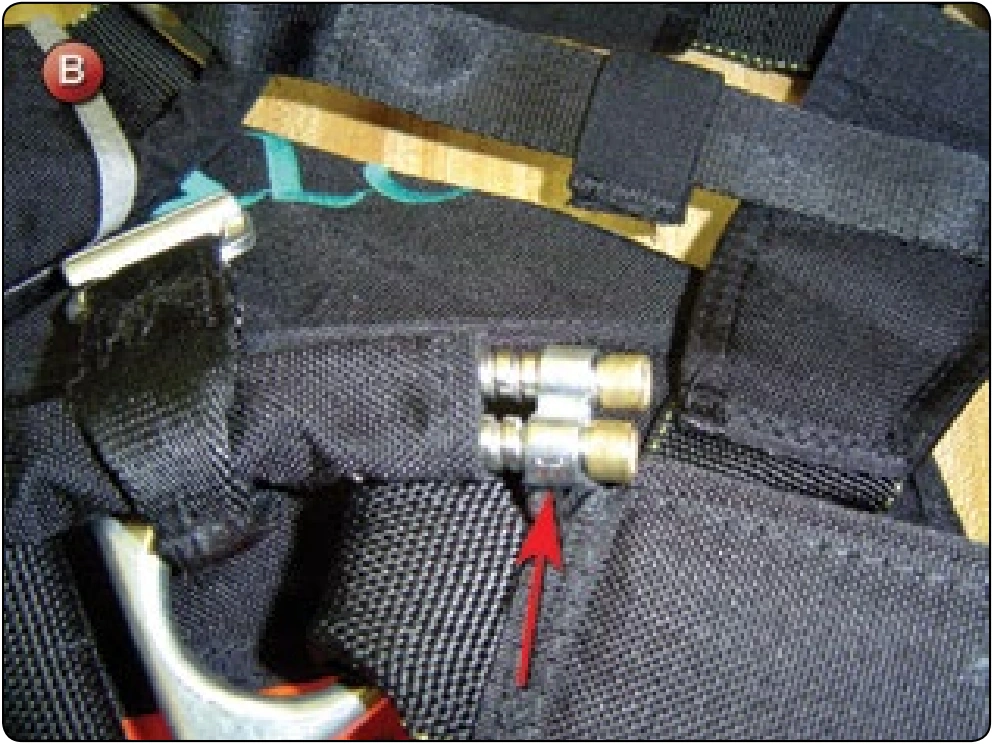
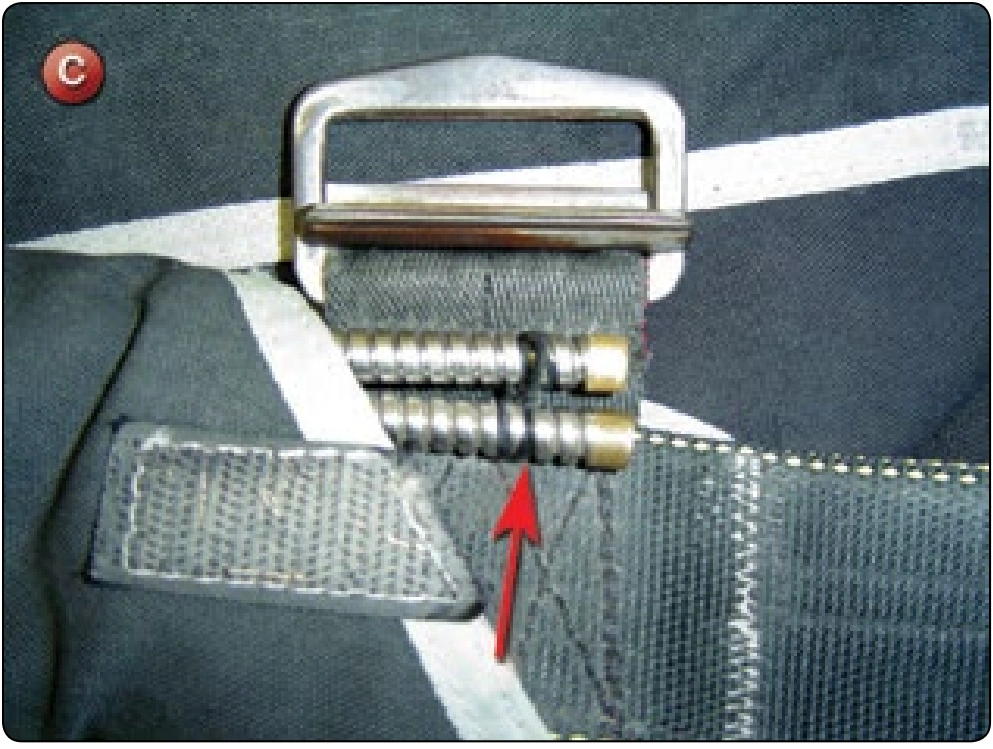
- Align the handle end of the housings and secure as per the original installation. This may be with either a double clamp or hand tacking. [Figure B] Figure C shows a typical method of using supertack to secure the housings together.
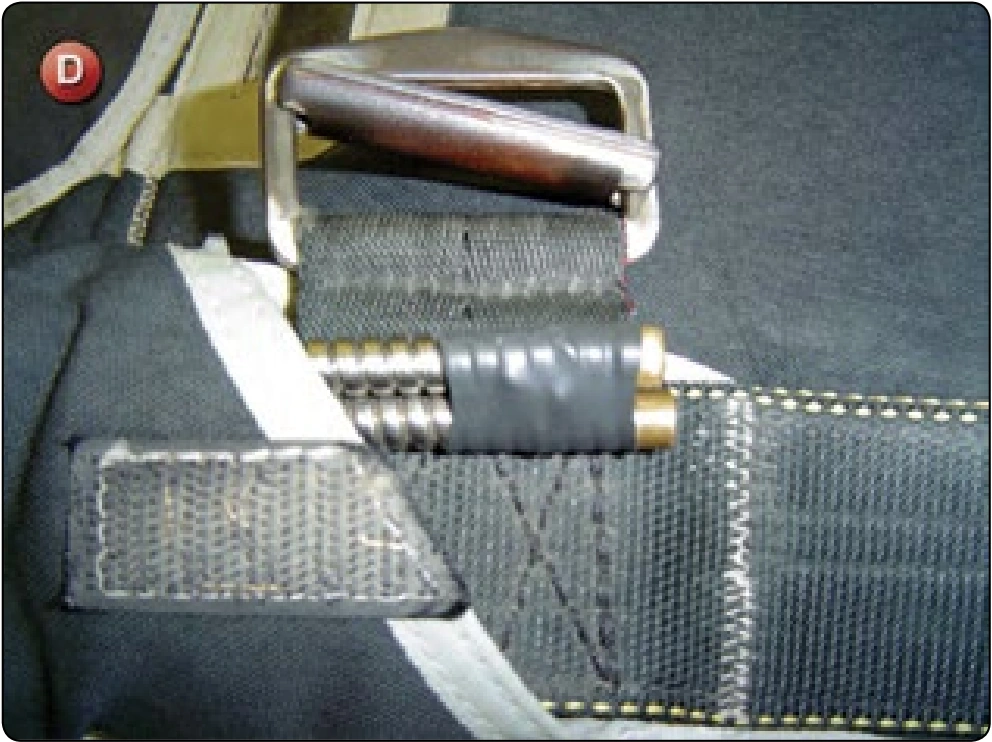
- If hand tacking is used, it is desirable to cover the tacking with heat shrink tubing. Place a length of tubing over the housing ends and shrink using the heat gun. [Figure D]
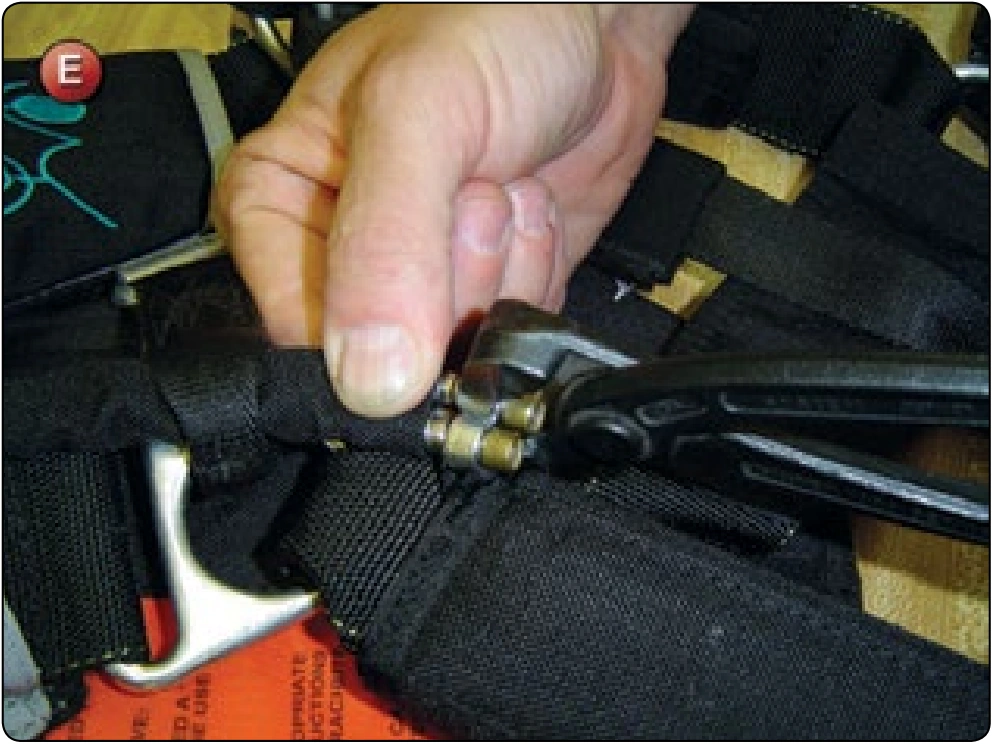
- Secure the double housing to the container/back pad or pocket assembly. Depending on the manufacturer, it may be necessary to provide a certain amount of “float” to the housings in order that the loop of the riser is not loaded or under tension when the main canopy is deployed. If available, consult the owner’s manual for correct positioning and tacking. Some systems use a double clamp to secure the housings together, as well as to the container or pockets. If these are used, inspect the clamp to make sure that it was not damaged when removing the housings and can be reused. Crimp the housings, making sure that the clamp is tight so the housings cannot work loose. [Figure E]
- Route the release cables through the housings to make sure there are no obstructions.
Inspection
- Check for correct routing of the housings.
- Verify correct orientation of the terminal ends.
- Housings should be secured together at the handle ends.
- Housings should be secured to the container/back pad or pockets with either clamps or supertack.
- There should be sufficient slack or “float” in the housings.
- Housings should be clear.